fbpx
blog author

Author: Vlad Kandybovich

Meet Vlad Kandybovich, your friendly moving expert with over 10 years in the game! As the heart and soul behind QShark Moving Company, he has been a part of more than 50,000 moving journeys, helping individuals like you make smooth and stress-free transitions. Vlad is not just about the business; he genuinely cares about making each move a happy memory. So, when you are looking for advice or a tip on your next move, know that Vlads wisdom comes with a big dose of care and friendship. Happy moving!

How To Pack Books For Moving

How To Pack Books For Moving

Summary: This comprehensive guide walks you through How To Pack Books For Moving. Learn how to sort, pack, and move your book collection safely and effectively. Whether you’re a book lover with a vast collection or someone looking to protect your reading materials during a move, this guide by QShark Moving Company has you covered.

Short Read:

SectionKey Points
Materials NeededBoxes of different sizes, packing paper, bubble wrap, packing tape, permanent marker
Preparing for PackingClean and sort books, decide which books to keep, sell, donate, or discard
Packing ProcessChoose right box size, line box for protection, place books correctly, fill gaps, seal and secure box, label box
Special ConsiderationsTake extra care when packing antique, valuable, large, heavy, or awkwardly shaped books, and softcover books
Moving Day: Handling and LoadingUse correct lifting techniques, position boxes correctly in the moving truck
Unpacking the BooksUnpack carefully, re-check for any potential damage, organize books in the new place
Why Choose QShark Moving CompanyExpertise in moving books and other fragile items, other services offered, testimonials, contact information

Whether moving across town or to a new city, one of the most daunting tasks can be packing your book collection. Books, while seemingly sturdy, can be damaged if not packed correctly. Knowing the best practices for packing books for a move is essential. As your professional movers, we at QShark Moving Company understand the challenges of moving and are here to help.

In this article, we’ll provide a comprehensive, step-by-step guide on how to pack books for moving. We’ll cover everything from preparing your books for the move to packing them securely and unpacking them at your new location.

Let’s dive in!

Materials Needed

Before we start the packing process, gathering all the necessary materials is important. This will make the process smoother and more efficient. Here’s what you’ll need:

  • Different Types of Boxes: Depending on the size and weight of your books, you may need small to medium-sized boxes. Books are heavy, so it’s best to use smaller boxes to make them easier to carry.
  • Packing Paper and Bubble Wrap: These will fill any gaps in the boxes to prevent the books from shifting during the move.
  • Packing Tape: This is essential for sealing the boxes. Ensure that you have good-quality tape that can withstand the weight of the books.
  • Permanent Marker for Labeling: Labeling your boxes will help you track what’s inside each box, making the unpacking process easier.

Preparing for Packing

Now that you have your materials ready, it’s time to prepare your books for packing.

  • Cleaning the Books: Clean each book to remove any dust or dirt. This can be done with a dry cloth. Consider using a soft brush to avoid damaging the book for older or more delicate books.
  • Sorting Books by Size and Type: Sort your books by size and type (hardcover, softcover, etc.) This will make it easier to pack them effectively.
  • Deciding Which Books to Keep, Sell, Donate, or Discard: Moving is a great opportunity to declutter. Consider if there are books you no longer need or want. These could be sold or donated, reducing the number of items you need to move.
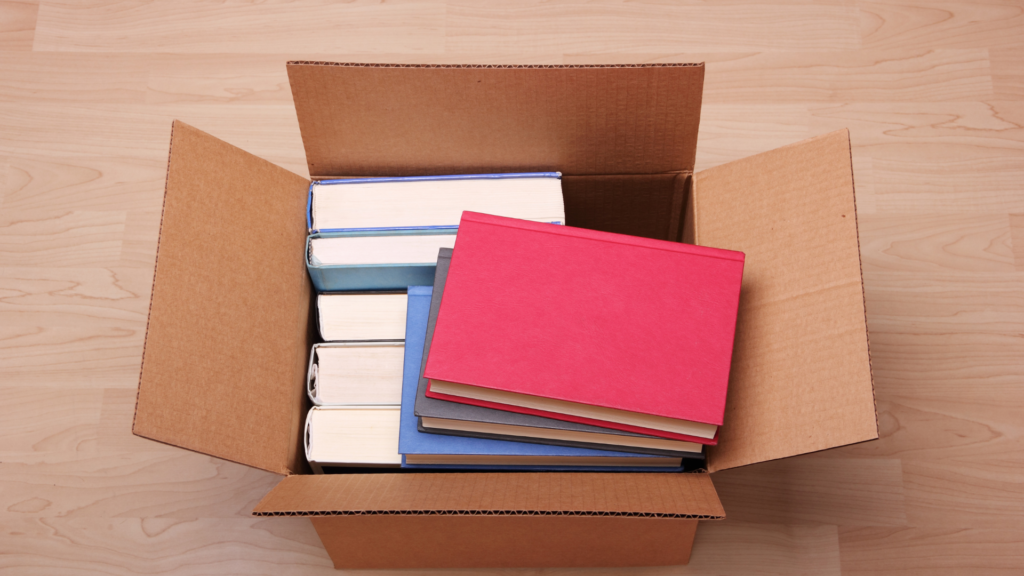
a picture of boxes packed in the box

Packing Process Step-by-Step

Now we get into the heart of the matter: the step-by-step process of packing your books for moving.

Choosing the Right Box Size

For books, we always recommend using smaller boxes. Books are heavier than they might appear, and loading too many into a large box can make it unmanageably heavy. Aim for a box size that, when filled, you can lift without straining.

Properly Lining the Box for Protection

To protect your books, line the bottom of your box with crumpled packing paper or bubble wrap. This creates a cushion that will absorb any shocks during the moving process.

Placing the Books in the Box – Correct Positioning

Arrange your books in the box carefully. Lay them flat or with the spine facing down to prevent damage to the binding. Avoid standing them upright as you would on a shelf.

Filling Gaps with Packing Paper or Bubble Wrap

Once you have filled your box, check for any gaps. Fill these with crumpled packing paper or bubble wrap to ensure the books do not move around during transport.

Sealing and Securing the Box

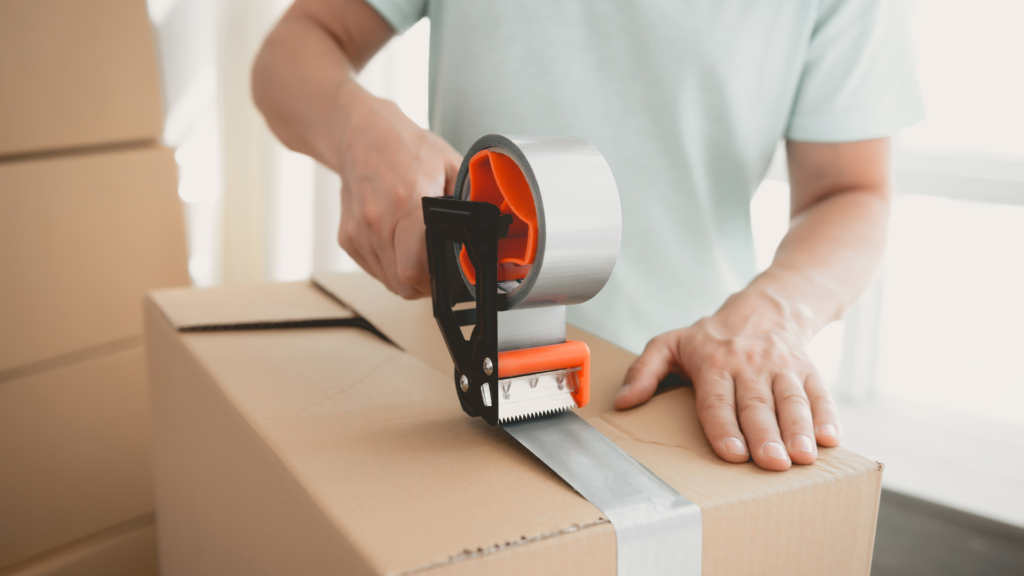
With your books packed snugly, close the box and seal it securely with packing tape. Run the tape along all the seams to reinforce the box.

Properly Labeling the Box

Label the box ‘Books’ using your permanent marker and indicate which room they came from. This will make unpacking and arranging your books easier in your new home.


Special Considerations

Sometimes, you’ll need extra care when packing certain types of books.

Packing Antique or Valuable Books

Antique or valuable books should be wrapped individually using packing paper. Consider using an additional layer of bubble wrap for added protection.

Packing Large, Heavy, or Awkwardly Shaped Books

Use a larger box for oversized books but ensure not to load it too heavily. Remember, safety should always come first.

Packing Softcover Versus Hardcover Books

Softcover books are more prone to damage than hardcover books. Pack them separately and fill any empty spaces with paper or bubble wrap if possible.

With this comprehensive guide, you’re now on your way to packing your books like a professional mover. In the next section, we’ll provide tips on handling and loading your boxes of books on a moving day.

a picture of a person carrying a box saying books

Moving Day: Handling and Loading Boxes of Books

Your books are packed and ready to move to your new location. Here’s how to handle and load your boxes of books on a moving day:

Correct Lifting Techniques

Lifting heavy boxes incorrectly can lead to injury. Always lift with your knees, not your back. Keep the box close to your body, and maintain good posture as you lift.

Positioning in the Moving Truck

When loading the moving truck, place heavier boxes like those filled with books at the bottom and towards the front of the truck. This helps keep the truck balanced and prevents lighter boxes from being crushed.


Unpacking the Books at the New Location

Upon reaching your new home, it’s time to unpack your books and set up your new reading space.

Best Practices for Unpacking

Open the boxes and remove each book, checking for any potential damage. This is also a great time to organize your books as you unpack. You might want to arrange them by author, genre, or any way that suits your new space.

Re-checking for Any Potential Damage

There can be unexpected incidents even with the most careful packing and moving. Check each book for any possible damage during the move. Any damaged items can be claimed if you have opted for insurance (a service often provided by professional movers).

Tips for Organizing Books in the New Place

Consider the layout and storage options in your new home. You might want to invest in new bookshelves or create a dedicated reading space. Remember to place your books away from direct sunlight and damp areas to protect them from damage.


Why Choose QShark Moving Company for Your Moving Needs

While packing and moving your books is certainly something you can do yourself, hiring professional movers like QShark Moving Company can make the process much more efficient and stress-free.

Expertise in Moving Books and Other Fragile Items

At QShark, we have expertise in packing and moving books and other fragile items. We ensure the safety and security of your belongings from the start to the finish of your move.

Other Services Offered

Aside from moving, we also offer packing services, providing all the necessary materials and packing all your items.

Testimonials from Satisfied Customers

Many satisfied customers highly recommend our services. Check out our testimonials to see what our customers are saying.

Contact Information and Next Steps to Schedule a Move

To schedule your move or learn more about our services, visit our website or contact us directly. Our team is ready to assist you.

Conclusion How To Pack Books For Moving

Moving doesn’t have to be a stressful experience. With these tips on How To Pack Books For Moving, you can safeguard your books from any potential damage during moving. QShark Moving Company is always here to help with all your moving needs. Happy moving!

blog author

Author: Vlad Kandybovich

Meet Vlad Kandybovich, your friendly moving expert with over 10 years in the game! As the heart and soul behind QShark Moving Company, he has been a part of more than 50,000 moving journeys, helping individuals like you make smooth and stress-free transitions. Vlad is not just about the business; he genuinely cares about making each move a happy memory. So, when you are looking for advice or a tip on your next move, know that Vlads wisdom comes with a big dose of care and friendship. Happy moving!

How to Use Moving Straps

How to Use Moving Straps

Summary: Learn the ins and outs of How to Use Moving Straps, an essential tool for any moving process. From understanding different types of straps to detailed steps on how to use them, this guide aims to make your moving process smoother and safer.

SectionsKey Points
Understanding Moving StrapsMoving straps are essential tools for lifting and moving heavy items. Types include Shoulder Dolly, Forearm Forklift, Hump Straps, and Appliance Straps.
Choosing the Right Moving StrapsConsider the weight and type of items to be moved. Ensure the straps can support the weight and are suitable for the shape/size of your items.
Preparing for the MovePrepare your items, position the moving straps correctly, and clear your pathway before starting the move.
Using Moving StrapsPosition the straps, lift the item using your leg muscles, move slowly towards your destination, and navigate through spaces with caution.
Tips and Best PracticesFollow safety tips, maintain your moving straps, and avoid common mistakes such as overloading the straps or poor communication.

I. Introduction

Moving can be a strenuous task, often filled with heavy lifting and the risk of potential injuries. However, certain tools can significantly lighten the load, making your move safer and more efficient. One such tool is the moving strap. At QShark Moving Company, we firmly believe in the importance of education when moving safely and efficiently. In line with this, we’ve prepared a comprehensive guide on how to use moving straps.

In this guide, you’ll learn about the following:

  • What are moving straps and their various types
  • How to choose the right straps for your needs
  • Preparing for the move and how to position your moving straps correctly
  • A step-by-step process on how to use moving straps
  • Tips, best practices, and common mistakes to avoid

As your trusted professional movers, we aim to make your moving process as smooth as possible. We encourage you to read this guide carefully, apply the techniques, and take the first step toward a safer, more efficient move. Let’s dive in!

II. Understanding Moving Straps

Before we delve into how to use moving straps, let’s first understand what they are. Moving or furniture or lifting straps are tools used to move, lift, and maneuver heavy or bulky items easily and safely. These straps can greatly reduce the risk of injuries and damage to your items during a move.

There are various types of moving straps available on the market:

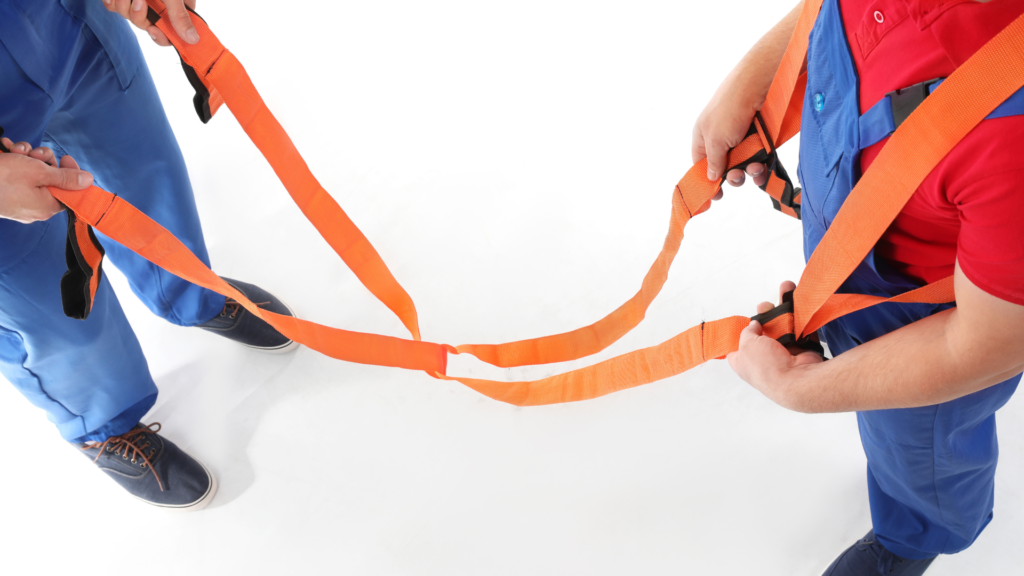
  1. Shoulder Dolly: These are two individual straps that go over the shoulder and under the arm and are used by two people to lift and carry a heavy object. It allows the users to maintain an upright posture while moving the object.
  2. Forearm Forklift: This type of moving strap wraps around the forearm of two individuals and works best for long and bulky items, like a couch or a mattress.
  3. Hump Straps: A hump strap is a single strap that wraps around the item to be moved, providing a point of leverage. One or two individuals can use this.
  4. Appliance Straps: These are similar to shoulder dollies but have an additional ratchet system for extra security when moving heavy appliances.

Each type of moving strap has its advantages and specific use cases. The key is to choose the one that best suits your specific needs.

a picture of two movers using moving straps

III. Choosing the Right Moving Straps

Choosing the right equipment ensures a smooth and safe moving process. Here are some factors to consider:

  • Weight of Items: Look at the items you plan to move. Different straps have different weight capacities. Ensure the straps you choose can support the weight of your items.
  • Type of Items: The shape and size of the item can also determine which type of moving strap is most suitable. For example, a forearm forklift may be best for long, bulky items, while an appliance strap may be more suitable for heavy, boxy items like a washing machine or a refrigerator.

If you need assistance, QShark Moving Company, your trusted local movers, can provide recommendations based on our years of experience in the moving industry.

IV. Preparing for the Move

Now that you have your moving straps chosen, it’s time to prepare for the move. This step is crucial for ensuring a smooth, safe moving process.

A. Preparing Your Items

Start by preparing the items you plan to move. Make sure they’re clean and any loose parts are secured. If possible, disassemble large furniture into smaller, more manageable pieces.

B. Positioning the Moving Straps

Next, place the moving strap under the item. The positioning may vary depending on the type of strap you’re using:

  • Shoulder Dolly/Forearm Forklift: Place the strap at the item’s center, balancing its weight equally. Each person should stand at opposite ends of the item, with the strap positioned on their shoulder or forearm.
  • Hump Strap: Wrap the strap around the item at a point where you can get the most leverage.
  • Appliance Strap: Position the strap around the middle of the appliance, ensuring the ratchet is in a position that’s easy to access.

C. Preparing the Pathway

Ensure your path is clear of obstacles. Plan your route, taking into account any doorways, stairs, or tight spaces you may have to navigate through.


V. Using Moving Straps: Step-by-step Process

Now that everything is set up let’s get into the details of using the moving straps.

A. Positioning the Straps

Stand on opposite sides of the item. Slide the moving strap under the item until it’s approximately midway, ensuring an even weight distribution.

B. Lifting the Item

Bend your knees and keep your back straight as you prepare to lift the item. Using your leg muscles instead of your back will help prevent injuries. Communicate with your partner and lift the item together.

C. Moving the Item

Slowly move towards your destination, keeping the item balanced. Communicate with your partner if you need to rest or are having difficulty maneuvering.

D. Navigating Through Spaces

You might need to tilt or turn the item when moving through doors or tight spaces. Always communicate with your partner and move slowly to avoid sudden weight shifts.

These steps may vary depending on the type of straps you’re using. Always remember that safety is a priority. If you feel unsure or unsafe, don’t hesitate to contact professional movers like QShark Moving Company for assistance.

a picture of professional movers moving a couch

VI. Tips and Best Practices

Utilizing moving straps effectively involves more than just understanding the basic usage. Here are some additional tips and best practices to ensure a safer and more efficient moving process:

A. Safety Tips

  • Always wear closed-toe shoes when moving heavy items to protect your feet.
  • Avoid twisting your body when carrying the load; pivot with your feet.
  • If you need to go up or down stairs, go backward so you can see where you’re going.

B. Maintenance and Care for Moving Straps

  • Regularly check your equipment for wear and tear. If you notice any signs of damage, replace them immediately.
  • After use, clean your straps according to the manufacturer’s instructions, then store them in a dry place to prevent damage.

C. Common Mistakes to Avoid

  • Overloading the straps: Always adhere to the weight limit stated by the manufacturer to avoid accidents.
  • Poor communication: Good communication is key when using moving straps, especially types that require two people. Plan your moves and communicate clearly with your partner.
  • Ignoring discomfort: If you feel any discomfort or strain, stop immediately. Remember, safety comes first.

VII. Conclusion How to Use Moving Straps

Moving straps are essential tools for any relocation process. They not only make the task of moving heavy items easier but also significantly reduce the risk of injuries. As your trusted cheap movers, we at QShark Movers hope this guide has provided you with a comprehensive understanding of how to use straps. You can make your moving process much smoother and safer with the right techniques and precautions.

Appendices

To supplement the main content of this guide, we’ve also included an appendix section. Here, we’ll provide additional information to assist you in your moving journey.

A. Glossary of Terms

Understanding the terminology related to moving straps can make your moving process much smoother. Here’s a brief glossary:

  • Leverage: The mechanical advantage or power gained through using a lever.
  • Load: The item or items being moved.
  • Ratchet: A mechanical device that allows continuous linear or rotary motion in one direction while preventing motion in the opposite direction. Often used for tightening straps.
  • Distribution of Weight: The even spreading out of weight for balanced moving.

B. FAQ

  1. Can one person use moving straps? While some moving straps are designed for two-person use, there are straps like the hump strap that a single person can use.
  2. Are moving straps safe to use? When used correctly, they can significantly reduce the risk of injuries during a move. They distribute the weight of the load evenly, minimizing strain on your body.
  3. Where can I buy moving straps? They are available in many places, including online stores, home improvement stores, or directly from your local movers.
blog author

Author: Vlad Kandybovich

Meet Vlad Kandybovich, your friendly moving expert with over 10 years in the game! As the heart and soul behind QShark Moving Company, he has been a part of more than 50,000 moving journeys, helping individuals like you make smooth and stress-free transitions. Vlad is not just about the business; he genuinely cares about making each move a happy memory. So, when you are looking for advice or a tip on your next move, know that Vlads wisdom comes with a big dose of care and friendship. Happy moving!

How To Pack Knives For Moving

How To Pack Knives For Moving

Summary: This all-inclusive guide by QShark Moving Company lays out detailed instructions on How To Pack Knives For Moving. From preparation to final packing, we cover all the crucial steps in an easy-to-follow manner to ensure a smooth and hazard-free moving experience. This guide is ideal for everyone – from local movers to long-distance adventurers.

SectionKey Points
Importance of Properly Packing Knives for MovingPrevents injuries, protects other items, preserves knives
Preparation Before PackingClean and dry knives, gather packing materials
Packing Individual KnivesWrap blade with packing paper, secure with tape, wrap knife with bubble wrap, label
Packing Knife SetsSecure knives in block, wrap block, place in box, fill extra space
Choosing the Right BoxSelect a strong, appropriately sized box with room for padding
Securing and Labeling the BoxTape the box securely, label with “Fragile” and “Sharp Objects Inside”
Safety Measures During the MoveCareful loading, handle with caution when unpacking

I. Introduction

Packing can be one of the most daunting tasks when preparing for a move. And when it comes to packing sharp objects like knives, it becomes a matter of safety too. As professional movers, we understand the need for meticulous planning and attention to detail, especially for packing potentially hazardous items.

At QShark Moving Company, we ensure clients have a seamless and safe moving experience. This is why we’ve compiled this comprehensive guide to help you understand how to pack knives safely and efficiently. This guide is a part of our larger series about moving, aimed at making your move as smooth as possible. Whether you’re local movers shifting to a new neighborhood or moving across states, this guide will be indispensable.

In this guide, you’ll learn:

  • The importance of correctly packing knives for moving
  • How to prepare your knives for packing
  • A step-by-step guide to packing individual knives and knife sets
  • Tips on selecting the right box for packing
  • How to securely and appropriately label the boxes
  • Safety measures during the move and while unpacking

With these pointers at your fingertips, you can become your expert packer, ensuring your cutlery arrives at your new home safe and sound.

a picture of the knives and how to pack them

II. Importance of Properly Packing Knives for Moving

Knives are indispensable tools in any kitchen, but their sharp edges can pose significant risks if not properly packed during a move. Mishandling of improperly packed knives could lead to severe injuries. Furthermore, unprotected blades can scratch and damage other items during the move. Thus, the importance of packing knives correctly cannot be overstressed.

Some potential dangers of improperly packed knives include:

  • Risk of Injuries: This is the most significant risk. If the sharp edges are not adequately covered, anyone who handles the boxes could be injured.
  • Damage to Other Items: Unprotected knives can pierce through the packing material, potentially scratching, cutting, or damaging other items.
  • Knife Damage: Improperly packed knives can also get damaged or dulled, reducing lifespan.

III. Preparation Before Packing

Before starting to pack your knives, a little preparation is necessary. This step is often overlooked, but it is crucial in ensuring the long-term quality of your knives and the safety of those involved in the packing and moving process. Here’s what you need to do:

  1. Clean the Knives: Thoroughly wash each knife to ensure no food particles are left. This step is crucial to prevent rusting and staining of the blades during the move.
  2. Dry the Knives: After washing, dry each knife thoroughly. Any remaining moisture can lead to rust, which can damage the knife.
  3. Gather Packing Materials: Prepare all the packing materials you will need. This includes packing paper, bubble wrap, packing tape, and sturdy boxes.

IV. Detailed Step-by-Step Guide to Packing Individual Knives

Packing each knife individually can be time-consuming, but it’s the best way to ensure the safety of your belongings and the movers. Follow these steps to pack each knife:

  1. Wrap the Blade with Packing Paper: Lay the knife on a piece of packing paper. Please fold the paper over the blade, covering it entirely.
  2. Secure the Paper with Packing Tape: Secure the blade with a piece of packing tape once fully covered. Be sure not to put tape directly on the blade to avoid leaving any residue.
  3. Wrap the Knife with Bubble Wrap: For added protection, wrap the knife (blade and handle) with bubble wrap. This adds an extra layer of cushioning.
  4. Secure the Bubble Wrap with Packing Tape: Tape the bubble wrap to ensure it stays in place during the move.
  5. Label the Knife for Easy Identification: Write “Knife” or “Sharp” on a masking tape and stick it to the bubble wrap. This will help alert anyone handling the box that sharp objects are inside.
a person packing knives into a box

V. Detailed Step-by-Step Guide to Packing Knife Sets

When packing a knife set, especially those with a knife block, you might find these steps useful:

  1. Secure Individual Knives in the Knife Block: If your knife set comes with a block, ensure each knife is securely placed in its respective slot.
  2. Wrapping and Securing the Knife Block: Wrap the entire block with the knives in bubble wrap. Secure it with packing tape.
  3. Packing the Knife Block in a Box: Choose a box that comfortably fits the wrapped block. Add extra padding at the bottom, place the block inside, then fill any remaining space with additional packing material.
  4. Packing Loose Knife Sets: If your knife set doesn’t come with a block, follow the steps mentioned in Section IV for packing individual knives.

VI. Choosing the Right Box

Choosing a sturdy and appropriately sized box is crucial for packing your knives. A weak box can compromise the safety of the packed knives and risk damaging other items. Similarly, an overly large box can allow the knives to move around during transit, increasing the risk of damage.

Here are some key points to consider when choosing the right box:

  • Strength: Choose a box that is strong and in good condition. It should be able to withstand the weight of the knives without collapsing.
  • Size: The box should be appropriately sized. It should comfortably accommodate the knives without too much extra space that could allow movement.
  • Padding: The box should have enough room to accommodate padding materials for extra protection. You can use old clothes, bubble wrap, or packing peanuts.
a picture of packed knives

VII. Securing and Labeling the Box

Securing and labeling the box properly is important once you have packed the knives and placed them in the box.

  1. Tape the Box: Use strong packing tape to secure the box. Ensure to tape both the top and bottom for added security.
  2. Label the Box: Label the box with “Fragile” and “Sharp Objects Inside.” This will ensure anyone handling the box will do so with caution.

VIII. Safety Measures During the Move

After packing, it’s crucial to handle the boxes with care during the moving process. Here are some tips:

  • Load the Boxes Correctly: Boxes with knives should be loaded carefully into the moving truck. They should be placed in a stable position and not stacked under heavy items that could crush the box.
  • Unpacking Advice: When you reach your new home, be careful while unpacking. Remember the labels and handle the boxes accordingly.

IX. Conclusion How To Pack Knives For Moving

Packing knives for a move requires careful attention to detail to ensure the safety of everyone involved and to prevent damage to your valuable items. By following this comprehensive guide on How To Pack Knives For Moving provided by QShark Moving Company, you can be confident that your knives and other sharp objects will arrive at your new home in the same condition they left the old one. Remember, the key lies in careful wrapping, selecting the right box, and correctly labeling and loading your boxes. Safe moving!

blog author

Author: Vlad Kandybovich

Meet Vlad Kandybovich, your friendly moving expert with over 10 years in the game! As the heart and soul behind QShark Moving Company, he has been a part of more than 50,000 moving journeys, helping individuals like you make smooth and stress-free transitions. Vlad is not just about the business; he genuinely cares about making each move a happy memory. So, when you are looking for advice or a tip on your next move, know that Vlads wisdom comes with a big dose of care and friendship. Happy moving!

How To Pack Dishes For Moving

How To Pack Dishes For Moving

Summary: Moving can be stressful, but with our comprehensive guide on How To Pack Dishes For Moving, you can safeguard your precious dishware and make your moving process easier. Learn from the experts at Qshark Moving Company to ensure a smooth transition.

One Minute Read How To Pack Dishes For Moving:

SectionKey Steps
I. IntroductionOverview of the importance of properly packing dishes for moving.
II. Materials NeededDish boxes, packing paper, bubble wrap, packing tape, and a permanent marker.
III. Preparing for PackingClean dishes, prepare packing space, and organize dishes by type and size.
IV. General Packing TipsHeavier items on bottom, avoid overpacking boxes, fill empty spaces, wrap items individually, and label everything.
V. Packing Different Types of DishesDetailed steps for packing plates, bowls, glasses, cups, specialty items, and pots and pans.
VI. After PackingDouble-check boxes, arrange boxes thoughtfully, consider hiring professional movers, and consider moving insurance.
VII. ConclusionSummary of the article and reminder of the importance of proper packing and potential assistance from Qshark Moving Company.

Moving is often a daunting task. It can be hectic, from sorting out your belongings and deciding what to keep and discard to packing and transportation. One of the most nerve-wracking moving parts is ensuring your fragile items, like dishes, make it to your new home in one piece. That’s why we at Qshark Moving Company, your trusted local movers, have compiled this comprehensive guide to help you learn How To Pack Dishes For Moving like a professional mover.

Understanding the nuances of packing can be the difference between broken plates and a set of dishes ready to be placed in your new kitchen cabinets. We’ll guide you through every step, ensuring you have all the knowledge you need to make your move as smooth as possible.

What this Guide Covers:

  1. Understanding the Required Materials: Detailed list and descriptions of all the materials you need to pack your dishes safely.
  2. Preparing for Packing: Tips and tricks on preparing your dishes and packing area before you begin.
  3. General Packing Tips: Important principles to remember throughout the packing process.
  4. Step-by-Step Guide on Packing Different Types of Dishes: In-depth instructions on packing plates, bowls, glasses, cups, specialty items, and pots and pans.
  5. Securing the Box: How to ensure your boxes are sealed, labeled, and ready for transport.
  6. Special Considerations: Guidelines for packing antique or expensive dishes and dealing with unusual sizes or shapes.
  7. Loading and Unloading Boxes Containing Dishes: Best practices for moving your packed boxes into and out of the moving truck.
  8. Frequently Asked Questions: Answers common questions about packing dishes for a move.

So, let’s get started! With Qshark, your trusted cheap movers and packers, your dishes are one step closer to being safely transported to their new home.

II. Understanding the Required Materials

Before we dive into packing specifics, let’s ensure you have all the necessary materials. Here’s a list of the items you will need:

  • Dish Boxes are sturdy, double-walled boxes designed to pack dishes and other fragile items. They are the safest option for transporting your dishes.
  • Packing Paper: Also known as newsprint, packing paper is perfect for wrapping individual dishes and providing a cushion within the box. Remember, never use printed newspapers, as the ink can rub off your dishes.
  • Bubble Wrap: This is useful for wrapping more delicate or valuable dishes. The air-filled bubbles provide excellent protection against shocks and bumps during the move.
  • Packing Tape: Strong packing tape is necessary to seal your boxes securely. Don’t skimp on the quality here — you want to ensure your boxes stay closed during the move.
  • Permanent Marker: You’ll need this for labeling your boxes. Clear labels help you and your movers know what’s inside each box and how it should be handled.
  • Scissors or Box Cutter: These will be used to cut the packing tape, bubble wrap, and other items as needed.
a picture of qshark movers loading a truck after packing dishes for moving

Packing Materials for Moving

Let’s dive a bit deeper into each item and understand why they are essential in packing dishes for moving:

  1. Dish Boxes: These specialized boxes from Qshark are double-walled, providing extra protection for your dishes. They come in different sizes, so choose the ones that best fit your dishes.
  2. Packing Paper: Packing paper acts as a barrier between dishes, reducing the risk of scratches or chips. It can also be crumpled up to fill empty spaces in the box, preventing your dishes from moving around during transport.
  3. Bubble Wrap: Bubble wrap offers additional protection for your most fragile items. Each bubble functions as a shock absorber, reducing the impact of bumps and shocks.
  4. Packing Tape: High-quality packing tape ensures your boxes stay sealed. It’s worth investing in strong tape to avoid boxes opening unintentionally during the move.
  5. Permanent Marker: Proper labeling is crucial in the moving process. Indicating the contents and room destination on the box can help during unpacking. It’s also important to mark boxes containing fragile items as “FRAGILE” to ensure careful handling.
  6. Scissors or Box Cutter: A basic tool to cut tape, bubble wrap, and packing paper. Having one on hand will make your packing process smoother.

Ensuring you have all these packing materials before you start can make your packing process more efficient and stress-free.


III. Preparing for Packing

Before you dive into packing, it’s important to prepare your dishes and your packing area. This will make the process smoother and more efficient. Here are the steps you should follow:

A. Clean and Dry Your Dishes

  1. Wash all dishes thoroughly. Packaging clean dishes is best to prevent dirt, food particles, or oils from causing damage.
  2. Allow your dishes to dry completely. Packing damp dishes can lead to mildew or mold during transit.

B. Clear and Set Up Your Packing Space

  1. Choose a large, flat surface to pack your dishes, such as a dining table or a clean countertop. Ensure the area is free from clutter.
  2. Lay a large bubble wrap or blanket on the surface to create a soft packing area.
  3. Organize your packing materials. Have your dish boxes, packing paper, bubble wrap, packing tape, and permanent marker close at hand.

C. Organize Dishes by Type and Size

  1. Sort your dishes into categories (plates, bowls, cups, glasses, etc.). This makes it easier to pack similar items and helps you track what you’ve packed.
  2. Within each category, sort the dishes by size. Generally, heavier and larger items should be packed first, with lighter and smaller items on top.

Preparing properly can make the packing process much easier and more efficient. Now, you’re ready to start packing!

a picture of what material should be used

IV. General Packing Tips and How To Pack Dishes For Moving

Before we dive into the specific packing instructions for different types of dishes, you should keep some general packing principles in mind. These tips will help ensure your dishes reach your new home safely:

A. Heavier Items on Bottom

When packing your dish boxes, always place heavier items at the bottom. This creates a stable base and prevents lighter, more fragile items from being crushed.

B. Don’t Overpack Boxes

While cramming as many items into a box may be tempting, this can lead to broken dishes. Allow plenty of room for packing materials; never force an item into a box.

C. Fill Empty Spaces

Any space in a box can cause your dishes to shift during transit, leading to breakages. Fill these spaces with crumpled packing paper or other padding materials.

D. Wrap Items Individually

To protect against scratches and chips, each item should be wrapped individually in packing paper or bubble wrap.

E. Label Everything

Using your permanent marker, label each box with its contents and the room it belongs in. Don’t forget to mark boxes with fragile items.

Following these general packing tips can protect your dishes during your move. Next, we will look at specific packing instructions for different types of dishes.

V. Step-by-Step Guide: How to Pack Different Types of Dishes

a picture of a person packing dishes

A. Plates

Plates are some of the most commonly damaged items during a move, but carefully packing ensures they arrive at your new home intact. Here’s how to pack your plates:

  1. Prepare the Box: Assemble your dish box according to the manufacturer’s instructions. Strengthen the bottom of the box with extra packing tape to ensure it can hold the weight of your plates.
  2. Cushion the Box: Create a layer of crumpled packing paper at the bottom of the box for additional cushioning.
  3. Wrap Each Plate: Lay one plate in the center of a packing paper sheet. Fold the paper over the plate, tucking the ends in as if wrapping a present. For extra protection, consider adding a layer of bubble wrap around each wrapped plate.
  4. Pack the Plates: Place each wrapped plate vertically (on its side) in the box. This reduces the surface area in contact with the box, minimizing the risk of damage. Continue packing the plates this way, ensuring they fit snugly without forcing them.
  5. Fill the Gaps: Once all plates are in the box, fill any remaining spaces with crumpled packing paper to prevent the plates from shifting.
  6. Seal and Label the Box: Close the box and seal it securely with packing tape. Label the box as “Fragile – Plates” and indicate which side is up.

By following these steps, your plates should be well-protected for your move.

a happy couple packing bowls into the boxes using our how to guide

B. Bowls

Bowls can be tricky to pack due to their shape, but they can be transported safely with careful wrapping and placement. Here’s how to pack your bowls:

  1. Prepare the Box: As with plates, assemble your dish box, reinforce the bottom with packing tape, and create a cushioned layer with crumpled packing paper.
  2. Wrap Each Bowl: Like plates, lay a bowl in the center of a sheet of packing paper and fold the paper around the bowl. You might want to stuff some crumpled paper inside for deeper bowls to provide extra protection.
  3. Pack the Bowls: Place each wrapped bowl vertically in the box like plates. If you have bowls of different sizes, start with the largest ones at the bottom.
  4. Fill the Gaps: Once all the bowls are packed, fill any remaining spaces with crumpled packing paper.
  5. Seal and Label the Box: Close the box, seal it with packing tape, and label it as “Fragile – Bowls.”

C. Glasses and Cups

Glasses and cups are often the most fragile items you’ll pack, but they can be moved without damage with a little care. Here’s how:

  1. Prepare the Box: Assemble your dish box, reinforce the bottom with packing tape, and put a layer of crumpled packing paper at the bottom.
  2. Wrap Each Glass/Cup: Start by stuffing the interior of each glass or cup with crumpled packing paper. This helps to prevent damage from impacts. Then, wrap the entire item in packing paper, taking extra care with the handle if it’s a cup.
  3. Add Bubble Wrap: For added protection, especially for delicate stemware, add a layer of bubble wrap around the wrapped glass or cup.
  4. Pack the Glasses/Cups: Place each wrapped item upright in the box, starting with the heaviest glasses or mugs at the bottom.
  5. Fill the Gaps: Fill any remaining spaces with crumpled packing paper.
  6. Seal and Label the Box: Secure and seal the box with packing tape. Label it as “Fragile – Glasses/Cups.”

Remember to be gentle when handling boxes containing glasses and cups, as these items are particularly fragile.


D. Specialty Items

Specialty items include serving platters, wine decanters, casserole dishes, and other unique or irregularly shaped items. Because of their shapes and sizes, these items require special care when packing. Here’s how to do it:

  1. Prepare the Box: Assemble your dish box, reinforce the bottom with packing tape, and add a cushioned layer of crumpled packing paper.
  2. Wrap the Item: Since these items are varied in shape, the wrapping method may change slightly. The basic idea is to cover all parts of the item with packing paper. For delicate items with protruding parts, like the spout of a decanter, consider adding extra padding with bubble wrap.
  3. Pack the Item: Depending on the item’s size and shape, it may be best to pack it upright or fit better on its side. Use your judgment, remembering that the goal is to prevent movement within the box.
  4. Fill the Gaps: As always, fill any remaining spaces with crumpled packing paper to prevent movement during transit.
  5. Seal and Label the Box: Seal the box with packing tape, and label it as “Fragile – Specialty Dishes.”

E. Pots and Pans

Pots and pans are typically sturdy but can still get scratched or dented during a move. Here’s how to pack your pots and pans for a move:

  1. Prepare the Box: Assemble a medium-sized box (since pots and pans are heavy), reinforce the bottom with packing tape, and put a layer of crumpled packing paper at the bottom.
  2. Nest Pots and Pans: If possible, nest your pots and pans together by size. This can save space and provide extra protection. However, you should place a layer of packing paper between each pot or pan to prevent scratches.
  3. Wrap Handles: If the pot or pan has a handle, wrap it in packing paper to prevent it from puncturing the box or other items.
  4. Pack Pots and Pans: Place the nested pots and pans into the box. Pack them individually if they don’t nest, placing heavier items at the bottom.
  5. Wrap and Pack Lids: Wrap each lid in packing paper and place them in the box alongside their corresponding pot or pan.
  6. Fill the Gaps: Use crumpled packing paper to fill any remaining spaces in the box.
  7. Seal and Label the Box: Secure and seal the box with packing tape. Label it as “Kitchen – Pots and Pans.”
a picture of boxes loading with kichenwear

VI. After Packing

Once all your dishes are packed, it’s time to ensure they’re ready for the big move. Here’s what to do:

A. Double-Check Boxes

Go through each box to ensure it’s properly sealed and labeled. Check that the boxes are not overpacked and that there’s no movement inside when gently shaken.

B. Arrange Boxes Thoughtfully

Remember to place heavier boxes at the bottom when loading the boxes onto your moving truck. Avoid stacking other items on top of boxes labeled as fragile.

C. Hire Professional Movers

While a DIY move is certainly possible, hiring professional movers like Qshark Moving Company can make the process much smoother. They have the expertise and equipment to handle your precious items with the care they deserve.

D. Consider Moving Insurance

To further protect your dishes, consider purchasing moving insurance. This can provide financial protection in case any items are damaged during the move.

In conclusion, packing dishes for moving requires a bit of time and effort, but by following these detailed steps, you can ensure your kitchen items arrive safely at their destination. And remember, whether you’re looking for local movers, cheap movers, or professional packers, Qshark Moving Company is here to assist with your moving needs.


VII. Conclusion How To Pack Dishes For Moving

Whether you’re moving across town or the country, packing your dishes properly is crucial to ensure they arrive safely at your new home. While the process may seem daunting, a little preparation and the right packing materials can make a difference. And remember, if you need help, Qshark Moving Company is always here to lend a professional hand. And now you know How To Pack Dishes For Moving. Happy moving!

blog author

Author: Vlad Kandybovich

Meet Vlad Kandybovich, your friendly moving expert with over 10 years in the game! As the heart and soul behind QShark Moving Company, he has been a part of more than 50,000 moving journeys, helping individuals like you make smooth and stress-free transitions. Vlad is not just about the business; he genuinely cares about making each move a happy memory. So, when you are looking for advice or a tip on your next move, know that Vlads wisdom comes with a big dose of care and friendship. Happy moving!

How To Pack Jewelry For Moving

Summary: This comprehensive guide offers a step-by-step walkthrough on how to pack jewelry for moving. It explains the importance of properly packing jewelry properly, the materials required, and the processes to follow. Additionally, it offers insights on special instructions for valuable or antique jewelry, best practices for packing, and helpful transportation tips.

SectionSummary
Importance of Properly Packing JewelryPacking jewelry properly prevents damage, loss, and saves time during unpacking.
Materials Needed for Packing JewelryMaterials include jewelry boxes, anti-tarnish cloth, bubble wrap, packing tape, zip-lock bags, small envelopes, and markers for labeling.
Preparing Your Jewelry for PackingClean, sort, and make an inventory of your jewelry before packing.
Packing Different Types of JewelrySpecial packing techniques are outlined for necklaces, bracelets, rings, and earrings.
Special Instructions for Valuable or Antique JewelryValuable items require extra padding, professional appraisal, and possibly additional insurance.
Best Practices for Packing and Labeling Jewelry BoxesOrganize and label boxes in a way that prevents damage and promotes ease of identification.
Transportation Tips for Packed JewelryDecide on using professional movers vs. self-move, consider using a safe box, and always keep jewelry with you during the move.
Unpacking Your Jewelry at Your New HomeSet up a clean, soft space for unpacking, refer to your inventory list, unpack each piece individually, and organize your jewelry in your new space.

I. Introduction

Welcome to our in-depth guide on how to pack jewelry for moving! We at Qshark Moving Company understand that moving can be stressful, and packing delicate items like jewelry can add to the stress. That’s why we’ve put together this comprehensive guide to help you pack your precious items safely and efficiently.

Our mission as professional movers is not just to move your belongings from one place to another but to ensure that every item arrives at its destination in perfect condition. This guide serves as a reflection of that commitment.

In this guide, we’ll cover:

  1. The Importance of Properly Packing Jewelry
  2. Basic Materials Needed for Packing Jewelry
  3. Preparing Your Jewelry for Packing
  4. A Step-by-Step Guide to Packing Different Types of Jewelry
  5. Special Instructions for Valuable or Antique Jewelry
  6. Best Practices for Packing and Labeling the Jewelry Boxes
  7. Transportation Tips for Your Packed Jewelry
  8. Unpacking Your Jewelry at Your New Home

Whether you’re looking for a local mover, cheap movers, or need some advice on packing and moving, this guide is a valuable resource that you can count on.

How To Pack Jewelry For Moving. a picture of qshark movers organazing a truck

II. Importance of Properly Packing Jewelry

Jewelry often has not just monetary but also sentimental value. Hence, it’s crucial to pack these delicate and precious items carefully to prevent damage or loss. Here’s why proper packing is so important:

  • Avoid Damage: Jewelry can easily get scratched, broken, or tarnished if not packed correctly. Proper packing ensures your pieces stay intact.
  • Prevent Loss: Small jewelry pieces can easily get misplaced or lost during a move. Proper packing techniques can help keep all your jewelry items accounted for.
  • Save Time: Organized packing means easier unpacking. You won’t have to spend hours untangling necklaces or searching for that second earring when you reach your new home.

III. Basic Materials Needed for Packing Jewelry

Before we delve into the packing process, gathering the necessary packing materials is essential. Here’s a checklist:

  1. Jewelry boxes: Ideal for packing all kinds of jewelry. You can use the original boxes if you still have them.
  2. Anti-tarnish cloth: For wrapping silver pieces to prevent tarnishing.
  3. Bubble wrap: To provide extra protection for fragile or valuable items.
  4. Packing tape: To secure wraps and seal boxes.
  5. Zip-lock bags: Perfect for smaller items like rings and earrings.
  6. Small envelopes: Useful for tiny pieces or individual pairs of earrings.
  7. Marker for labeling: To help keep everything organized and easy to find.

You can find these materials at most local stores or online.


IV. Preparing Your Jewelry for Packing

Before packing your jewelry, it’s a good idea to take some preparatory steps:

  • Cleaning: Clean your jewelry before packing. Dirt and dust can cause scratches or other damages during the move.
  • Sorting: Sort your jewelry by type (necklaces, bracelets, earrings, rings), material (gold, silver, gemstone), and value. This will make packing easier and more organized.
  • Inventory: Make an inventory of all your jewelry. This will help ensure nothing gets lost during the move and will be particularly useful when unpacking in your new home.
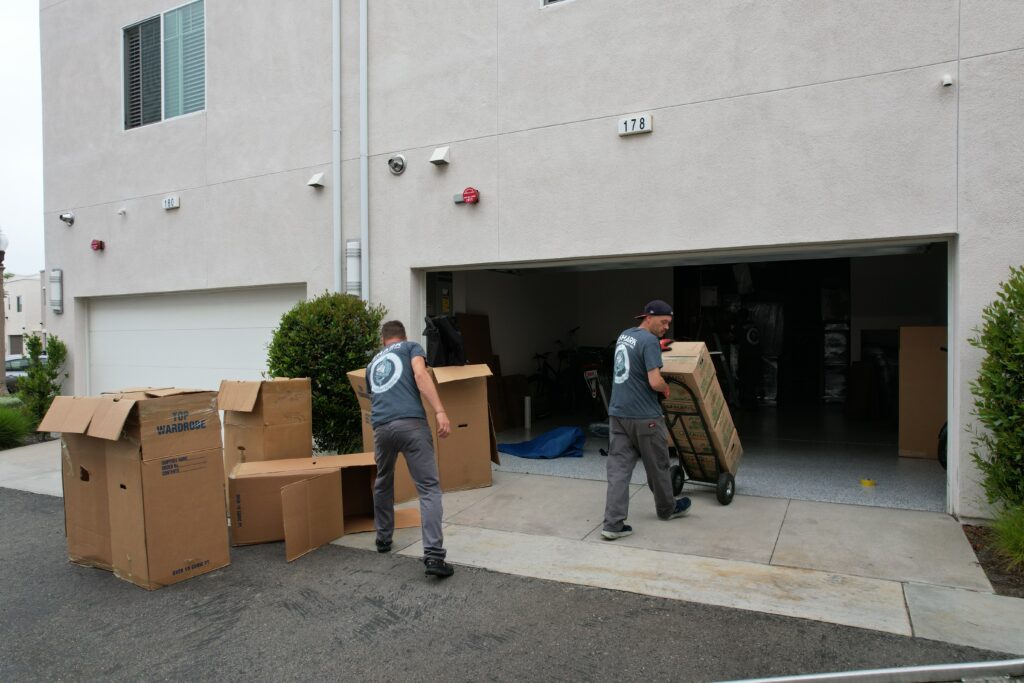
a picture of qshark movers unloading items into a garage

V. Step-by-Step Guide to Packing Different Types of Jewelry

Let’s dive into the specifics of how to pack various kinds of jewelry:

A. Packing Necklaces

Necklaces can easily get tangled or broken during a move. Here’s how to pack them:

  1. Lay a necklace flat on a piece of bubble wrap or anti-tarnish cloth.
  2. Roll the material around the necklace, making sure it’s fully covered.
  3. Place the wrapped necklace in a zip-lock bag or small envelope.
  4. Label the bag or envelope for easy identification later.

Tip: Use a drinking straw or toilet paper roll to prevent tangling for extra long or delicate necklaces. Thread the necklace through the straw or roll, clasp it, then wrap in your chosen material.

B. Packing Bracelets

Bracelets, like necklaces, can also get damaged if not packed correctly. Follow these steps:

  1. If the bracelet is a bangle or has no loose elements, you can stack them together.
  2. Wrap the stack or individual bracelet with bubble wrap or anti-tarnish cloth.
  3. Place the wrapped bracelet in a zip-lock bag or envelope, then label it.

C. Packing Rings

Rings are usually sturdy but can still get lost during a move. Here’s how to pack them:

  1. Wrap each ring in a small piece of bubble wrap or anti-tarnish cloth.
  2. Place the wrapped ring in a zip-lock bag or small envelope.
  3. Label the bag or envelope for easy identification.

Special Precaution: For rings with precious stones, ensure the stone is fully covered and cushioned during wrapping to avoid any potential damage.

D. Packing Earrings

Earrings are small and can easily get separated. Here’s the best way to pack them:

  1. Pair your earrings together. You can use a piece of cardboard, an old button, or the original box to keep pairs together.
  2. Once paired, wrap them in bubble wrap or anti-tarnish cloth.
  3. Place the wrapped pair in a zip-lock bag or envelope, then label it.

VI. Special Instructions for Valuable or Antique Jewelry

Valuable and antique jewelry requires extra care. Here are some suggestions:

  • Extra Padding: Use additional padding or specially made jewelry cases for these items.
  • Professional Appraisal: Consider having valuable jewelry professionally appraised before the move. This documentation can be important for insurance purposes.
  • Insurance: If you use professional movers, look into their insurance policies. If necessary, consider taking out additional insurance for your most valuable items.

VII. Best Practices for Packing and Labeling the Jewelry Boxes

Now that individual jewelry pieces are packed, it’s time to secure them in jewelry boxes. Follow these steps:

  1. Place heavier items at the bottom of the box. Arrange items strategically to prevent them from moving around during transportation.
  2. If there’s any space left in the box, fill it with crumpled paper or additional bubble wrap to avoid the movement of the jewelry items.
  3. Once the box is packed, secure it with packing tape.
  4. Label each box carefully. Instead of simply writing “jewelry”, consider using codes or numbers that match your inventory. This will discourage potential theft while still helping you know what’s inside.

Note: Using multiple small boxes rather than one large one is better. This prevents your jewelry from getting mixed up and damaged and makes boxes easier to handle.

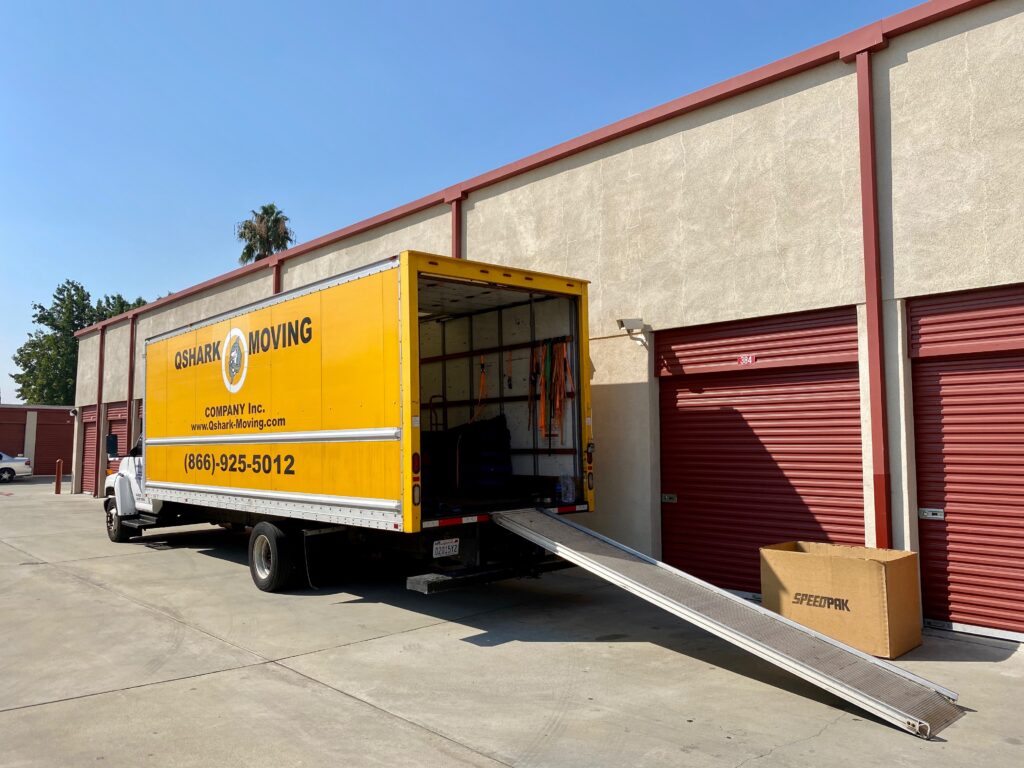
a picture of qshark moving truck

VIII. Transportation Tips for Your Packed Jewelry

Packed jewelry should be transported with care. Here are some tips:

  • Professional Movers vs Self-Move: Decide whether you feel more comfortable moving the jewelry yourself or entrusting it to professional movers.
  • Safe Box: Consider using a safe box for particularly valuable items.
  • Carry-On: If you’re moving long-distance or internationally, pack your jewelry in a small box that can be taken in your carry-on luggage. Never put jewelry in checked luggage.
  • Keep It With You: Regardless of how you’re moving, keep your jewelry with you rather than in a moving truck. This gives you control over its safety.

IX. Unpacking Your Jewelry at Your New Home

After your move, unpacking your jewelry correctly is just as important as packing. Follow these steps:

  1. Start by setting up a clean, soft space to unpack your jewelry. This could be a bed, a plush chair, or a clean table with a towel.
  2. Refer to your inventory list as you unpack. This will help you ensure all your pieces made it safely to your new home.
  3. Unpack each piece of jewelry individually. Remove all the packaging and make sure each item is intact and undamaged.
  4. As you unpack, you can begin to organize your jewelry in your new space. Consider investing in a jewelry organizer to keep your items neat and easy to find.

Remember, there’s no need to rush the unpacking process. Take your time to make sure each piece of jewelry is unpacked safely and stored properly.


X. Conclusion How To Pack Jewelry For Moving

Packing and moving jewelry require careful attention, but with this comprehensive guide from Qshark Moving Company, you’re well-equipped to get your precious items safely to your new home. Proper packing, careful transportation, and organized unpacking are key to keeping your jewelry safe during a move. Whether you’re a professional mover, a local mover, or just someone preparing for a move, we hope you find this guide useful.

If you need further assistance or professional moving services, please contact us at Qshark Moving Company. We’re here to make your move as smooth as possible.

blog author

Author: Vlad Kandybovich

Meet Vlad Kandybovich, your friendly moving expert with over 10 years in the game! As the heart and soul behind QShark Moving Company, he has been a part of more than 50,000 moving journeys, helping individuals like you make smooth and stress-free transitions. Vlad is not just about the business; he genuinely cares about making each move a happy memory. So, when you are looking for advice or a tip on your next move, know that Vlads wisdom comes with a big dose of care and friendship. Happy moving!

How To Pack Fragile Items

a picture of a person packing a fragile item

Summary: This detailed guide walks you through how to pack fragile items, ensuring their safety during your move. From selecting the right supplies to sealing and labeling your boxes, Qshark Moving Company shares industry secrets for a hassle-free moving experience.

Short Read:

StepsSummary
IntroductionOverview of the importance of properly packing fragile items for moving.
Choosing the Right SuppliesDiscussion about the crucial supplies needed: Packing Paper, Packing Tape, and Bubble Wrap.
Choosing the Right BoxThe importance of selecting an appropriately-sized box for your items.
Packing the ItemStep-by-step process of wrapping and protecting individual items.
Packing the BoxInstructions on how to layer and arrange items within the box.
Sealing and Labeling the BoxDetails on how to securely close the box and appropriately label it.
Special Tips for Specific ItemsSpecial considerations for certain items like mirrors, dishes, electronics, and antiques.
ConclusionFinal thoughts and encouragement, including the services offered by Qshark Moving Company.

I. Introduction

Moving can be stressful, especially when packing and transporting fragile items. These belongings often hold both monetary and sentimental value, making their safety a top priority. But how can you ensure these items arrive at your new home in one piece? The key is in how you pack them. At Qshark Moving Company, we understand the challenges that come with moving. This guide aims to equip you with the knowledge and skills to pack your fragile items securely.

You’ll need a few essential supplies to start, which can be found conveniently via the included links. We highly recommend the use of these specific packing materials due to their proven effectiveness and quality:

Each of these items plays a vital role in protecting your fragile belongings. They work together to provide a sturdy, cushioned environment that absorbs shocks and prevents damage.

In this guide, we’ll go over every detail of the packing process, from selecting the right box to safely moving your items. So, whether you’re packing precious heirlooms, delicate glassware, or your favorite home decor, you can rest easy knowing they’re packed for a secure journey. Let’s get started!

Short Cuts:

This guide has been split into the following sections for easier navigation. Feel free to jump to any section that you need assistance with:

  1. Selecting the Right Box
  2. Packing the Box
  3. Wrapping Fragile Items
  4. Securing the Wrapping with Packing Tape
  5. Packing the Item in the Box
  6. Sealing and Labeling the Box
  7. Safely Stacking and Moving Boxes

Following the steps and techniques outlined in this comprehensive guide, ensure your fragile items are as safe as possible during transit. Not only will you be more confident in your packing abilities, but you’ll also be able to focus on the excitement of your move rather than worrying about potential breakages.

a picture of different sized boxes

II. Selecting the Right Box

Choosing the right box is the first step in ensuring the safety of your fragile items. Not every box is created equal; using the right kind can make all the difference.

  1. Size: Select a box slightly larger than the item you’re packing. This leaves room for protective material such as bubble wrap, packing paper, and padding. However, too large a box can also be a problem, as it allows the item to move around and potentially get damaged.
  2. Strength: Look for a strong, sturdy box that can withstand the weight of your items. Fragile items can be surprisingly heavy, and a weak box can give way during the move. A double-walled box is ideal for heavier items.
  3. Condition: Use new or lightly-used boxes whenever possible. Overused boxes lose their structural integrity and can easily collapse. A fresh box provides the best protection.

You can pack your fragile item once you have selected the right box. Remember, using the right box is as important as how you pack the item. If you need a reliable source for quality boxes, Qshark Moving Company can help guide you to suitable options.

a person packing a box

III. Packing the Box

Packing the box correctly is crucial in ensuring the safety of your fragile items. Here’s how you should go about it:

  1. Cushioning: Before placing your item in the box, line the bottom with crumpled Packing Paper. This creates a cushioning layer that can absorb shocks during the move.
  2. Packing Peanuts: You can also use packing peanuts for additional protection. They fill up any extra space in the box and prevent the item from moving around.
  3. Bubble Wrap: Wrap your item in Bubble Wrap before placing it in the box for optimal protection. Ensure the item is completely covered and secured with Packing Tape.
  4. Placement: Place the wrapped item in the box. If you’re packing multiple items in the same box, start with the heaviest item at the bottom. Be sure to leave space between items and the sides of the box.
  5. Extra Protection: Fill the remaining spaces with crumpled packing paper or peanuts. This prevents items from shifting during transit.

By following these steps, you’ll provide your items with a protective environment that can withstand the rigors of moving. The correct use of packing materials will keep your fragile items safe and sound.

IV. Wrapping Fragile Items

Properly wrapping your fragile items is a vital step in the packing process. Here’s a step-by-step guide to doing it effectively:

  1. Lay Out Your Materials: On a clean, flat surface, lay out your Packing Paper and Bubble Wrap.
  2. Wrap with Packing Paper: Start by wrapping your item with packing paper. This helps to prevent scratches and provides a basic layer of protection. For items like dishes or glassware, first stuff the interior with crumpled paper for extra security.
  3. Apply Bubble Wrap: Next, wrap your item in bubble wrap. The bubble wrap provides a cushion that absorbs shocks and impacts during the move.
  4. Secure the Wrap: Secure the wrap with Packing Tape. Ensure all edges and ends of the bubble wrap are taped down to stay in place.

Remember, take your time with this process. It might seem tedious, but careful wrapping protects your fragile items. The more securely an item is wrapped, the less likely it is to be damaged in the move.

a person who packing and sealing the box

V. Securing the Wrapping with Packing Tape

Once your items are properly wrapped, it’s time to secure everything with packing tape. This will ensure the wrapping stays in place and protects your items during the move.

  1. Tape All Edges: Run the Packing Tape along all edges and seams of the bubble wrap. This ensures that the wrap is secured and won’t unravel.
  2. Multiple Layers: Don’t be afraid to use multiple layers of tape, especially around areas with a lot of stress or wear. This reinforces those areas and helps prevent tears or breaks.
  3. Smooth Out: After applying the tape, smooth it out with your hand to ensure it adheres fully and there are no bubbles or loose areas.

Taping might seem like a small step, but it’s an essential part of packing. The right tape applied correctly can make all the difference in ensuring your items stay safe and secure during the move.

VI. Packing the Box

Packing the box properly is crucial for the safety of your fragile items. Here’s how to do it correctly:

  1. Prepare the Box: First, reinforce the bottom of the box with extra Packing Tape. This will provide an extra layer of security and prevent the box from breaking under weight.
  2. Layer of Padding: Add a thick layer of crumpled Packing Paper or Bubble Wrap at the bottom of the box. This acts as a shock absorber during the move.
  3. Place Your Items: You can place your wrapped fragile items in the box. Place heavier items at the bottom if you’re packing multiple items in the same box. Also, try not to leave too much space as this can allow items to shift during the move.
  4. Fill Empty Spaces: Fill empty spaces with crumpled packing paper or bubble wrap. This will help keep items secure and prevent them from moving around in the box.
  5. Final Padding Layer: Finally, add another layer of bubble wrap or crumpled paper before closing the box. This ensures that your items are snug and protected on all sides.
a person sealing and labeling the box , how to pack a fragile items

VII. Sealing and Labeling the Box

  1. Seal the Box: Once you’ve packed your items, close the box flaps and seal them with generous packing tape. It’s a good idea to apply tape in both directions – across the top and down the sides of the box.
  2. Label Correctly: Label the box as “FRAGILE” using a thick marker. You can also briefly describe the contents and the room they belong to (e.g., “FRAGILE – Kitchen Glassware”). This will remind you to handle the box carefully and help you stay organized during unpacking.

VIII. Special Tips for Specific Items

Certain fragile items require special attention or methods of packing. Here are a few examples:

  1. Mirrors and Frames: For items like mirrors or picture frames, use painter’s tape to create an ‘X’ on the glass. This helps to prevent it from shattering. Then, wrap in packing paper and a generous layer of bubble wrap. Consider investing in specialty mirror or picture frame boxes for added protection.
  2. Dishes and Glasses: Wrap each dish and glass separately in packing paper, then bubble wrap. For glasses, consider using a cell box with individual compartments for each item to prevent them from knocking against each other.
  3. Electronics: If possible, pack electronics in their original boxes. If these aren’t available, wrap them in packing paper and bubble wrap, then place in a box that’s about the same size as the item. Fill any space with packing paper or foam peanuts.
  4. Antiques and Valuables: These items should be handled with extra care. It may be worth hiring professionals or getting them professionally packed. If you do decide to pack them yourself, use plenty of packing paper, bubble wrap, and ensure they are snugly packed in their box with no room to move.

IX. Conclusion

Packing fragile items takes time, patience, and the right technique. But with careful preparation, the right packing materials, and attention to detail, you can ensure your breakables are well-protected for the move.

Remember, the goal is to ensure that everything arrives at your new home in the same condition it left the old one. The right packing methods can make all the difference, whether moving a short distance or across the country.

If you’re overwhelmed by the process, remember that Qshark Moving Company is here to help. We offer professional packing services that remove the stress of moving, ensuring your items are packed safely and efficiently.

The journey to a new home can be filled with many challenges, but with a little preparation and the right guidance, it can also be an exciting adventure. Here’s to a successful move!

blog author

Author: Vlad Kandybovich

Meet Vlad Kandybovich, your friendly moving expert with over 10 years in the game! As the heart and soul behind QShark Moving Company, he has been a part of more than 50,000 moving journeys, helping individuals like you make smooth and stress-free transitions. Vlad is not just about the business; he genuinely cares about making each move a happy memory. So, when you are looking for advice or a tip on your next move, know that Vlads wisdom comes with a big dose of care and friendship. Happy moving!

How to shrink wrap?

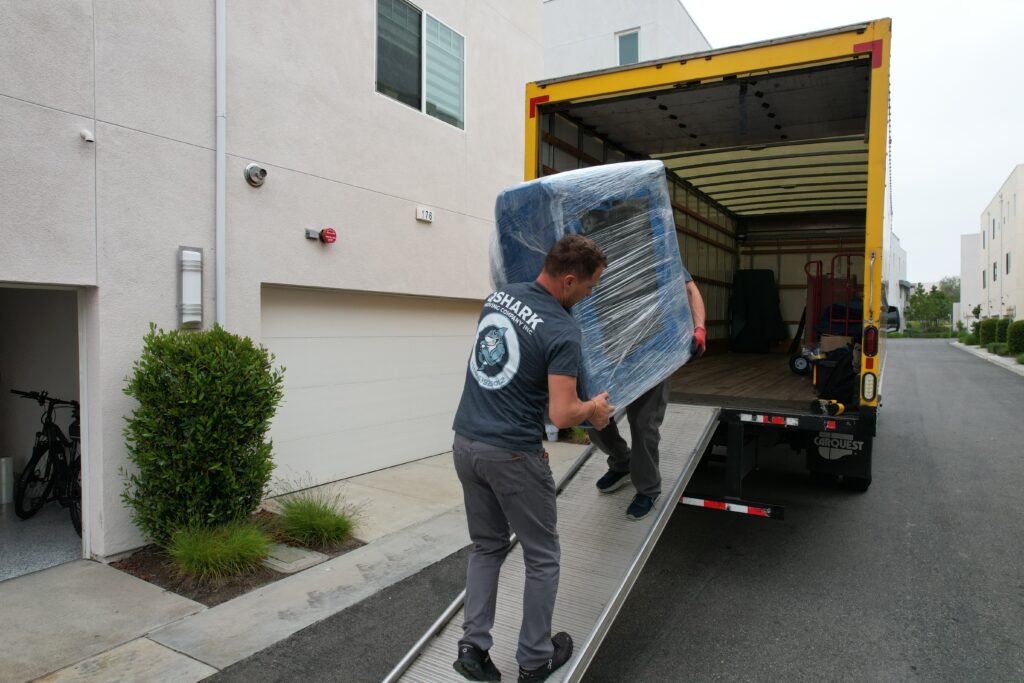
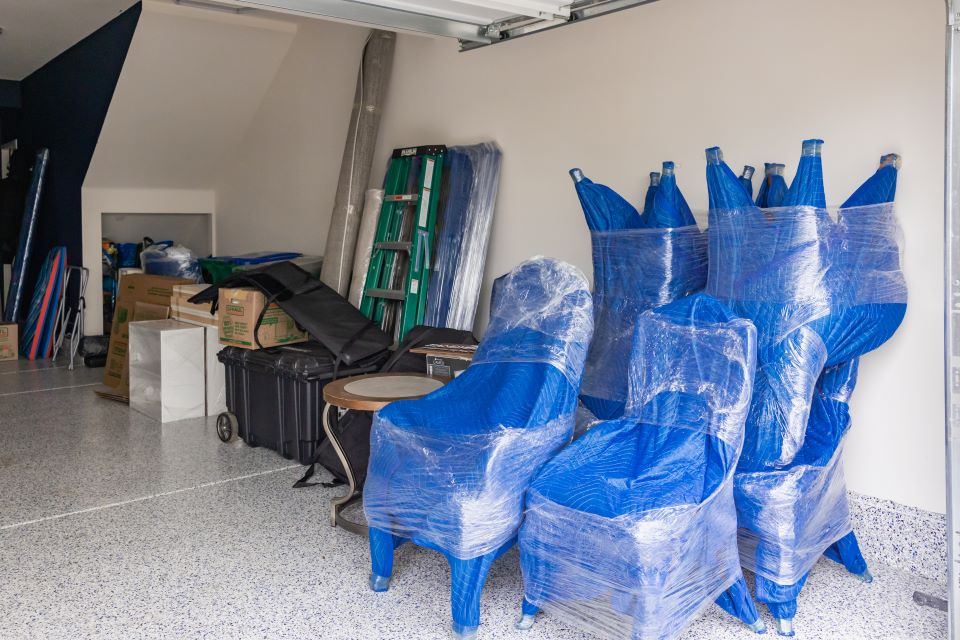
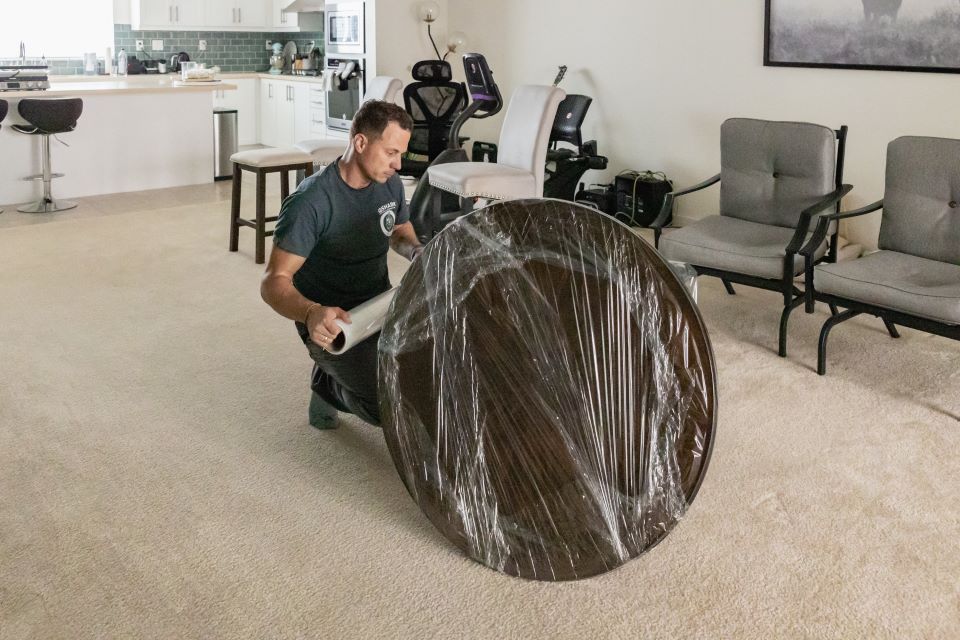
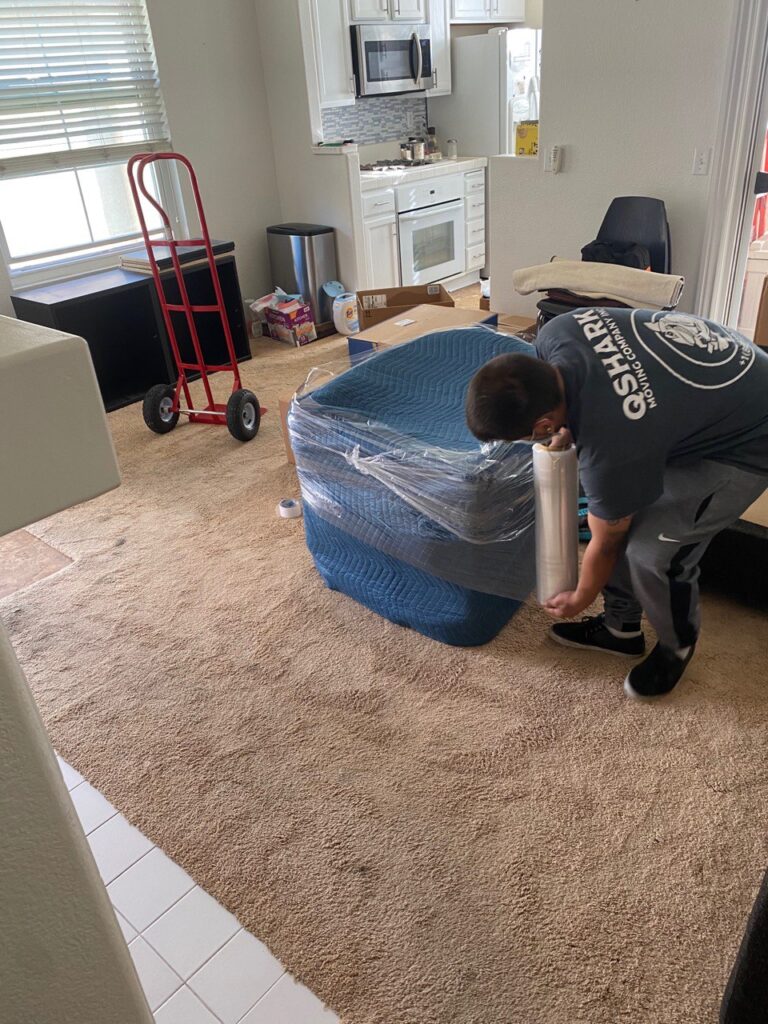
how to shrink wrap, a picture of qshark movers unwrapping a table

Summary: From safeguarding items against damage to streamlining the moving process, shrink wrapping plays a pivotal role in the moving industry. This comprehensive guide by QShark Moving Company, your trusted professional movers, takes you through the A to Z of how to shrink wrap.

SectionsKey Points
IntroductionShrink wrapping is an essential strategy in moving for protecting items during transit.
Understanding Shrink WrappingShrink wrap is a protective plastic film. It protects against damage, aids in transportation and enhances organization.
Preparation Before Shrink WrappingStart by assessing items and selecting the right shrink wrap. Gather necessary tools, and ensure safety measures.
Step-by-Step Guide to Shrink WrappingStart with a clean item, wrap it tightly, secure the ends and check the wrap.
Post Shrink Wrapping ProcessHandle wrapped items with care, prepare for potential shifting during transport and unwrap items safely.
The Role of Professionals in Shrink WrappingConsider professional help for large, fragile or numerous items. QShark provides professional shrink wrapping services.
Sustainability and Shrink WrappingShrink wrap is a type of plastic with environmental implications. QShark is committed to minimizing its environmental impact.
Shrink Wrapping FAQsShrink wrap is typically not reusable, is suitable for most items and should not leave a residue.
ConclusionShrink wrapping is critical for moving, QShark can assist with all shrink wrapping needs.

Introduction

Whether planning a small-scale local move or gearing up for a cross-country adventure, ensuring your belongings are secure during transit is critical. One of the most effective strategies employed by QShark Moving Company – and many other professional movers – is the use of shrink wrap. Shrink wrap, a plastic film wound around an item and then tightened, is renowned for its protective qualities and ability to keep items intact. This article is designed to provide an in-depth look at how to shrink wrap is utilized within the moving industry, guiding you through its importance, the preparation process, its application, and how to deal with shrink-wrapped items post-move.

Who is QShark Moving Company?

QShark Moving Company is a full-service moving company with years of experience assisting residential and commercial moves. As local movers committed to providing excellent customer service, we have honed our skills in all aspects of moving, including using shrink wrap to protect your belongings. This guide expresses our dedication to making every move easier and safer for our clients.

Understanding Shrink Wrapping

Shrink wrapping is a technique used in packaging, and it’s been adopted as an essential strategy in the moving industry. Let’s dive into what it is and why it’s so useful:

What is Shrink Wrapping?

Shrink wrap is a highly durable, puncture-resistant plastic film. Unlike other wrapping materials, shrink wrap is unique because it covers the item tightly, minimizing the chance of slipping or loosening. While some shrink wraps require heat application to tighten, we typically utilize non-heat shrink wraps in the moving industry. This allows us to provide maximum protection without the need for heat tools.

Benefits of Shrink Wrapping in the Moving Industry

Shrink wrap offers numerous advantages when it comes to packing and moving. Here are some key benefits:

  • Protection: Shrink wrap protects against dirt, dust, and moisture. It’s especially useful for items that might be sensitive to these factors.
  • Stability: Shrink wrap can help keep items from moving or shifting during transport, making it particularly beneficial for fragile items.
  • Efficiency: Shrink wrap can bundle items together, making moving multiple items at once easier.

Types of Shrink Wraps

While many shrink wraps are available, the moving industry primarily uses industrial-strength shrink wraps. These wraps are designed to withstand the rigors of moving, providing reliable protection for various items.


Why Shrink Wrap is Crucial for Moving

Shrink wrap is not just a ‘good-to-have’; it’s an essential part of the moving process. Here’s why:

  • Protecting Goods from Damage: Whether it’s a prized piece of furniture, delicate ceramics, or sensitive electronics, shrink wrap can help protect these items from scratches, dust, and moisture during the move.
  • Ease of Transportation: By consolidating smaller items into one wrapped unit, shrink wrap can simplify the moving process and make transporting goods more manageable.
  • Enhancing Organization: Shrink wrap can also be used to group similar items together, which can be particularly useful when unpacking and setting up at your new location.

The next section delves into how to prepare for the shrink-wrapping process.

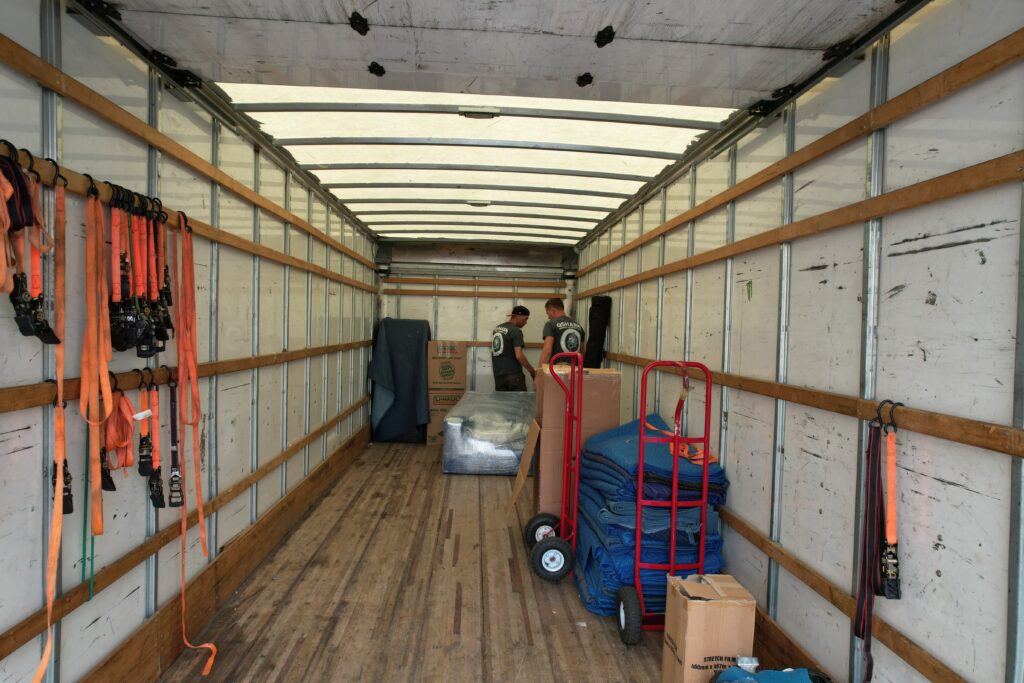
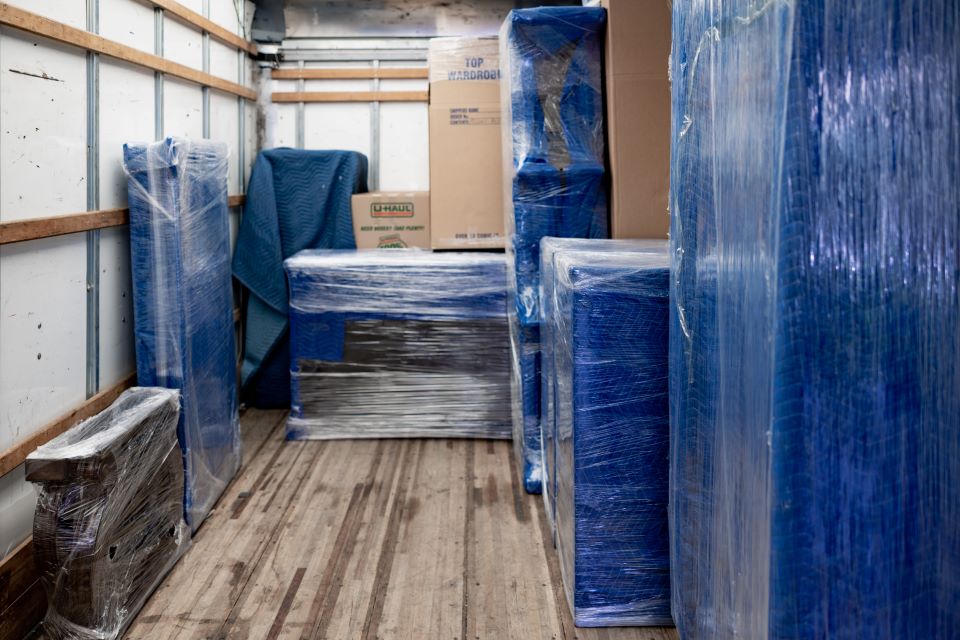
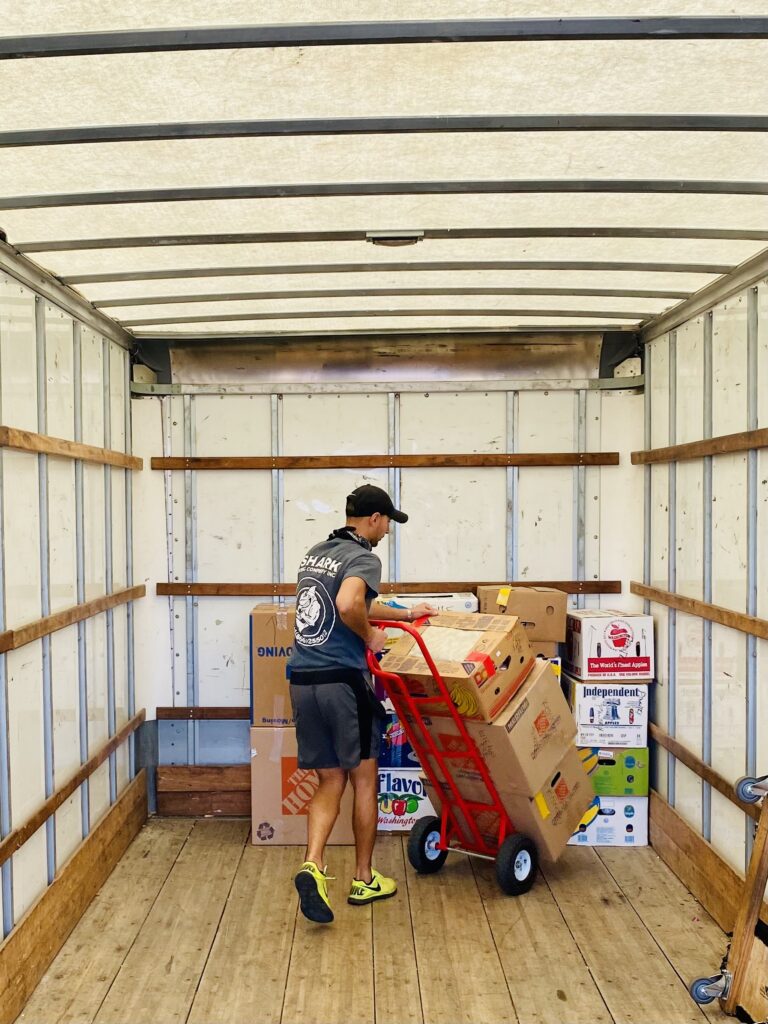
a picture of a loaded truck

Preparation Before Shrink Wrapping

Before we start shrink-wrapping, a few things need to be in place. Here are some preparatory steps:

Assessing the Type and Size of Items

Each item has its unique packing requirements. Start by assessing the items you plan to shrink wrap, and decide on the type of shrink wrap that’s most suitable.

  • Furniture: For larger items like furniture, thicker shrink wrap may be necessary to provide adequate protection.
  • Electronics: Electronic items might require anti-static shrink wrap to protect against static electricity.
  • Delicate Items: Items that are fragile or have a high risk of damage might benefit from being wrapped in a layer of bubble wrap or packing paper before applying the shrink wrap.

Selecting Appropriate Shrink Wrap

When it comes to selecting the right shrink wrap, consider the size and shape of the items. Ensure the wrap is wide enough to cover the items effectively. Remember, it’s always better to have a bit more than less.

Necessary Tools and Materials for Shrink Wrapping

Alongside the shrink wrap, you’ll need a few other tools:

  • Scissors: To cut the shrink wrap.
  • Tape: To secure the ends of the shrink wrap after wrapping.

Safety Considerations

Safety should always be paramount when packing and moving. Always wear gloves to protect your hands from sharp edges when wrapping items. Be careful not to wrap items too tightly as it could cause damage.


Step-by-Step Guide to Shrink Wrapping

Now that we have everything ready, it’s time to get wrapping. Here are the steps to follow:

  1. Start with a Clean, Dry Item: Ensure the item is clean and dry. Any dirt or moisture trapped under the shrink wrap could cause damage.
  2. Start Wrapping: Start at one end of the item and wrap the shrink wrap around it. Ensure the wrap overlaps on each pass to provide maximum protection.
  3. Secure the Ends: Once entirely covered the item, cut the shrink wrap and secure the end with tape.
  4. Check the Wrap: Ensure the wrap is secure and has no loose ends. The wrap should be tight, but not so tight that it risks damaging the item.

Post Shrink Wrapping Process

Once your items are securely wrapped, it’s time to think about how to handle them during the move:

How to Handle Shrink-Wrapped Items

Treat shrink-wrapped items with care. While the wrap provides some protection, it doesn’t make the items invincible.

What to Expect During the Move

Items may shift during transport, so ensure all items are securely placed in the moving truck. Shrink-wrapped items should ideally be placed with the wrapped surfaces facing upwards.

How to Unwrap Items Safely

When you arrive at your new location, carefully cut the shrink wrap to remove it. Be careful not to damage the item underneath with the scissors.

The Role of Professionals in Shrink Wrapping

Shrinkwrapping might seem straightforward, but it can quickly become overwhelming when you have a houseful of items to move. Here’s when you might want to consider getting professional help:

When to Consider Professional Help

While you might want to pack some smaller items yourself, you should consider professional help when it comes to:

  • Large Items: Large, bulky items can be difficult to wrap properly.
  • Fragile Items: An easily damaged item can benefit from a professional’s touch.
  • Volume: If you have a lot of items to wrap, it might be more efficient to let professionals handle it.
a picture of qshark mover unwrapping furniture

How QShark Moving Company Provides Professional Shrink Wrapping

At QShark Moving Company, our experienced team is trained to handle all items. We have the necessary tools and knowledge to safely and efficiently shrink-wrap your belongings. We understand how precious your items are and treat them with the utmost care.


Sustainability and Shrink Wrapping

While shrink wrap plays an important role in the moving process, it’s also essential to consider its environmental implications:

Understanding the Environmental Implications

Shrink wrap is a type of plastic, and like all plastics, it poses a potential environmental problem. It’s important to consider this impact and take steps to mitigate it.

QShark’s Commitment to Sustainability in Shrink Wrapping

At QShark Moving Company, we’re committed to environmental sustainability. We aim to minimize our environmental impact by:

  • Using only the necessary amount of shrink wrap
  • Educating our customers about proper disposal
  • Continually seeking more sustainable packing alternatives

FAQs

To wrap up, let’s address some frequently asked questions about shrink wrapping in the moving process:

  • Can I reuse shrink wrap? Although saving and reusing shrink wrap can be tempting, it’s generally not recommended as it loses its elasticity and strength after the first use.
  • Can all items be shrink wrapped? Most items can be shrink wrapped, but some exceptions, like certain antiques or oil paintings, might require specialized packing methods.
  • Does shrink wrapping leave a residue? High-quality shrink wraps used by professional movers should not leave any residue.

Conclusion

Shrink wrapping is a critical part of the moving process. It helps protect your belongings from damage and makes transportation easier. While you can try to do it yourself, remember that professional movers like QShark Moving Company are always here to help.

blog author

Author: Vlad Kandybovich

Meet Vlad Kandybovich, your friendly moving expert with over 10 years in the game! As the heart and soul behind QShark Moving Company, he has been a part of more than 50,000 moving journeys, helping individuals like you make smooth and stress-free transitions. Vlad is not just about the business; he genuinely cares about making each move a happy memory. So, when you are looking for advice or a tip on your next move, know that Vlads wisdom comes with a big dose of care and friendship. Happy moving!

What is Shrink Wrap?

qshark movers using shrink wrap to protect furniture

Summary: This article offers an all-encompassing look at shrink wrap and its pivotal role in the moving industry. From the science behind it to practical usage tips, QShark Moving Company guides you through everything you need to know to ensure safe and efficient moving.

SectionSummary
IntroductionIntroduces shrink wrap and its importance in the moving industry, with a special mention of QShark Moving Company’s commitment to quality.
Types of Shrink WrapDescribes the different types of shrink wrap, including Polyolefin, PVC, and Polyethylene, and their specific uses.
The Science Behind Shrink WrapExplains the manufacturing process and how shrink wrap shrinks and adapts around items.
Benefits in Moving IndustryDetails how shrink wrap protects against dust, secures loads, and offers clarity, making it cost-effective for moving.
Step-by-Step Guide to Shrink WrappingProvides a guide on materials needed, preparation, wrapping techniques, and safety considerations for effective shrink wrapping.
Special ConsiderationsDiscusses handling of fragile items, large objects, seasonal considerations, and regulatory factors in using shrink wrap.
Shrink Wrap in Sustainable Moving PracticesAddresses the environmental impact of shrink wrap and how to make its use more sustainable, including recycling and proper disposal.
Case StudiesPresents real-life examples of moves with and without shrink wrap, illustrating its effectiveness in the moving industry.
Frequently Asked QuestionsAddresses common questions and provides expert advice on the use of shrink wrap in moving.
ConclusionSummarizes the importance of shrink wrap in ensuring safe and efficient moves, and QShark Moving

I. Introduction

Shrink wrap, a common term that may sound familiar, plays an integral role in various industries. In this article, we will dive in-depth into shrink wrap and its immense significance in the moving industry, particularly how QShark Moving Company leverages this resource to ensure quality service.

A. Definition of Shrink Wrap

  • Shrink wrap is a plastic film used to wrap products and packages.
  • When heat is applied to this film, it shrinks tightly over whatever it covers.

B. Brief History and Evolution of Shrink Wrap

  • Shrink wrap was first used in the late 1950s to replace bulky and less effective packaging materials.
  • Over time, its manufacturing process has evolved, making it more cost-effective and efficient.

C. Introduction to its Significance in the Moving Industry

Shrink wrap is an invaluable tool for professional movers. Here’s why:

  • Protection: It safeguards furniture and other items from scratches and damages.
  • Efficiency: It aids in making the packing process faster and more efficient.
  • Stability: It helps to keep items tightly bound, preventing movement during transportation.

D. Mention of QShark Moving Company’s Commitment to Quality Service

QShark Moving Company, a leading moving service provider, heavily relies on shrink wrap to ensure that our clients’ belongings are safely and efficiently transported. Whether you are looking for local movers or need help with a long-distance move, QShark places paramount importance on utilizing the best materials and techniques.

In the next section, we will explore the different types of shrink wrap available and how to select the right type for different items.

a picture of a shrink wrap machine

II. Types of Shrink Wrap

Understanding the varieties of shrink wrap is crucial for selecting the right material for each specific task. Let’s explore the common types:

A. Polyolefin

  • Polyolefin is versatile and can be used for wrapping a wide range of products.
  • It is characterized by its high clarity, making it easy to see what is wrapped.
  • QShark Moving Company recommends this for delicate items due to its softer texture.

B. PVC (Polyvinyl Chloride)

  • PVC shrink wrap is quite popular due to its strength and durability.
  • It’s ideal for items that require a tight seal because it shrinks at lower temperatures.
  • However, when sealed, it releases harmful chemicals, so it’s not ideal for food items.

C. Polyethylene

  • Polyethylene is the most commonly used shrink wrap.
  • It’s known for its high strength and is used for wrapping larger items like furniture.
  • Professional movers often use this type due to its toughness.

D. Importance of Selecting the Right Type for Different Items

Choosing the right type of shrink wrap is vital to ensure maximum protection and efficiency during the moving process. It is important to consider:

  • The size and shape of the item
  • The fragility of the item
  • Environmental considerations, like temperature

III. The Science Behind Shrink Wrap

Shrink wrap is more than just plastic; there’s a science behind how it functions.

A. The Manufacturing Process

  • Shrink wrap is made from polymer plastic film.
  • During production, it is stretched so the molecules are aligned in both directions.
  • Later, when heat is applied, the memory of the molecules causes the material to shrink.

B. How it Shrinks

  • When heat is applied to the shrink wrap, it breaks the bonds between the polymer chains.
  • The density increases, causing the wrap to shrink in size.

C. Strengths and Limitations

  • Shrink wrap is incredibly durable, but it’s not indestructible.
  • It can withstand a great deal, but sharp objects can puncture it.
  • Understanding its limitations is key for local movers to use it effectively.
What Is Shrink Wrap

IV. Benefits of Using Shrink Wrap in the Moving Industry

Shrink wrap has transformed the moving industry. Let’s delve into the reasons:

A. Protection Against Dust, Dirt, and Moisture

  • Shrink wrap forms a barrier that shields items from environmental factors.
  • It’s particularly useful for safeguarding electronics and furniture.

B. Stabilizing and Securing Loads

  • Shrink wrap can bind multiple items together, reducing the risk of shifting during transport.
  • It is an indispensable tool for professional movers to prevent damage.

C. Clarity and Visibility of Wrapped Items

  • Shrink wrap is usually transparent, allowing easy identification of items without opening the packaging.

D. Cost-effective Compared to Other Packaging Materials

  • Shrink wrap is relatively lightweight and requires less material than alternatives such as bubble wrap or packing peanuts, saving costs in the moving process.

V. Step-by-Step Guide to Shrink Wrapping for Moving

Knowing how to use shrink wrap properly is vital as a customer or moving professional. Here’s a step-by-step guide:

A. Materials Needed

  • Shrink wrap roll
  • Heat source (heat gun or hairdryer)
  • Scissors

B. Preparing the Items

  • Ensure items are clean and dry.
  • Remove any loose parts or pieces.

C. Proper Technique of Wrapping

  • Start at one end of the item and unroll the shrink wrap around it.
  • Ensure it’s snug but not too tight to avoid damage.
  • For large items, QShark Moving Company professionals recommend using multiple layers.

D. Safety Considerations

  • Be cautious when handling the heat source to avoid burns.
  • Ensure proper ventilation as some shrink wraps can release fumes when heated.

E. Tips for Effective Shrink Wrapping by QShark Experts

  • Use the right type of shrink wrap for the item.
  • Ensure even heating for a tight seal.
  • Consider the environmental conditions during the move.

a picture of protected chaies

VI. Special Considerations in Shrink Wrapping

A. Handling Fragile Items

  • Use padding or bubble wrap in conjunction with shrink wrap for extra protection.

B. Managing Large or Oddly Shaped Objects

  • Using an adequately sized shrink wrap and wrapping in sections can help.
  • Consult professional movers for specialized wrapping techniques.

C. Seasonal Considerations (Temperature, Humidity)

  • In hot weather, shrink wrap may become too tight; in cold weather, it may become brittle.
  • Local movers should adjust techniques accordingly.

D. Regulatory Considerations

  • Be aware of any laws or regulations regarding the use of plastics for packaging in your area.

VII. Shrink Wrap in Sustainable Moving Practices

Environmental responsibility is paramount. Let’s examine the environmental impact of shrink wrap and how to make its use more sustainable.

Environmental Impact of Shrink Wrap

  • Shrink wrap is made from plastic, which is not biodegradable and can contribute to pollution if not disposed of properly.

Recycling and Disposal of Shrink Wrap

  • Shrink wrap can be recycled. Make sure to remove any labels or adhesive materials before recycling.
  • Some areas have specific recycling programs for plastic films. It’s good practice to find out what’s available in your area.

QShark Moving Company’s Initiatives in Sustainability

  • QShark Moving Company is committed to sustainability and encourages clients to recycle used shrink wrap.
  • The company continuously explores alternatives and strategies to reduce the environmental impact of moving materials.

X. Conclusion

As we’ve explored, shrink wrap is an essential tool in the moving industry. Its versatile nature and protective properties make it invaluable for ensuring safe and efficient moves. Whether you’re a moving professional or preparing for a personal move, understanding and utilizing shrink wrap effectively is key to a successful moving experience.

IX. Frequently Asked Questions About Shrink Wrap in Moving

Q: What is the best way to recycle shrink wrap after a move?

A: After a move, it’s important to dispose of shrink wrap to minimize environmental impact responsibly. Here’s how you can recycle it:

  • Firstly, ensure the shrink wrap is clean and free from any labels or adhesive materials.
  • Check with local waste management or recycling centers to see if they accept plastic films. Some areas have specific recycling programs for plastic films.
  • If curbside recycling is not an option, you can search for nearby drop-off locations through websites like plasticfilmrecycling.org.

Q: Is shrink wrap safe for all types of furniture?

A: Shrink wrap is generally safe for most types of furniture, but there are exceptions:

  • It’s important to ensure wooden furniture is completely dry before wrapping to prevent mold and mildew.
  • In the case of leather furniture, it’s advisable to first wrap the item in moving blankets or paper pads before applying shrink wrap, to allow the material to breathe and prevent moisture buildup.
  • Always use caution and ensure the wrap is not tightly applied to avoid damaging surfaces.

Q: What alternatives to shrink wrap are available for more sustainable moving?

A: For a more environmentally friendly move, you can consider these alternatives to shrink wrap:

  • Moving Blankets and Pads: Reusable moving blankets and pads are a great alternative to protect furniture and large items without plastic.
  • Cardboard and Paper: Biodegradable materials like cardboard and paper can protect smaller items.
  • Reusable Plastic Bins: Instead of using boxes often wrapped in shrink wrap for extra support, you can opt for reusable plastic bins for packing.
  • Biodegradable Shrink Wrap: Biodegradable shrink wrap options are also available from plant-based materials.

Q: How do professionals at QShark Moving Company use shrink wrap effectively?

A: At QShark Moving Company, the use of shrink wrap is optimized through:

  • Using padding or moving blankets with shrink wrap for fragile or delicate items.
  • Employing experienced techniques to ensure the shrink wrap is applied securely without being too tight.
  • Staying informed about, and adhering to, environmental best practices regarding the use and disposal of shrink wrap.
blog author

Author: Vlad Kandybovich

Meet Vlad Kandybovich, your friendly moving expert with over 10 years in the game! As the heart and soul behind QShark Moving Company, he has been a part of more than 50,000 moving journeys, helping individuals like you make smooth and stress-free transitions. Vlad is not just about the business; he genuinely cares about making each move a happy memory. So, when you are looking for advice or a tip on your next move, know that Vlads wisdom comes with a big dose of care and friendship. Happy moving!

Can you wash moving blankets?

can you was moving blankets? advice from pros

Summary

This comprehensive guide dives into the importance of washing moving blankets and the best practices for doing it. Clean moving blankets are crucial not just for hygiene but also for their functionality and aesthetic value. With expert advice from QShark Moving Company, this article will also guide you on recognizing when it’s time to replace your moving blankets.

Short Answer:

Yes, most moving blankets, especially those made of durable materials like polyester and cotton, can be washed. However, checking the manufacturer’s care instructions before washing is recommended to avoid potential damage.


I. Introduction

Moving blankets are indispensable in any relocation process, protecting your valuables from potential damage. Just as you wouldn’t pack your belongings in a dirty box, using clean moving blankets is equally vital. As professional movers, we at QShark Moving Company understand this need and always strive to maintain our equipment’s cleanliness, including moving blankets.

Why Does Cleanliness Matter?

  • Hygiene: The blankets often come in contact with various surfaces, accumulating dust, dirt, and potential allergens. Regular washing is essential to maintain a clean environment during your move.
  • Performance: Accumulated dirt and debris can affect a moving blanket’s cushioning ability, diminishing its performance over time.
  • Aesthetics: Clean moving blankets show our customers the professionalism and care we put into our work, reinforcing trust in our services.

This guide will explore the importance of washing moving blankets, how to do it correctly, and when it’s time for a replacement. For those unsure about the number of moving blankets they might need for their move, check out our previous article. Similarly, if you’re wondering how to use them efficiently, we’ve covered you here. Let’s dive in!

II. Understanding Moving Blankets

Before we delve into the details of washing moving blankets, it’s important to understand what they are and their roles in a successful move.

What are Moving Blankets?

Moving blankets, often referred to as furniture pads, are thick protective coverings used to prevent damage to furniture and other large items during a move. They provide a layer of cushioning to protect against scratches, dings, and other potential harm.

Types of Moving Blankets

There are primarily three types of moving blankets:

  1. Professional-grade moving blankets are the thickest and most durable type, often used by professional movers due to their excellent protection and reusability.
  2. Mid-grade moving blankets – These offer a balance between cost and protection. They are slightly less thick than the professional-grade ones but still provide ample protection for most items.
  3. Economy moving blankets – These are the thinnest and least expensive type. They’re suitable for light protection and single-use scenarios.

Role of Moving Blankets in a Successful Move

Moving blankets serve multiple roles:

  • Protection: They protect your belongings from scratches, dents, and other types of damage during the move.
  • Cushioning: They provide cushioning between items, preventing damage caused by items rubbing against each other.
  • Security: They can be used to secure items in place, preventing movement during transportation.

Knowing what moving blankets are and their roles is crucial to understanding their maintenance and cleanliness needs. However, not all moving blankets are created equal, and this plays a big part in how they are cleaned. We’ll dive into this next.


a pciture of qshark movers loading a truck

III. Why is it Essential to Wash Moving Blankets?

Clean moving blankets are essential not just for hygienic reasons but also to maintain functionality and extend lifespan.

Hygiene Reasons

Moving blankets often come into contact with various surfaces and accumulate dust, dirt, allergens, and sometimes even pests. Keeping them clean helps ensure a safe and hygienic environment during your move.

Performance Reasons

Dirt and debris can affect the cushioning ability to move blankets, reducing their protective qualities. Grime and moisture can degrade the materials over time, diminishing their durability.

Aesthetic Reasons

Clean moving blankets create a positive impression, demonstrating professionalism and care for your belongings. They also help prevent any dirt or dust from the blankets from transferring onto your items.

At QShark Moving Company, maintaining clean moving blankets is integral to our operations. It’s not only about providing quality service but also about ensuring the health and satisfaction of our customers.

In the following sections, we’ll explore if and how moving blankets can be washed, providing a comprehensive guide to keeping your blankets clean and durable.

IV. Can You Wash Moving Blankets?

Not all moving blankets are created equal, and their washability depends on a few factors, such as material, quality, and size. Let’s break it down:

Material

Moving blankets are usually made of a combination of polyester and cotton. Some high-quality blankets may also have a woven outer layer for extra durability. Generally, these materials are washable, but always check the manufacturer’s instructions.

Quality

High-quality, professional-grade moving blankets are designed to withstand repeated use and washing. However, lower-quality, economy blankets may also not hold up to frequent cleaning.

Size

Large moving blankets can be bulky and heavy, especially when wet. If you’re washing at home, ensure your washing machine can handle the size and weight.


a picture of qshark moving truck

V. Washing Moving Blankets: The Do’s and Don’ts

Once you’ve determined your moving blankets are washable, follow these guidelines to keep them clean and increase their lifespan.

  1. Do check the material: Knowing the material of your moving blanket is crucial as it determines the correct washing and drying procedures.
  2. Don’t use harsh detergents: Harsh detergents can damage the fabric of your moving blankets. Opt for mild detergents instead.
  3. Do wash on a gentle cycle: Using a gentle or delicate wash cycle can prevent damage to your moving blankets.
  4. Don’t overload your washer: Overloading your washer can cause unbalanced loads and damage your machine. Wash one or two blankets at a time, depending on their size.
  5. Do air dry your moving blankets: If possible, air drying is the best way to dry your moving blankets to prevent shrinkage or damage from high heat.
  6. Don’t ignore stains or spills: If your moving blanket has a stain or spill, pre-treat it before washing.

Remember, washing guidelines can differ based on the type and quality of moving blankets. Always refer to the manufacturer’s instructions if available.


VI. Step-by-Step Guide to Washing Moving Blankets at Home

If you choose to wash your moving blankets at home, follow this step-by-step guide to ensure they are cleaned properly and their quality is maintained.

Step 1: Preparation

Remove any loose debris before washing your moving blankets and check for any damages or heavy stains. Pre-treat heavy stains if necessary.

Step 2: Washing

Use a large-capacity washing machine if possible. Add a gentle detergent and set the machine to a delicate cycle. The water temperature should be cool to prevent any damage or shrinkage.

Step 3: Drying

Once washed, hang your moving blankets to dry. Avoid using a dryer if possible, as high heat can cause damage or shrinkage. Ensure they are completely dry before storing them to prevent mold or mildew.

Step 4: Storage

Store your moving blankets in a dry, cool place. Avoid areas with high humidity to prevent mildew. Fold them neatly and store them in a breathable container or bag.

By maintaining your moving blankets properly, you can significantly increase their lifespan and efficiency. It’s not just about cleanliness; it’s about making the most of your moving equipment.

The next section delve into QShark Moving Company‘s approach to maintaining our moving blankets.

VII. QShark Moving Company’s Approach to Cleaning Moving Blankets

At QShark Moving Company, we understand that cleanliness is next to professionalism. We are committed to maintaining high cleanliness standards to ensure your moving experience is as smooth and hygienic as possible.

Our Cleaning Procedure

  1. Pre-Cleaning Inspection: We thoroughly inspect each blanket for damages and debris before cleaning. Any severely damaged blankets are taken out of circulation and replaced.
  2. Professional Washing: We use professional-grade washing machines and mild detergents to effectively clean our moving blankets without causing damage.
  3. Air Drying: To preserve the quality and durability of our blankets, we prefer air drying. This avoids potential damage or shrinkage caused by high heat in dryers.
  4. Post-Cleaning Inspection: After drying, we inspect each blanket again to ensure it’s clean and ready for the next move.
  5. Proper Storage: Our moving blankets are stored in a clean, dry place to keep them ready and in perfect condition for your move.

Through our stringent cleaning and inspection process, we strive to provide you with moving blankets that are not only clean but also durable and reliable.


VIII. When to Replace Moving Blankets

Despite regular cleaning and maintenance, moving blankets can wear out over time. Here’s how to determine if it’s time to replace them:

  1. Thinning Material: If the material is getting thin, especially in the middle of the blanket, it’s a sign that it is worn out and needs replacement.
  2. Tears or Holes: Any significant tears or holes in a moving blanket can greatly reduce its protective abilities.
  3. Persistent Odors or Stains: If, despite washing, a blanket retains odors or stains, it’s time to replace it.

At QShark Moving Company, we routinely inspect and replace our moving blankets as needed. Our commitment to quality ensures that we provide only the best equipment for your move.


IX. Conclusion

The care and cleaning of moving blankets are crucial to ensure their performance and longevity. Clean moving blankets are a significant factor in a successful and stress-free move from hygiene to efficiency. At QShark Moving Company, we uphold these values, providing our customers with clean, high-quality moving blankets and exceptional moving services.

blog author

Author: Vlad Kandybovich

Meet Vlad Kandybovich, your friendly moving expert with over 10 years in the game! As the heart and soul behind QShark Moving Company, he has been a part of more than 50,000 moving journeys, helping individuals like you make smooth and stress-free transitions. Vlad is not just about the business; he genuinely cares about making each move a happy memory. So, when you are looking for advice or a tip on your next move, know that Vlads wisdom comes with a big dose of care and friendship. Happy moving!

How To Use Moving Blankets?

how to use moving blankets is shown on this picture by qshark movers

Are you gearing up for a move? Protecting your belongings is paramount, whether around the corner or across the country. One of the key tools at your disposal for this purpose is the humble moving blanket. But how do you use moving blankets effectively? QShark Moving Company, your trusted professional movers, is here with a comprehensive guide to answer just that.

Summary: This article presents an in-depth guide on using moving blankets for your move. It covers their importance, where to acquire them, and detailed instructions on how to use them for different items. The article also includes advanced tips and potential mistakes to avoid, showing you how moving blankets can ensure a safe, smooth, and stress-free moving experience.

One Minute Read:

SectionKey Information
What are Moving Blankets?Durable coverings made from polyester or a mix of cotton and polyester, used to protect items during a move.
Why Use Moving Blankets?They protect items from damage, absorb shocks during transit, and are versatile for a wide range of items.
Where to Acquire Moving BlanketsMoving companies, retail stores, online marketplaces, and rental services.
How to Use Moving BlanketsCover the item completely with the moving blanket and secure it using packing tape or moving straps.
Common Mistakes to AvoidNot securing the blankets properly, not using enough blankets, and using blankets on dirty items.
How QShark Moving Company Can HelpWe use moving blankets as a standard part of our service, wrapping your items fully and securely.
Frequently Asked QuestionsRegular blankets are not a substitute for moving blankets; some moving blankets can be machine washed; moving blankets are necessary even for small moves.

Introduction

Moving can be a challenging and stressful process. But the right tools and knowledge can be much easier and smoother. A moving blanket is one such tool that can make a huge difference. It offers superior protection for your valuables during a move and is essential to every professional mover’s arsenal.

At QShark Moving Company, we believe in arming our clients with the knowledge they need for a successful move. Hence, we have compiled this comprehensive guide to help you understand how to use moving blankets effectively.

You’ll learn about their role in the moving process, the different types available, and where you can get them. We provide a detailed, step-by-step guide on using moving blankets for various items and additional tips and common mistakes to avoid. Finally, we also explain how our local movers use moving blankets as part of our commitment to a stress-free moving experience.

Estimating how many moving blankets you might need for your move? We’ve got you covered. Check out our detailed article on ‘How Many Moving Blankets Do I Need?’ for guidance.

So, whether you are a DIY mover or looking to understand how professionals do it, this guide will be invaluable. Let’s dive in!

What Are Moving Blankets?

Moving blankets, or furniture pads, are thick, durable coverings used to protect items during a move. They are typically made from materials like cotton, polyester, or a blend of both and are designed to prevent damage from impacts and abrasions. Let’s take a closer look at them:

Materials and Dimensions

Moving blankets are made of robust and durable materials. Here’s what you need to know:

  • Fabric: Most moving blankets are made from woven polyester or a mix of cotton and polyester. These materials are chosen for their durability and ability to absorb shocks.
  • Filling: The blanket’s inside, or the filler, is usually made from recycled cotton, which adds to the blanket’s overall cushioning effect.
  • Size: Most moving blankets come in a standard size of 72×80 inches, providing ample coverage for most furniture pieces. However, other sizes are also available to cater to different needs.

Different Types of Moving Blankets

Moving blankets come in various types, each suitable for specific applications:

  • Performance moving blankets are the heaviest and thickest type, providing the best protection. They are best used for highly valuable or delicate items.
  • Economy moving blankets: Lighter than performance moving blankets, these are more suitable for less delicate items and shorter moves.
  • Furniture pads: These are typically lighter and less padded than moving blankets. They are great for protecting surfaces from scratches but offer less shock protection.
moving blankets, boxes and mattress

Why Use Moving Blankets?

Moving blankets are critical to protecting your belongings during a move. Here’s why:

  • Protection from damage: Moving blankets protect items from scratches, dings, and other damage during a move.
  • Shock absorption: The thick padding in moving blankets helps absorb shocks during transit, protecting your items from damage.
  • Versatility: Moving blankets can protect many items – from delicate glassware to large furniture pieces.

Where to Acquire Moving Blankets

There are several places to acquire moving blankets, depending on your specific needs:

  • Moving companies: Many moving companies, including QShark Moving Company, offer moving blankets as part of their services. This is often the most convenient option, especially if you already use the company’s services.
  • Retail stores: Home improvement and moving supply stores often sell moving blankets. This option allows you to see and feel the blankets before purchasing.
  • Online marketplaces: Websites like Amazon and eBay have a wide variety of moving blankets available for purchase. This option offers the convenience of shopping from home and often has a wider range of choices.
  • Rental services: Some companies offer moving blanket rental services. This can be cost-effective if you don’t foresee needing the blankets after your move.

Remember to compare costs and consider the quality, size, and quantity of blankets you’ll need when deciding where to get them.


How to Use Moving Blankets: A Step-by-step Guide

Here’s a step-by-step guide on how to use moving blankets for different items during your move:

  1. Before you start: Plan and estimate how many moving blankets you’ll need. Check out our guide on ‘How Many Moving Blankets Do I Need?’ to help with your estimation.
  2. Protecting Furniture:
    • Cover the furniture completely with the moving blanket. Ensure all sides are covered.
    • Secure the blanket using packing tape or moving straps. Do not place tape directly on the furniture to avoid any residue.
  3. Protecting Delicate Items:
    • Wrap each item individually in a moving blanket.
    • Secure the blanket with packing tape. Again, avoid placing tape directly on the item.
  4. Protecting Electronics and Appliances:
    • Unplug and clean the appliance or electronic item.
    • Wrap the item with the moving blanket and secure it with packing tape or straps.

Remember, the goal is to ensure your items are fully covered and secured so the blanket doesn’t come loose during the move.

qshark movers moving furniture

Additional Tips and Tricks

Here are some additional tips for making the most of your moving blankets:

  • Use moving blankets with other packing materials like bubble wrap and packing paper for protection.
  • Ensure the moving blanket is secured tightly around the item to prevent it from coming loose during the move.
  • Don’t forget to protect corners and edges, as these are often the areas most prone to damage during a move.

This marks the end of the practical guide, but there’s more to come. Stay tuned as we delve into common mistakes to avoid and how the professional movers at QShark utilize moving blankets.

Common Mistakes to Avoid

When using moving blankets, there are several common mistakes to avoid:

  • Not securing the blankets properly: It’s essential to secure the moving blanket tightly around the item to ensure it doesn’t slip off during the move.
  • Not using enough blankets: Skimping on moving blankets can lead to unprotected areas on your items. Remember to check out our guide on ‘How Many Moving Blankets Do I Need?’ to help you estimate the right quantity.
  • Using blankets on dirty items: Before wrapping, ensure items, especially furniture and appliances, are clean to avoid stains or scratches.

How QShark Moving Company Can Help

At QShark Moving Company, we understand the importance of keeping your belongings safe during a move. Our professional movers use moving blankets as a standard part of our service.

We carefully wrap your items, ensuring they are fully covered and secured. Our experienced team knows exactly how many and what type of moving blankets to use for each item. So, you can rest assured that your belongings are in safe hands.

Here’s what a few of our satisfied customers have to say:

“The team at QShark took great care of my belongings during my move. I was especially impressed with how they used moving blankets to protect my furniture. Everything arrived in perfect condition!” – John D.

“The movers from QShark were very professional. They used plenty of moving blankets and took their time to make sure everything was well protected. I couldn’t be happier with their service!” – Mary S.

If you’re planning a move, let us take the stress out of your hands. Contact QShark for a smooth, safe, and stress-free moving experience.


Conclusion

Moving blankets are critical in ensuring a smooth and safe moving process. They offer protection for your valuable items and absorb shocks during transit. With the right knowledge and techniques, you can utilize moving blankets to make your move much easier. Remember, if you need help with your move, the professional movers at QShark are just a call away.


Frequently Asked Questions

Here are answers to some commonly asked questions about moving blankets:

Q: Can I use regular blankets instead of moving blankets?

A: While regular blankets can provide some level of protection, they lack the thickness and durability of moving blankets and may not offer sufficient protection during a move.

Q: Can moving blankets be washed?

A: It depends on the specific blanket. Some moving blankets can be machine washed, while others should be spot cleaned only. Check the care instructions on your moving blankets to be sure.

Q: Are moving blankets necessary for a small move?

A: Yes, even for a small move, moving blankets can help protect your items from damage during transit.

Have more questions or need assistance with your move? Feel free to contact QShark Moving Company. Our team of experienced movers is ready to assist you.

That concludes our in-depth guide on how to use moving blankets. We hope you found this article helpful!

blog author

Author: Vlad Kandybovich

Meet Vlad Kandybovich, your friendly moving expert with over 10 years in the game! As the heart and soul behind QShark Moving Company, he has been a part of more than 50,000 moving journeys, helping individuals like you make smooth and stress-free transitions. Vlad is not just about the business; he genuinely cares about making each move a happy memory. So, when you are looking for advice or a tip on your next move, know that Vlads wisdom comes with a big dose of care and friendship. Happy moving!

How many Moving Blankets Do You Need?

Moving Blankets and protection

Summary: This comprehensive guide explores the integral role moving blankets play in the relocation process, offering insights into how many you’ll need for a seamless move. Drawing on the expertise of QShark Moving Company, this article seeks to demystify the often overlooked yet essential aspect of moving. You’ll discover various factors determining the number of moving blankets required, practical examples for estimations, best practices when using them, and much more.

Short Answer:

Property SizeLocal Move (Short Distance)Long-Distance Move
Small (Studio/1-Bedroom)12-15 Blankets20-25 Blankets
Medium (2-Bedroom)20-25 Blankets30-35 Blankets
Large (3-Bedroom and up)30-40 Blankets45-60 Blankets

I. Introduction

Moving to a new home or office can be both exciting and stressful. Among the myriad details to consider, one aspect often overlooked is the role of moving blankets. These simple yet essential tools safeguard your valuable items, preventing damage and making a move smoother.

  • What role does a moving blanket play?

Moving blankets, also known as moving pads, protect your furniture and other large items during the move. They help prevent scratches, dents, and other types of damage in transit.

As professional movers, we at QShark Moving Company understand the ins and outs of moving, including the nuances of using moving blankets. Our vast experience as local movers has equipped us with the knowledge to provide you with the best advice and tips, ensuring a hassle-free moving experience.

This comprehensive guide delves into the nitty-gritty of moving blankets, helping you determine how many you’ll need for your next move. Let’s dive in!

In This Article:

SectionsKey Points
What are Moving Blankets?Padded coverings used to protect furniture and large items during a move.
Why are Moving Blankets Important?They prevent damage to your belongings and reduce the risk of injury during the move.
Factors Determining the Number of Moving BlanketsSize of property, quantity and type of furniture, distance of move, fragility of items, specialty items, personal preference and budget.
Guide to Estimating Moving BlanketsTake inventory, assess each item’s coverage need, apply room estimate, factor in distance, and adjust based on personal preference.
Best Practices When Using Moving BlanketsProperly wrap items, ensure safety in transit, and reuse or recycle blankets after the move.
Professional Tips and Tricks from QShark’s Moving ExpertsMaximize the utility of moving blankets, choose quality over quantity, consider renting vs. buying, and get help from professional movers.

II. Understanding Moving Blankets

Before we dive into how many moving blankets you might need, it’s crucial to understand what they are and why they’re an essential part of the moving process.

A. What are Moving Blankets?

Moving blankets, often called moving or furniture pads, are protective coverings used during relocation. Made from durable materials, these blankets are a cushion for your items, protecting them from scratches, dents, or other damage during the move.

There are generally three types of moving blankets:

  1. Professional moving blankets: These are the highest quality and most durable. They are typically made from a mix of cotton and polyester and often have a woven structure for extra strength.
  2. Economy moving blankets: These are designed for limited usage, usually for a single move. They are typically made from non-woven polyester or a cotton and polyester mix.
  3. Paper moving pads: These are the most cost-effective option and are made from recycled paper. They are ideal for protecting items from dust and dirt but offer less protection against impacts.

B. Different Types of Moving Blankets and Their Uses

Each type of moving blanket is designed for specific use:

  • Professional moving blankets: Ideal for professional movers, these provide maximum protection and are perfect for long-distance moves and fragile or valuable items.
  • Economy moving blankets: Best suited for short-distance moves or less fragile items. They provide a basic level of protection and are usually more affordable.
  • Paper moving pads: These are great for single-use scenarios, such as painting or renovation, in addition to moving. While they don’t offer as much protection, they’re an excellent choice for covering large areas or wrapping less fragile items.
  • Weighted blankets: Primarily used for added stability and protection, weighted blankets are ideal for securing and cushioning heavier items during transit. They are heavier than standard moving blankets, providing enhanced shock absorption. This makes them particularly effective for protecting electronics, appliances, and other high-value items that may be sensitive to movement.

C. Why are Moving Blankets Essential for a Successful Move?

Moving blankets are pivotal to a successful, damage-free move. They:

  • Protect your belongings from damage during transit
  • Save you from potential repair or replacement costs
  • Offer peace of mind, knowing your possessions are well-protected
  • Can be used for various other purposes post-move, such as pet bedding, soundproofing, or during renovations.

Now that we’ve explored what moving blankets are and their importance, let’s examine the factors that influence how many you might need for your move.

a picture of a moving truck with moving blankets online

III. Factors Determining the Number of Moving Blankets Needed

Determining the number of moving blankets needed for a move can be tricky. It depends on several factors, each contributing differently to the overall requirement.

A. Size of the Property

Naturally, the size of your home or office significantly affects the number of moving blankets you will need. Here’s a rough guide to help you estimate:

  • One-bedroom property: Usually, 12 to 15 blankets suffice for a one-bedroom property.
  • Two-bedroom property: Consider around 20 to 25 blankets for a two-bedroom property.
  • Three-bedroom and larger properties may require 30 or more blankets, depending on the quantity and type of furniture.

Remember, these are just estimates, and the actual number may vary.

B. Quantity and Types of Furniture

The quantity and types of furniture you own can dramatically influence the number of moving blankets needed.

  • Wooden furniture: Items like dining tables, chairs, desks, etc., often require full coverage to protect them from scratches and dents.
  • Glass or delicate furniture may require extra padding, meaning more blankets, to ensure they remain intact during the move.

C. Distance of the Move

The further you’re moving, the more protection your items will need.

  • Local moving: If you’re working with experienced local movers like QShark Moving Company, fewer blankets may suffice as the transit time is short.
  • Long-distance moving: For long-distance moves, items are exposed to more prolonged movement, requiring extra protection. It’s advisable to use more moving blankets to ensure your belongings stay safe throughout the journey.

D. Fragility of Items

The fragility of your items is another important factor to consider.

  • Robust items: Items like books, pots, and pans, and some sturdy appliances may not require a moving blanket at all.
  • Fragile items: Delicate items like dishes, vases, electronic appliances, etc., often require additional padding. In this case, you might want to consider not just wrapping them in moving blankets, but also placing them in a box afterward for maximum protection.

E. Specialty Items

Specialty items like pianos, artwork, large appliances, etc., will require extra attention and likely more moving blankets.

  • Artwork and Mirrors: Artwork and mirrors should be fully covered with moving blankets and then placed in a mirror/picture box.
  • Appliances: Large appliances like refrigerators, washing machines, etc., should be fully wrapped with moving blankets to avoid scratches or dents.
  • Pianos: Pianos are especially tricky due to their size and fragility. It’s recommended to use multiple blankets for full coverage.

F. Personal Preference and Budget

Ultimately, the number of moving blankets needed also depends on your preference and budget. You may want to invest in more blankets if you prefer maximum property protection. Conversely, you might use fewer blankets and take more risks if you’re on a tight budget.

Understanding these factors will provide a foundation for estimating the number of moving blankets required. Next, we’ll provide a step-by-step guide on making this estimation.

a professionally wrapped couch with moving blankets

IV. A Comprehensive Guide to Estimating Moving Blankets

Estimating the number of moving blankets you need doesn’t have to be complicated. Follow this step-by-step guide to get a reasonable estimate.

A. Step-by-Step Guide on How to Estimate the Number of Moving Blankets Needed

1. Inventory Your Items:

The first step is to take a complete inventory of your belongings. Categorize items based on their type (wood, glass, appliances), fragility, and size.

2. Assess Each Item’s Coverage Need:

Determine how much coverage each item needs. Generally, more fragile and larger items will need more blankets.

3. Apply the Room Estimate:

Apply the basic room estimate guide provided in section III. A. Adjust as needed based on your inventory.

4. Factor in Distance:

Remember to consider the distance of the move. Longer moves usually require more padding for your items.

5. Adjust Based on Personal Preference:

Consider your comfort level. If you prefer extra protection, estimating on the higher end is okay.

B. Practical Examples Illustrating the Estimation Process

To help illustrate this, let’s walk through a couple of scenarios.

Scenario 1: A local move for a one-bedroom apartment with a mix of wooden and glass furniture, a large TV, and several pieces of artwork. We’d start with around 12-15 blankets based on the room estimate. However, considering the glass furniture and artwork, we might add an extra 5 blankets, bringing the total to around 17-20.

Scenario 2: A long-distance move for a three-bedroom house with many antique wooden furniture and a piano. Here, we’d start with the base estimate of 30 blankets for a three-bedroom house. Given the antique furniture, the piano, and the long-distance move, we’d add an extra 10-15 blankets. In this case, we’d estimate needing around 40-45 blankets.

Remember, these examples serve as a general guide and actual requirements may vary.

Using these steps and examples as a guide, you should get a reasonably accurate estimate of the number of moving blankets you’ll need. But having the right number of blankets is just the first step. Next, we’ll discuss best practices when using moving blankets.

V. Best Practices When Using Moving Blankets

Now that you know how many moving blankets you’ll need, it’s important to know how to use them effectively. Here are some best practices to keep in mind.

A. How to Properly Wrap Items with Moving Blankets

1. Fully Cover the Item:

Ensure the item is fully covered by the blanket. For furniture, start by placing the blanket over the top and allowing it to drape down the sides.

2. Secure the Blanket:

Secure the blanket with packing tape, making sure not to place the tape directly on the furniture to avoid leaving a sticky residue.

3. Double Up When Necessary:

For fragile or valuable items, consider using two blankets. Wrap the second blanket around the first for extra padding.

4. Keep Corners in Mind:

Pay extra attention to corners, which can easily get bumped during a move. Consider using additional padding at the corners.

B. Ensuring Safety and Preventing Damage While in Transit

1. Load Properly:

Load items wrapped in moving blankets carefully onto the truck. Heavier items should go on the bottom, while lighter ones should be on top.

2. Avoid Overloading:

Don’t overload the moving truck. Leaving some space allows for better weight distribution and prevents items from rubbing against each other.

3. Regularly Check the Load:

During long-distance moves, checking the load every few hours is wise to ensure the blankets haven’t shifted and items are still secure.

C. Tips on Reusing or Recycling Moving Blankets After the Move

1. Storage:

Use them as coverings for items in storage to keep dust away.

2. Pet Bedding:

They can be turned into bedding for pets.

3. Soundproofing:

Hang them up in a room you wish to soundproof.

4. Donate or Sell:

If you no longer need them, consider donating or selling them.

By following these best practices, you can ensure that your items are well-protected during the move and that your moving blankets serve you well even after the move. Next, we have exclusive tips and insights from our QShark’s moving professionals.

loaded truck by Qshark Moving Company

VI. Professional Tips and Tricks from QShark’s Moving Experts

In our years of service as professional movers, we at QShark Moving Company have gathered some exclusive tips and tricks to enhance your moving experience. Here are some pro insights straight from our experts.

A. Expert Recommendations for Maximizing the Utility of Moving Blankets

1. Think Beyond Furniture:

While moving blankets are commonly used for furniture, they can be used to protect all kinds of items, from appliances to valuable art pieces.

2. Utilize for Disassembling/Assembling Furniture:

Lay out a moving blanket when disassembling or assembling furniture. It can protect both the floor and the furniture parts from scratches.

3. Don’t Forget the Corners:

Reinforce corners of furniture with extra moving blankets, as these are areas prone to damage during transit.

B. Insider Tips on Choosing and Buying Moving Blankets

1. Quality Over Quantity:

A few high-quality moving blankets can offer better protection than many low-quality ones.

2. Rent vs. Buy:

Consider renting moving blankets if you’re on a tight budget or moving just once. But investing in your own set might be wiser if you foresee multiple moves or can use the blankets post-move.

C. How to Get Help from Professional Movers

1. Get Professional Assistance:

Our team at QShark is equipped to handle all your moving needs, including providing and utilizing moving blankets. Feel free to reach out to us for any assistance.

2. Request an In-House Estimate:

To get the most accurate estimate of how many moving blankets you’ll need (and a comprehensive quote for your move), consider requesting an in-house estimate.

Moving is more than just transporting items from point A to point B. It’s about ensuring the safe and efficient transportation of your belongings. As local movers with vast experience, we at QShark Moving Company hope this in-depth guide has been insightful and has equipped you with the knowledge you need to estimate and use moving blankets in your next move successfully. Happy moving!

VII. Conclusion

Knowing how many moving blankets you need is essential to planning a successful move. Not only do moving blankets protect your belongings during transit, but the right amount ensures that each item receives the protection it deserves. It all boils down to the size of your property, the type and quantity of items you own, the distance of the move, and your preference.

While it might seem daunting, the process becomes much simpler when you break it down step-by-step, as we have done in this article. From understanding what moving blankets are, the factors influencing their number, and how to use them properly, we’ve covered every detail you need to make an informed decision.

Always remember each move is unique. What worked for someone else might not work for you. Don’t hesitate to adjust the number of moving blankets as needed or seek professional movers’ help. QShark Moving Company is always ready to assist you and make your moving process as smooth as possible.

We hope this guide has been helpful in your moving journey. Here’s to a stress-free, damage-free move!

If you have more questions or need professional help, please get in touch with us. Our team of experienced movers at QShark Moving Company is always ready to assist you.

blog author

Author: Vlad Kandybovich

Meet Vlad Kandybovich, your friendly moving expert with over 10 years in the game! As the heart and soul behind QShark Moving Company, he has been a part of more than 50,000 moving journeys, helping individuals like you make smooth and stress-free transitions. Vlad is not just about the business; he genuinely cares about making each move a happy memory. So, when you are looking for advice or a tip on your next move, know that Vlads wisdom comes with a big dose of care and friendship. Happy moving!

Expert Guide to Taping a Moving Box by QShark Moving Company

how to tape a moving box, a step by step guide and tricks

Summary: This comprehensive guide delves into every intricate detail on how to tape a moving box. Correctly taping your boxes is crucial to protect your belongings during a move. Every step is crucial from selecting the right tape to the finishing touch. Let QShark Moving Company Los Angeles, your trusted professional movers, guide you through the process to ensure your move is as smooth as possible.

One Minute Read:

SectionKey Points
Understanding the BasicsBox types: small, medium, large. Required materials: packing tape, tape dispenser, box cutter. Get these from QShark Moving Company.
Selecting the Right TapePacking tape is best. Duct tape leaves residue and masking tape is weak. Use a tape dispenser for efficiency.
Taping a Moving BoxAssemble the box, seal the bottom, pack your items, seal the top, and check your work. Make sure all tape is secure and all items are tightly packed.
Tips and TricksDon’t skimp on tape, apply pressure, use the ‘H’ method, tape box handles.
Benefits of Proper TapingIncreases security, makes moving more efficient, provides protection from weather, and simplifies unpacking.
QShark’s Professional Packing ServicesQuality packing materials, expert packing, efficient service, and peace of mind. Contact our professional movers for assistance.

I. Introduction

At QShark Moving Company Los Angeles, we believe in doing things right. As experienced local movers, we’ve handled countless boxes and have seen firsthand what happens when a box is not properly taped—it can lead to damage of valuable items and create unnecessary hassle during the moving process.

This article will explore in-depth how to tape a moving box correctly. We’ll cover:

  1. Understanding the Basics
  2. Selecting the Right Tape
  3. Step-by-step Guide to Taping a Moving Box
  4. Tips and Tricks
  5. Benefits of Proper Box Taping
  6. QShark’s Professional Packing Services

This step-by-step guide aims to help you pack your boxes securely, ensuring a safe transit for your belongings. Let’s dive right in!

II. Understanding the Basics

Before we delve into taping, getting the basics right is essential. Let’s explore different box types and the materials you’ll need to start taping.

A. Types of Boxes

  • Small boxes: Ideal for heavy items like books, DVDs, tools, or canned goods.
  • Medium boxes: Versatile and perfect for small appliances, toys, or pots and pans.
  • Large boxes: Best for lighter, bulky items like bedding, curtains, or clothes.

Remember, the type of box you choose can significantly impact the safety of your items during the move. So, select wisely!

B. Necessary Materials

Now, let’s get your taping arsenal ready. You’ll need:

  • Packing Tape: A robust, wide adhesive tape specially designed for sealing boxes.
  • Tape Dispenser: This tool can significantly speed up your taping process.
  • Box Cutter: Handy for cutting tape and breaking down boxes if necessary.

These materials are essential for a smooth taping process. If you’re missing anything, head to our QShark Moving Company Los Angeles, for all your moving supply needs.

C. Where to Purchase or Acquire Materials

You can purchase these materials from any local home improvement or office supply store. However, we provide high-quality moving supplies at QShark Moving Company Los Angeles, ensuring your moving process is as seamless as possible.


a picture showitn moving boxes and packing tape

III. Selecting the Right Tape

Selecting the correct tape is pivotal in securing your boxes.

A. Different Types of Tape

There are several types of tape available, each with its unique features. Here’s a quick comparison:

  • Packing Tape: Strong and wide, ideal for moving boxes.
  • Duct Tape: Although strong, moving boxes are not recommended as it can leave a residue and peel off in certain temperatures.
  • Masking Tape: Typically used for painting, it’s too thin and weak for securing boxes.

B. Why Packing Tape?

We recommend using packing tape for taping moving boxes because of its strength and width, ensuring a secure seal. It’s also designed to withstand various temperatures, which is beneficial during transit.

C. Using a Tape Dispenser

A tape dispenser will speed up your taping process and make it much more comfortable. To use a tape dispenser:

  1. Position the tape on the sharp, serrated edge.
  2. Pull the tape across this edge to your desired length.
  3. Apply the tape to your box, using the dispenser’s edge to cut the tape.

Now that we’ve covered the basics and understood the right tape to use let’s delve into the taping process.

a picture of a qshark mover packing a coffee table

IV. Step-by-Step Guide to Taping a Moving Box

Taping a moving box involves more than slapping some tape onto a box. Here’s our expert guide:

A. Step 1: Box Assembly

  1. Open up your flat-packed box and shape it into a square or rectangle.
  2. Fold the bottom flaps inward. The larger flaps should be on the inside, with the smaller flaps on the outside.
  3. Make sure all corners of the box are properly aligned.

B. Step 2: Sealing the Bottom

  1. With your packing tape and dispenser ready, apply a strip of tape along the seam where the two bottom flaps meet in the middle. This is your middle seal.
  2. Add two more strips of tape parallel to your first one for extra reinforcement, effectively creating an ‘H’ shape. Ensure all the tape strips extend 4-5 inches up the sides of the box.
  3. Press down the tape to ensure it sticks well to the box.

C. Step 3: Packing the Box

  1. Start placing your items into the box, considering that heavier items should go at the bottom.
  2. If there’s any void space, fill it with packing material such as bubble wrap, packing peanuts, or crumpled newspaper.

D. Step 4: Sealing the Top

  1. Once your box is packed, close the top flaps like you did the bottom ones.
  2. Repeat the taping process as you did on the bottom, starting with the middle seal and then creating the ‘H’ shape for reinforcement.

E. Step 5: Checking Your Work

  1. Ensure that all tape is secure and has no loose edges.
  2. Give your box a gentle shake to ensure nothing is moving around. If it is, add more packing material.

V. Tips and Tricks

After mastering the basic taping process, these expert tips and tricks can help ensure a more secure, efficient packing:

  • Do Not Skimp on Tape: Better to use too much than too little. The additional cost of the tape is worth the security it provides to your items.
  • Apply Pressure: When laying down your tape, ensure it sticks firmly to the box.
  • Use the ‘H’ Method: Always remember to use the ‘H’ method for both the top and bottom of the box. It provides extra security and strength.
  • Tape Handles: If your box has handles, tape them closed. This helps to reinforce the box’s structure.

a picture of qshark mover carrying the boxes to customers house

VI. Benefits of Proper Box Taping

Properly taping your moving boxes may seem like a minor detail, but it carries significant benefits:

  • Security: Secure taping protects your belongings during transit.
  • Efficient Moving: Properly taped boxes are easier to handle, stack, and move.
  • Protection from Weather: Quality tape can help protect your items from weather elements during the move.
  • Ease of Unpacking: Well-taped boxes are less likely to collapse or spill their contents, making unpacking easier.

Remember, efficient moving begins with well-packed and well-taped boxes. Don’t underestimate the importance of this step in your moving process. If you need any assistance, your professional movers at QShark Moving Company Los Angeles are always ready to help!

Next up, we’ll introduce you to QShark’s professional packing services and how they can make your moving process even more seamless.

VII. QShark’s Professional Packing Services

At QShark Moving Company Los Angeles, we strive to make your moving experience as stress-free as possible. While our expert guide can help you tape boxes like a pro, sometimes, you might need more assistance.

Our professional packing services offer:

  1. Quality Packing Materials: We use only the best packing materials to ensure the safety of your belongings.
  2. Expert Packing: Our skilled professionals are trained in packing various items, from fragile glassware to bulky furniture.
  3. Efficient Service: We aim to get your belongings packed and ready to move quickly and efficiently.
  4. Peace of Mind: Knowing your belongings are packed securely by professionals can provide relief during the chaotic moving process.

Whether you need assistance packing a few delicate items or your entire home, we’re here to help. Reach out to our team of professional movers to discuss your packing needs.


And finally, let’s wrap up our comprehensive guide:

VIII. Conclusion

Taping a moving box correctly is critical in ensuring a successful move. From choosing the right tape to applying it effectively, each step matters in protecting your valuables during transit. We hope this comprehensive guide has been helpful in your moving process.

At QShark Moving Company Los Angeles, we’re committed to helping make your move as smooth as possible. If you have any questions or need further assistance, don’t hesitate to contact us.

Thank you for trusting QShark with your moving needs. Happy moving!

blog author

Author: Vlad Kandybovich

Meet Vlad Kandybovich, your friendly moving expert with over 10 years in the game! As the heart and soul behind QShark Moving Company, he has been a part of more than 50,000 moving journeys, helping individuals like you make smooth and stress-free transitions. Vlad is not just about the business; he genuinely cares about making each move a happy memory. So, when you are looking for advice or a tip on your next move, know that Vlads wisdom comes with a big dose of care and friendship. Happy moving!

How to Break a Lease California Summary:

a picture of qshark movers helping customer relocate

In this comprehensive guide, we dive deep into understanding the process and implications of how to break a lease in California. We address common questions such as the possibility of breaking a lease before moving in, how to navigate the process, and the costs involved. We aim to give tenants the knowledge they need to make informed decisions.

One Minute Read:

TopicKey Points
Understanding Lease AgreementsKnow the specifics of your lease, especially the termination clause and penalties for breaking the lease.
Breaking Lease Before Moving InYes, it’s possible, but costs can vary. Consider lease terms, timing, and communication with your landlord.
Breaking a Lease in CaliforniaUnderstand California’s tenant laws. Notify your landlord, settle payments, document everything, and consider ways to mitigate costs.
Cost of Breaking a LeaseAverage costs typically equal 1-2 months’ rent, but many factors can affect this. Don’t forget to account for property damage, unpaid rent, and hidden moving or storage costs.
Qshark Moving Company’s RoleQshark offers professional moving and storage services to help you during a lease break, making the process less stressful and more manageable.

I. Introduction

Navigating the complex waters of lease agreements can be daunting. When circumstances change, a tenant may find themselves needing to break their lease, a process fraught with legal implications and potential financial costs. Understanding this issue’s rules, rights, and responsibilities is vital for anyone looking to terminate their lease agreement.

As a leading moving company, Qshark Moving Company has extensive experience in helping clients deal with various moving and lease concerns. We’ve curated this comprehensive guide to assist you in understanding how to break a lease in California, what it might cost you, and what you can do to mitigate potential penalties.

In this article, we will cover:

“Knowledge is power. Knowing your tenant rights and responsibilities can save you a lot of stress and money.” – Qshark Moving Company

Please note that while we aim to provide accurate and up-to-date information, this guide should not replace professional legal advice. It’s crucial to consult with a legal expert when dealing with lease agreements and potential disputes.


a picture of a lease agreement

II. Understanding the Lease Agreement

Before discussing how to break a lease, it’s essential to understand the lease agreement itself.

A lease agreement is a legally binding contract between a tenant and a landlord. This document outlines the rights and responsibilities of both parties and includes specific terms and conditions for living in the rental property.

Some of the key points typically covered in a lease agreement include:

  • Rent: This section details the amount of rent, when it’s due, and how it’s to be paid.
  • Security Deposit: The amount of the security deposit, its purpose, and the conditions for its return are typically outlined here.
  • Lease Term: This section specifies the length of the lease and what happens when the term ends.
  • Maintenance and Repairs: This details who is responsible for what in terms of maintaining the property.
  • Rules and Regulations: This covers guidelines for living in the property such as noise restrictions, pet policies, and more.

But when it comes to breaking a lease, the most crucial sections to pay attention to are:

  • Termination Clause: This section explains the conditions under which the lease can be terminated before the term ends.
  • Penalties: Details on what penalties, if any, are applicable if the lease is broken.

Reading and understanding these sections can provide valuable information on what to expect if you break your lease.

“A lease agreement is not just a piece of paper; it’s a legal document. Understanding it is crucial for every tenant.” – Qshark Moving Company

In the following sections, we’ll discuss the process of breaking a lease in California, including the specific situations where you can break a lease without penalty.

a picture of a person breaking a lease in california

III. Can You Break a Lease Before You Move In?

It’s not uncommon for tenants to face a change in circumstances between signing a lease and moving in. The question arises: can you break a lease before you move in?

The short answer is yes, but the implications of this decision can vary widely based on the specifics of your lease agreement and the timing.

  1. Review Your Lease: Understanding your lease agreement cannot be overstated. Some lease agreements may include an opt-out clause or a cooling-off period during which you can cancel the lease without any penalties.
  2. Consider the Timing: If you have just signed the lease, landlords might be more amenable to breaking the lease as they can likely still find another tenant without losing much time or money.
  3. Communicate with Your Landlord: Open communication with your landlord can be crucial. Explain your situation clearly and honestly, and they might be willing to let you out of the lease or help find an alternative solution.

“Breaking a lease before moving in is legally possible but requires a clear understanding of your lease agreement and open communication with your landlord.” – Qshark Moving Company

While you can break a lease before moving in, it’s essential to understand that you may still be responsible for some costs, which we will discuss further in the section about the [cost of breaking a lease](Link to section V).

a sign showing" how to?" reffering to how to break a lease in california

IV. How to Break a Lease in California

Breaking a lease in California involves several key steps and considerations. California tenant laws provide specific situations where a tenant can legally break a lease without penalties.

A. Understanding California’s Tenant Laws

In the following situations, you may be allowed to break your lease without any financial consequences:

  1. Implied Warranty of Habitability: If the landlord fails to maintain livable conditions, you may have grounds to break the lease.
  2. Constructive Eviction: If your landlord violates your rights to privacy or otherwise makes the property unlivable for you, this is considered constructive eviction, and you may be able to break your lease.
  3. Domestic Violence Situations: Victims of domestic violence are allowed, under certain conditions, to free themselves from lease obligations.
  4. Military Duty: Federal law allows service members who are being deployed or permanently changed stations to break their lease.

Please consult with a legal expert to understand if these conditions apply to your situation.

B. The Process of Breaking a Lease

If you decide to proceed with breaking your lease, follow these steps:

  1. Notify Your Landlord: Start by informing your landlord of your intent to break the lease. Communication should always be in writing to ensure a record of all interactions.
  2. Write a Lease Termination Letter: This letter should include your departure date, a brief explanation of why you’re breaking the lease, and any other relevant information.
  3. Settle Outstanding Payments: Pay any outstanding rent or other fees due before you leave.
  4. Document Everything: This includes the condition of the property when you leave. Pictures can be very useful if disputes about property damage arise later.

“Breaking a lease involves more than packing up and leaving. Knowing the right process can protect you from unnecessary financial burdens.” – Qshark Moving Company

C. How to Mitigate the Costs and Consequences of Breaking a Lease

While breaking a lease often comes with financial consequences, there are ways to mitigate these costs:

  1. Finding a Replacement Tenant: Known as re-renting, finding someone to take over your lease can significantly reduce costs.
  2. Negotiating with Your Landlord: If finding a replacement isn’t possible, try negotiating the terms of your lease break with your landlord. They might agree to reduce penalties or allow a payment plan.

Keep in mind, breaking a lease should always be the last resort. It’s often best to work with your landlord to find a mutually beneficial solution.

a picture saying "cost" to displayy how much it cos to break a lease

V. How Much Does It Cost to Break a Lease?

One of the most frequently asked questions is about the cost of breaking a lease. While it’s difficult to pinpoint a precise amount due to the varying nature of lease agreements and personal circumstances, here are some factors to consider:

A. Average Costs in California

In many cases, tenants breaking their lease can expect to pay at least one to two months’ rent, but this varies greatly depending on the specifics of the lease agreement and the local rental market.

B. Factors that Could Increase the Cost

Several factors can increase the cost of breaking a lease:

  • Time left on the lease: The more time left, the higher the potential costs, as landlords will seek to cover the rent they would have received.
  • Rental market conditions: If the local market is slow, it may be more difficult for the landlord to find a new tenant, which could result in higher costs for you.
  • Lease stipulations: Some leases have specific early termination fees or conditions.

C. Costs Related to Property Damage or Unpaid Rent

If there’s damage to the property beyond normal wear and tear or unpaid rent, you could be liable for additional costs.

D. Hidden Costs You Should Be Aware Of

Some hidden costs could include storage and moving expenses, especially if you have to move on short notice. It’s essential to factor these into your total costs.

“Understanding the potential costs involved in breaking a lease can help you make an informed decision.” – Qshark Moving Company


a picture of qshark movers helping unload a moving truck

VI. How Qshark Moving Company Can Assist During this Process

The process of breaking a lease and moving can be stressful. Qshark Moving Company is here to ease that stress and provide assistance where necessary. Here’s how we can help:

A. Services Offered by Qshark Moving Company for Tenants Planning to Move

  1. Moving Services: We offer professional packing and moving services to ensure a smooth transition.
  2. Storage Services: If you need to move out quickly and don’t have your new place ready, we can offer secure storage solutions for your belongings.

B. Testimonials of Customers Who Were Assisted During a Lease Break

At Qshark Moving Company, we’ve assisted many customers during lease breaks. Here are a few testimonials:

“When I had to break my lease due to a job relocation, Qshark Moving Company was there to make the process less stressful. They took care of all my moving needs and even provided a short-term storage solution. Highly recommend!” – Jane D.

“Qshark Moving Company turned a stressful situation into a manageable one when I had to break my lease. Their professional team handled everything from packing to moving, which allowed me to focus on settling into my new home.” – Robert S.

Whether facing a lease break due to unexpected life changes or finding a better living situation, Qshark Moving Company is here to support you. We strive to make your transition as smooth and hassle-free as possible.


VII. Conclusion

Breaking a lease in California can be complex, with numerous legal and financial considerations. From understanding your lease agreement to knowing your rights and potential costs, it’s crucial to be well-informed before making such a decision.

Whether you’re questioning if you can break your lease before you move in, wondering about the process, or concerned about the cost, we hope this guide provides you with the clarity you need.

While it’s essential to understand the general principles and steps involved, each situation is unique. Therefore, always consider seeking advice from a legal professional when dealing with lease agreements.

At Qshark Moving Company, we understand that moving can be stressful, especially when you must break your lease. Our team is ready to help make this transition smoother for you.

Frequently Asked Questions (FAQs)

1. Can I break my lease before moving in?

Yes, it’s possible to break a lease before moving in. However, reviewing your lease agreement is important, as there may be penalties for early termination. It’s also crucial to communicate your intentions to your landlord as early as possible.

2. What are some legal grounds for breaking my lease in California?

In California, certain situations may allow you to break your lease legally. These include violating the implied warranty of habitability, constructive eviction, domestic violence situations, and military duty.

3. How much does it usually cost to break a lease?

The cost of breaking a lease varies based on several factors, including the terms of your lease agreement and local rental market conditions. Typically, you might expect to pay an amount equivalent to one to two months’ rent. However, the cost could be more or less depending on specific circumstances.

4. Are there any ways to reduce the costs of breaking a lease?

Yes, there are strategies to mitigate the costs of breaking a lease. These include finding a replacement tenant to take over your lease (known as re-renting), negotiating with your landlord, and ensuring you know of any potential additional costs such as property damage or unpaid rent.

5. How can Qshark Moving Company assist me in the process of breaking a lease?

Qshark Moving Company can assist you with professional packing and moving services, ensuring a smooth transition from one property to another. In addition, if you need to move out quickly and don’t have your new place ready, we can offer secure storage solutions for your belongings.

blog author

Author: Vlad Kandybovich

Meet Vlad Kandybovich, your friendly moving expert with over 10 years in the game! As the heart and soul behind QShark Moving Company, he has been a part of more than 50,000 moving journeys, helping individuals like you make smooth and stress-free transitions. Vlad is not just about the business; he genuinely cares about making each move a happy memory. So, when you are looking for advice or a tip on your next move, know that Vlads wisdom comes with a big dose of care and friendship. Happy moving!

What To Do When Movers Are Packing?

Moving day is often an exciting, albeit daunting, event. With a world of possibilities opening up in front of you, it also brings a range of logistics that need careful consideration and meticulous planning. Every stage requires your attention, from preparing for the day navigating the actual moving process, and settling down in your new place.

But fear not; we’ve got you covered whether you are searching for the best movers in town or some handy tips to streamline your moving process. This comprehensive guide will take you through every step, offering expert advice and practical tips to help you navigate this complex process.

StageKey Actions
Before the Movers ArriveFinalize your inventory, disconnect appliances, organize documents, handle pets and kids, and understand the company’s policies.
Day of the MoveFacilitate parking for the moving team, conduct a walkthrough, and supervise the packing process.
In TransitStay updated about the move’s progress, handle any issues or delays, and ensure your belongings are protected.
Arrival at Your New HomePrepare for unloading, supervise the unpacking process, and perform a post-move review.
Post-MoveDeal with leftover packing materials, follow-up with the moving company, and start settling in.

Before The Movers Arrive

Proper preparation is the foundation for a smooth moving day. Here are some general things to consider:

  • Finalize your moving inventory: Start with listing out all your belongings. Categorizing them room-wise can make the process easier. Don’t forget to include valuable and fragile items separately for extra care.
  • Disconnect and prep appliances: Ensure all your appliances are unplugged and prepared for the move. Remove any liquids, detach removable parts, and secure doors and cords.
  • Important documents: Gather all vital documents and keep them separate. These include IDs, financial documents, housing papers, etc.
  • Handling pets and kids: Plan for their care during the moving process. It might be useful to have them stay with friends or family.
  • Personal Items: Remove all personal items from walls, desks, etc., and pack them separately. You wouldn’t want your cheap movers to pack your family photos with the kitchen appliances accidentally.
  • Understanding the company’s policies: Before your professional movers arrive, make sure you understand their insurance and damage policies.

Stay tuned for our next section, where we’ll delve into what to expect on the actual moving day.

what to do whem movers are packing
a picture of a moving truck

Day of The Move

When the much-anticipated moving day arrives, knowing what to expect is crucial. Whether your moving company is the top movers in town, you should adhere to a standard process to ensure everything goes smoothly.

The Arrival of the Moving Team

Expect your moving team to arrive on time. Here’s what should happen upon their arrival:

  • Team Structure and Responsibilities: A standard moving team usually consists of a team leader and several crew members. The team leader typically handles the communication with you, while crew members are responsible for the heavy lifting.
  • Facilitate Parking: Ensure sufficient space for the moving truck to park as close to your home as possible. The fewer distance movers have to carry your items, the less risk of damage.

Walkthrough and Review of Inventory

The movers will do a walkthrough of your home and review the inventory. This step is crucial to identify any last-minute changes.

  • Addressing Changes: This is the time to communicate if you’ve added or removed any items from your initial inventory.
  • Highlighting Delicate Items: Point out any items that need special care during the move. Your movers should know which items to handle with extra caution.

The Packing Process

Your Orange County Movers will pack your items systematically and organized.

  • Tools and Materials: The movers will use a variety of tools and packing materials like bubble wrap for fragile items and sturdy boxes for heavier items.
  • Protecting Your Home: Your movers should take precautions to protect your home during the move, such as using furniture pads and floor protectors.
  • Duration of Packing: The time taken to pack will depend on the size and number of your items. Be prepared for this process to take several hours.

Final Check Before Leaving Your Old Home

Once everything is packed and loaded into the moving truck, do a final walkthrough of your home.

  • Final Walkthrough: Check all rooms, closets, and outdoor areas to make sure nothing has been left behind.
  • Confirmation: Once you’ve checked, confirm with the movers that everything has been loaded onto the truck.

Your moving journey is well underway, with your belongings safely packed and on their way. Keep reading for the next section, where we’ll discuss what to expect while your items are in transit.


In Transit

Once your belongings are on the move, knowing what to expect during this period is important. Whether you’re moving with Movers San Diego or another service, this phase should be handled with care and professionalism.

Tracking Your Move

Many professional moving companies offer ways to stay updated about your move’s progress.

  • Stay Updated: This could be through a tracking app, regular text updates, or personal calls from the team. If this is not offered, you should be able to call the moving company for updates.
  • Communication: It’s crucial to maintain open lines of communication during transit. If you have any questions or concerns, don’t hesitate to contact your movers.

Handling Delays or Issues

Despite the best preparations, sometimes unforeseen issues or delays can occur.

  • Be Prepared: Have a plan in place in case of delays, such as arranging temporary accommodation.
  • Issue Resolution: If there are any issues, like an item getting damaged in transit, your movers should have a process for resolving these. This should be detailed in the moving company’s policy.

Protection of Your Belongings

Your moving company should take every measure to protect your belongings during transit.

  • Packing Quality: Good packing can prevent damage from moving or vibrations in the truck.

The anticipation grows as your belongings make their way to your new home. The next section will explore what to expect upon arrival at your new abode.

a picture of a mover moving a tv

Arrival at Your New Home

This is the moment you’ve been waiting for. Your belongings have made the journey; now it’s time to start setting up your new home. Here’s what you can expect:

Preparation for Unloading

Before the Irvine Movers start unloading, there are a few things to do:

  • Facilitate Access: Make sure there’s a clear path from the moving truck to the entrance of your new home.
  • Preliminary Checks: Check if there’s any damage to your new home that could be aggravated by the move, like a loose staircase railing.

The Unloading and Unpacking Process

Now that everything is ready, it’s time for the movers to unload your belongings:

  • Directing Movers: Tell the movers where each box should go based on its labeling. This will make the unpacking process much easier.
  • Changes in the Plan: If there are any changes in where you want certain items, communicate this with the movers.

Post-Move Review

Once everything has been unloaded, it’s time to check the condition of your items:

  • Assessing the Condition: Check all your boxes and items for any signs of damage. This should be done while the movers are still there.
  • Reporting Issues: If there are any damaged items, report this to the moving team leader. The moving company should have a process for handling these claims.

Congratulations! The moving process is almost done. The next section will discuss some important post-move procedures and tips.

Post-Move

After the moving team has left, you’ll likely find yourself amidst a sea of boxes. While it may seem daunting, don’t worry! Here are some steps to help you navigate this phase of your moving journey:

Dealing with Leftover Packing Materials

After unpacking, you’ll likely have a mountain of packing materials left over. Here are a few suggestions on how to deal with them:

  • Recycling: Most of the cardboard and paper packing materials can be recycled. Check your local waste management facility for recycling options.
  • Donating: Other people in your community may be moving as well. Consider donating your lightly-used packing materials on local community forums or social media groups.
  • Storing: If you foresee another move in your near future, consider storing some of the packing materials for future use.

Follow-Ups with the Moving Company

Even after the move is over, you might still need to communicate with your moving company:

  • Damage Claims: If any items were damaged, follow the moving company’s process to file a claim.
  • Feedback: Most companies appreciate feedback on their service. If your movers did a good job, consider leaving a positive review. If there were issues, provide constructive criticism to help them improve.

Settling In

After everything is unpacked and arranged, it’s time to settle in:

  • Deep Clean: Consider a thorough cleaning of your new home now that it’s empty. This can also be a good time to make any minor repairs or changes.
  • Unpacking: Start with essentials and gradually unpack the rest. Organizing your new home can take time, so don’t rush it.
  • Explore: Get to know your neighborhood. Find the local grocery store, park, restaurants, and other amenities.

You’ve successfully moved with one of the best moving companies! However, your journey doesn’t end here.

a picture of movers unloading a moving truck

Wrapping It Up

Moving can be a daunting task, but with careful planning, organization, and the help of professional movers, it can be a smooth and stress-free experience. Whether you’re moving locally within San Diego or coming in from another city, each stage of the moving process brings its own set of tasks and considerations.

This guide provided you with comprehensive information on every step of the moving process, from preparation before the movers arrive to settling down in your new home. We hope these tips and guidelines will help you navigate your moving day and make the process as effortless as possible.

Welcome to your new home in beautiful San Diego, where a host of exciting adventures await you. From its bustling food scene to the stunning outdoor vistas, there’s so much to explore and experience in this vibrant city. As you embark on this new chapter of your life, remember that the journey is just as important as the destination. Happy moving!

blog author

Author: Vlad Kandybovich

Meet Vlad Kandybovich, your friendly moving expert with over 10 years in the game! As the heart and soul behind QShark Moving Company, he has been a part of more than 50,000 moving journeys, helping individuals like you make smooth and stress-free transitions. Vlad is not just about the business; he genuinely cares about making each move a happy memory. So, when you are looking for advice or a tip on your next move, know that Vlads wisdom comes with a big dose of care and friendship. Happy moving!

What Movers Will Not Move?

Planning a move can be an overwhelming task. One of the first steps to a stress-free move is hiring professional movers. Yet, even the top movers have restrictions on what they can and cannot transport.

In this guide, we’ll go in-depth about what movers typically will not move. This information is crucial to know as you begin to pack and prepare for your relocation. Understanding these restrictions can save you valuable time and prevent potential complications on the moving day.

a picture of what movers will not move, and moving resctrictions

Why Do Moving Companies Have Restrictions?

Moving companies have certain restrictions for various reasons, mostly for safety and legal concerns. Movers aim to ensure the safety of your belongings, their team, and the public. Certain items can pose a threat if not handled properly or if they’re transported in a moving truck. Additionally, legal regulations prohibit the transport of specific types of items.

Below is a list of categories that movers usually do not handle:

  • Hazardous Materials: Items that can cause potential harm or damage
  • Perishable Food and Plants: Items that can spoil or die during transport
  • High-Value Items: Items that require special handling due to their monetary or sentimental value
  • Personal or Sentimental Items: Items that are irreplaceable or have sentimental value
  • Pets: For obvious reasons, your furry friends need to travel with you
  • Specific Heavy or Large Items: Certain items require special equipment or services to move
  • Dangerous Weapons: There are specific rules about moving firearms and other weapons
  • Chemicals and Cleaning Supplies: Many common household chemicals can’t be transported due to safety risks
  • Other Non-Allowables: Any other items that movers typically won’t move

Please note: This list is not exhaustive. Always check with your moving company for their specific list of non-allowable items.

As you prepare for your move, keep this guide handy. It will help you understand what items to pack and what items you’ll need to make other arrangements for. By knowing what to expect, you can ensure a smoother moving experience with your best movers. And if you’re looking for cheap movers who don’t compromise on quality and service, remember to consider us for your next move.

Let’s delve deeper into each category and discuss the reasons behind these restrictions.

hazardous materials

Hazardous Materials

Movers typically refuse to transport hazardous materials due to safety and legal reasons. These items can potentially cause damage or harm if they leak, ignite, or explode during the moving process. A comprehensive list of hazardous materials includes but is not limited to:

  • Gasoline: Full gas cans or gas-powered equipment should be emptied before the move.
  • Propane Tanks: Even if they seem empty, small traces of propane can pose a risk.
  • Aerosol Cans: They can explode under pressure or high temperatures.
  • Paint and Paint Thinner: They are flammable and can leak.
  • Batteries: Especially car batteries and other types of large, rechargeable batteries.
  • Fireworks: They are explosive and illegal to transport without a specific license.
  • Cleaning Supplies: Some can be corrosive or react badly with other substances.

Pro Tip: If you’re unsure whether an item qualifies as a hazardous material, check the label. Words like “caution,” “flammable,” “corrosive,” or “explosive” are good indicators.

Perishable Food and Plants

Most movers do not transport perishable food and plants. These items can spoil, attract pests, or, in the case of plants, may not survive the move, especially if it involves crossing state lines (due to various state regulations). Here’s how you can manage these items:

  • Perishable Food: Plan your meals ahead of the move to consume perishables. If you move a short distance, you could transport these items in a cooler.
  • Plants: Consider giving plants to friends or neighbors or transporting them in your vehicle.

High-Value Items

For many movers, monetary and sentimental value items are often on the “do not move” list. These can include items like:

  • Jewelry: Expensive or sentimental jewelry should be moved personally.
  • Antiques and Collectibles: Antique furniture, stamps, coins, or other collectibles.
  • Artwork: Original artwork or expensive prints.
  • Electronics: High-end cameras, computers, or other electronics.

Remember: It’s always a good idea to keep these items with you during the move to ensure their safety.

Personal or Sentimental Items

Although not inherently dangerous or expensive, certain personal or sentimental items are often better moved by the owners themselves. This category includes:

  • Personal Documents: Passports, birth certificates, social security cards, and financial documents.
  • Photos: Especially older, irreplaceable photos that can’t be replaced if lost or damaged.
  • Cash: Movers will not be responsible for cash.

Pets

Pets are a part of your family and, as such, they need to travel with you. Movers are not equipped to handle pets, and it’s safer and less stressful for your pets to move with you.

Important: Prepare a travel kit for your pet, including food, a leash, and any necessary medications.

Specific Heavy or Large Items

Certain heavy or large items may require special equipment or services to move. Some movers may not be equipped to handle these items. This category includes items like:

  • Pianos: Due to their size, weight, and fragility, pianos often require specialized movers.
  • Pool Tables must be disassembled and reassembled, which requires specific knowledge and tools.
  • Hot Tubs: Like pool tables, they are large, heavy, and require disassembly and reassembly.

Dangerous Weapons

There are specific rules and regulations about moving firearms and other weapons. While some movers might agree to transport firearms, they must be unloaded and properly packed. Ammunition, however, is usually not allowed.

Chemicals and Cleaning Supplies

Many common household chemicals and cleaning supplies can’t be transported due to their potential for leakage and damage. These items include bleach, ammonia, and other strong cleaners.

Note: Always check with your moving company about their specific policies regarding these items.

Other Non-Allowables

Each moving company has a list of non-allowable items. Be sure to ask your moving company for their list. Other items typically not allowed include car batteries, paints, and other similar items.

Preparing Restricted Items for a Move

You’ll inevitably come across items that your moving company won’t transport. Here’s a step-by-step guide to handling these types of belongings:

1. Hazardous Materials

Hazardous materials, like gasoline, propane tanks, and paint, pose safety risks and legal concerns.

  • Gasoline and Propane Tanks: Use up or safely dispose of gasoline before moving. Most cities have specific disposal sites for items like propane tanks. Check with your local waste disposal service for guidelines.
  • Paint and Paint Thinner: If you have leftover paint or thinner, consider donating it to a local school, theater group, or recycling center. If you must dispose of it, check your local regulations for safe disposal methods.

2. Perishable Food and Plants

To deal with perishable food and plants:

  • Perishable Food: Plan your meals to use up perishables before the move. Alternatively, consider donating unopened items to a local food bank.
  • Plants: If you can’t take them with you, give them to friends, neighbors, or a local community garden.

3. High-Value Items

If you’re moving high-value items, like jewelry and antiques, it’s safest to move them yourself. However, you should prepare them properly:

  • Jewelry: Keep jewelry in a small, secure box or case. Consider getting specific insurance for high-value pieces.
  • Antiques and Artwork: Consider using a specialty shipping service if you can’t carry them. Before the move, please take pictures of these items to document their condition.

4. Personal Documents and Sentimental Items

For personal documents and sentimental items:

  • Documents: Store personal documents like birth certificates, social security cards, and financial papers in a secure, portable file box. Keep this with you during the move.
  • Photos: Digitize old photos and keep the originals with you during the move. For newer photos, store them securely to prevent damage.

5. Firearms and Weapons

Moving firearms and weapons requires special consideration:

  • Firearms: Unload firearms and lock them in a secure, hard-sided case for transport. Be sure to check state and local regulations for transporting firearms.
  • Other Weapons: Pack other weapons safely in secure boxes or cases. Consult local laws about transporting weapons.

Note: The key to preparing restricted items for a move is planning ahead. This ensures the safety of your belongings, the moving crew, and the public. If you have any questions about specific items, don’t hesitate to ask your moving company.

This concludes the section on how to prepare restricted items for a move. Next, we’ll discuss moving insurance and how it relates to high-value items. Stay tuned!

Moving Insurance

Moving Insurance and High-Value Items

It’s essential to understand the role of moving insurance when moving, especially when it involves high-value items. Not only does it provide you peace of mind, but it’s also a crucial step in protecting your valuables. Here’s what you need to know:

Types of Moving Insurance

There are usually three types of moving insurance:

  1. Released Value Protection: This is the basic coverage offered by movers for free. However, it provides minimal coverage—usually around $0.60 per pound per item.
  2. Full Value Protection: This is more comprehensive coverage where the mover is liable for the replacement value of lost or damaged goods in your entire shipment. This comes at an extra cost.
  3. Third-Party Insurance: If you’re not satisfied with the coverage provided by your moving company, you can purchase additional coverage from a third-party insurance company. This coverage will complement the basic insurance provided by your mover.

Declaring High-Value Items

If you’re moving items that are exceptionally valuable, you’ll need to complete a “High-Value Inventory” form. This form is used to list items valued at approximately $100 per pound or more. This might include items like:

  • Jewelry and Watches: Especially those with precious stones and metals.
  • Electronics: High-end cameras, computers, and other electronics.
  • Antiques and Art: Antique furniture or original artwork.
  • Collectibles: Coins, stamps, or other valuable collectibles.

Note: Remember to keep an inventory of your high-value items, including their estimated value and any identifying characteristics. It’s also a good idea to take photos of these items to document their condition before the move.

Determining If You Need Additional Insurance

Before deciding whether to purchase additional insurance, consider the following factors:

  • Value of Your Items: If the total value of your goods is significantly more than what the moving company’s insurance covers, you may need additional insurance.
  • Risk of Damage or Loss: If your items are delicate, antique, or not easily replaceable, extra insurance could be a good idea.
  • Peace of Mind: Additional insurance can give you peace of mind, knowing that even high-value items are covered.

Pro Tip: Check with your home insurance policy. Some policies cover belongings during a move or offer an option to add this type of coverage.

Conclusion

Moving involves numerous details, and knowing how to prepare restricted items for a move is a crucial part of the process. Additionally, understanding the ins and outs of moving insurance ensures your high-value items are well-protected.

Remember, while your moving company can provide valuable guidance, it’s essential to research, ask questions, and make the best decisions for your circumstances. If you have any further questions or are ready to schedule a move, contact us for professional assistance.

blog author

Author: Vlad Kandybovich

Meet Vlad Kandybovich, your friendly moving expert with over 10 years in the game! As the heart and soul behind QShark Moving Company, he has been a part of more than 50,000 moving journeys, helping individuals like you make smooth and stress-free transitions. Vlad is not just about the business; he genuinely cares about making each move a happy memory. So, when you are looking for advice or a tip on your next move, know that Vlads wisdom comes with a big dose of care and friendship. Happy moving!
how to prepare for movers to pack?

How To Prepare For Movers To Pack?

Moving can be a complex and stressful endeavor. But with the right preparation, the process can be smooth and efficient. This comprehensive guide aims to help you prepare for the arrival of professional movers, ensuring that your moving day is as stress-free as possible. So, how to prepare for movers to pack?

We are QShark Moving Company, your go-to moving service for everything from local moving to long distance moving. As one of the top movers, we strive to be the best movers whether you are looking for Movers San Diego, Orange County Movers or Irvine Movers.

Here, we’ll guide you through the critical steps that lead to a successful move, such as:

  • Understanding Moving Services: Learn about our diverse range of services, from residential to office moving, even specialized piano movers and day labor services.
  • Setting the Date: We’ll discuss the importance of scheduling your move in advance and factors to consider when choosing your moving day.
  • Taking Inventory: A step-by-step guide on how to make a comprehensive list of your belongings to facilitate a smoother moving process.
  • Decluttering Your Home: Tips and techniques for reducing clutter and making your move lighter and more efficient.
  • Preparing for Packing Day: How to prepare your home and belongings for the packing services team.

By following this guide, you can ensure that you’re fully prepared for your move and make the job easier for your chosen moving company, whether you’re looking for cheap movers or the best in the business.

“Proper preparation prevents poor performance. Let’s move forward, together!” – QShark Moving Company

In the following sections, we will delve deeper into each of these steps, providing you with a detailed roadmap for your moving day preparation. Let’s get started!

II. Understanding Moving Services

Whether moving just a few blocks away or across the state, understanding the different types of moving services can help you choose the best option for your specific needs.

QShark offers a wide variety of moving services to cater to different situations:

  1. Local Moving: Ideal for short-distance moves within the same city or town.
  2. Long Distance Movers: This service is best for moves to a different city or state.
  3. Office Moving: A specialized service for relocating offices and commercial establishments.
  4. Piano Moving: Designed to transport heavy and delicate musical instruments safely.
  5. Day Labor: If you need help loading, unloading, packing, or unpacking, our day labor service can provide the manpower.

Each service caters to different needs and budgets. Understanding these options can help you make an informed decision that best fits your situation.

“Remember, a successful move starts with choosing the right service.” – QShark Moving Company

III. Setting the Date

Selecting the perfect moving date is a key part of the moving process. Here are some factors you should consider:

  • Season: The time of the year can affect moving conditions and prices. Spring and summer are popular times to move, so prices might be higher, and schedules busier. If possible, consider a fall or winter move for potential cost savings.
  • Work Schedule: If you’re working, choose a date that least interferes with your work commitments.
  • School Year: If you have school-aged children, moving during summer or winter break can minimize disruption to their schooling.

Once you’ve decided on the date, contact your moving company as soon as possible to secure your preferred slot.

“A well-planned move is a successful move. Lock in your date early!” – QShark Moving Company

IV. Taking Inventory

Taking an inventory of your belongings is crucial for a smoother moving process. Here’s how you can do it:

  1. Room by Room: Go through each room in your house and list all items. Don’t forget to check the garage, attic, or basement.
  2. Categorize: Divide your items into furniture, kitchenware, clothes, etc. This will help when it’s time to unpack.
  3. Special Items: Highlight any fragile or valuable items that need special care during the move.

This inventory will help you and the professional movers know exactly what’s being moved and ensure nothing is lost or misplaced.

“An item not listed is an item easily missed. Make sure to take a detailed inventory!” – QShark Moving Company

movers moving a couch up the stairs

V. De-Cluttering Your Home

Before the professional movers arrive, it’s wise to declutter your home. This process helps eliminate unnecessary items, reduce moving costs, and ensure a more organized move. Here’s how to declutter efficiently:

  1. Identify Unwanted Items: Use your inventory list and mark items that you no longer need or use. Consider if it’s worth the cost and effort to move each item.
  2. Sell, Donate, or Recycle: Organize a garage sale or list items online for sale. You can also donate items to local charities or recycle no longer functional items.
  3. Dispose Responsibly: For items that can’t be sold, donated, or recycled, ensure you dispose of them responsibly, following local regulations.

“Less clutter means a lighter move. Make your move a fresh start!” – QShark Moving Company

VI. Essential Items to Pack Yourself

Although our packing services are designed to handle all your packing needs, there are certain items that you might prefer to pack yourself for safety or convenience:

  • Valuables: Items such as jewelry, expensive electronics, and important legal documents are better packed and carried personally.
  • Personal Items: This includes items that you’ll need during the move like medication, toiletries, change of clothes, and snacks.
  • Irreplaceable Items: Family heirlooms or items of sentimental value are often safer in your own care.

Remember to pack these essential items in a separate box or bag and keep it with you throughout the move.

“Your peace of mind is our priority. Pack and keep essential items with you.” – QShark Moving Company

VII. Preparing for Packing Day

When the moving day is approaching, you’ll need to prepare your home for the arrival of the movers. Here’s how you can do it:

  • Clear the Pathways: Ensure all walkways inside and outside your home are clear of any obstacles to allow free and safe movement.
  • Prepare Appliances: If you have large appliances that need to be moved, ensure they’re clean, unplugged, and ready to go. For example, defrost the refrigerator at least a day in advance.
  • Special Care Items: If there are items that need special care or instructions, make sure to communicate this to your movers.

“A prepared home makes for a smooth move. Help us help you!” – QShark Moving Company

In the next section, we’ll cover what to expect and how to manage the day of the move. Let’s continue to ensure a seamless moving experience!


VIII. On the Day of the Move

On moving day, there are a few things you can expect when professional movers arrive at your home:

  1. Walkthrough: The movers will typically do a quick walkthrough of your home to get a sense of the layout and identify any potential challenges. This is also an opportunity to highlight any items needing special care.
  2. Packing: If you’ve opted for packing services, the movers will pack your belongings, taking special care with fragile or valuable items.
  3. Loading: Once everything is packed, the movers will load the boxes into the moving truck, with heavier items going in first for stability.

As the homeowner, your role during this process is to:

  • Be Available for Questions: Movers may need to clarify which items are going and which are staying, or they might need information about the destination address.
  • Keep Essential Items With You: Make sure to keep your essential items box or bag with you throughout the move.
  • Final Check: Once the truck is loaded, do a final walkthrough of your home to ensure nothing has been missed.

“Moving day can be hectic, but being prepared can keep things running smoothly.” – QShark Moving Company

IX. Post-Move Checklist

After the move, there are several steps to take to settle into your new home:

  1. Unpacking: Start unpacking your items, focusing on essential areas like the kitchen and bedrooms first.
  2. Inventory Check: Compare the items in your new home against your inventory list to ensure nothing is missing or damaged.
  3. Provide Feedback: Your movers would appreciate any feedback about the move. You can also raise any concerns or issues with them.

“Your comfort in your new home is our success. Don’t hesitate to reach out post-move.” – QShark Moving Company

professional mover moving a tv stand

XI. Key Points to Remember

In conclusion, here are the key points to remember for a successful move:

  1. Choose the Right Service: Understand the various moving services offered and choose the one that fits your needs, whether it’s local moving, long-distance moving, or office moving.
  2. Schedule in Advance: Book your moving service well in advance to secure your preferred moving date.
  3. Inventory: Make a thorough list of your belongings. This will help ensure nothing gets lost during the move and makes unpacking more organized.
  4. Declutter: Sell, donate, or dispose of items you no longer need. This makes the move easier and could save you money.
  5. Prepare Your Home: Clear pathways and prepare large appliances for moving day. Keep your essential items box close by.

“The key to a smooth move is preparation. Plan well, and your move will go well.” – QShark Moving Company

XII. Conclusion

Moving doesn’t have to be stressful. With the right preparation and a team of professional movers, your moving day can be a breeze. Remember, QShark Moving Company is here to help with all your moving needs, from packing services to day labor.

So, whether you’re searching for cheap movers, best movers, or specialized services like piano movers, remember that we’re just a call away.

“Moving is a big step, but you don’t have to take it alone. We’re here to help you every step of the way.” – QShark Moving Company

Feel free to explore our other resources and get in touch if you have any questions or concerns. Happy moving!
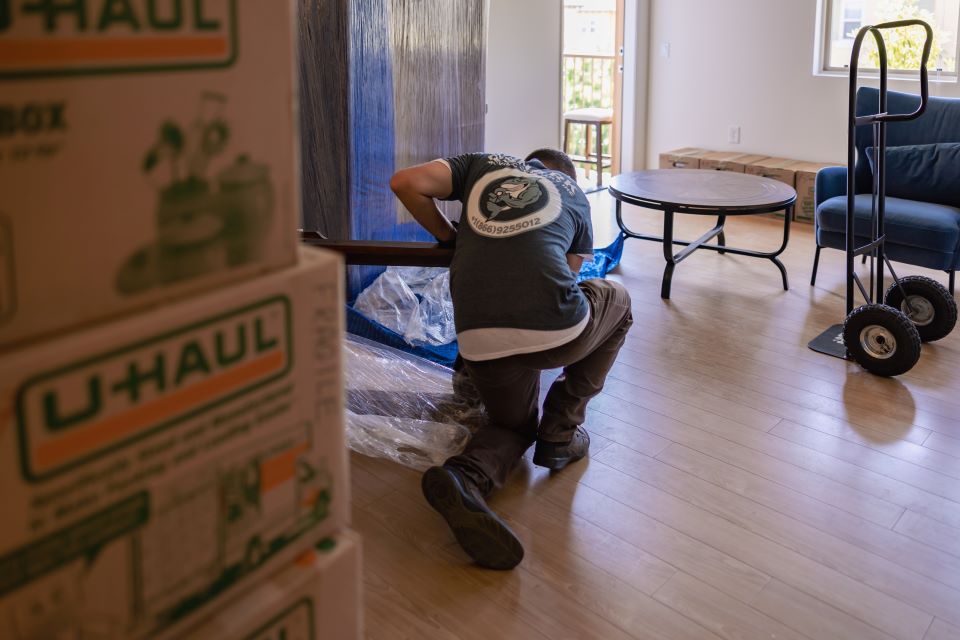
blog author

Author: Vlad Kandybovich

Meet Vlad Kandybovich, your friendly moving expert with over 10 years in the game! As the heart and soul behind QShark Moving Company, he has been a part of more than 50,000 moving journeys, helping individuals like you make smooth and stress-free transitions. Vlad is not just about the business; he genuinely cares about making each move a happy memory. So, when you are looking for advice or a tip on your next move, know that Vlads wisdom comes with a big dose of care and friendship. Happy moving!
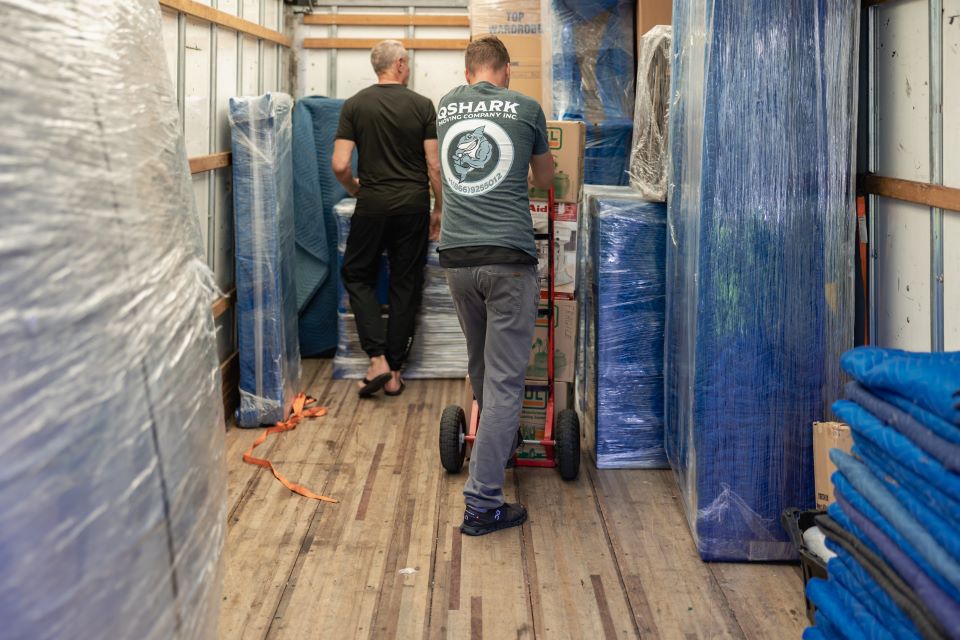
How to preprae for movers?

How To Prepare For Movers?

Welcome to the comprehensive QShark guide: your one-stop resource to aid you in preparation for the big move. Embarking on a move, whether big or small, can be overwhelming, and this guide is designed to make that journey as smooth as possible. Here we will answer how to prepare for movers.

At QShark Moving Company, we believe in empowering our customers with the knowledge and resources to streamline their relocation process. After all, moving is not just about transporting items from one place to another but about transitioning your life to a new space.

Why Prepare for a Move

Understanding and preparing for the moving process can be the difference between a stress-filled day and an exciting new chapter. Below, we provide you with some reasons why preparing for your move is crucial:

  • Efficiency: Good preparation makes the moving process quicker and more efficient. Our professional movers can do their job better when everything is well-organized.
  • Cost-effectiveness: Preparation can save you money. Whether you’re looking for cheap movers, or you’re investing in the best movers, being prepared means the work can be done faster, thus reducing the cost.
  • Safety: Well-prepared items are less likely to get damaged. This is especially important when you’re moving delicate items like pianos with our piano movers.
  • Peace of Mind: Preparation gives you peace of mind. Knowing that everything is in order will help reduce moving day stress.

QShark’s Commitment

As one of the top movers in the industry, QShark is committed to making your moving experience as hassle-free as possible. We offer a comprehensive range of services, from local moving, long distance moving, office moving, to packing services and day labor, designed to cater to all your needs.

Whether you are relocating within Orange County as our cherished Orange County Movers or moving further afield with our Movers San Diego or Irvine Movers, we have you covered.

In the upcoming sections, we will delve deeper into the intricacies of moving and provide a detailed roadmap to ensure you are ready for the arrival of our professional movers. Follow along as we walk you through this exciting journey!

Understanding Moving Services

At QShark, we pride ourselves on offering a broad range of moving services that cater to all your relocation needs. However, to make the most of these services, you need to understand what each entails and which suits your specific requirements.

Types Of Moving Services

  • Local Moving: Our local moving services are the perfect fit for those relocating within a short distance. We know the neighborhoods, the community, and the challenges that may arise.
  • Long Distance Moving: Are you moving to a different city or even a different state? Our long distance movers have the experience and skills to ensure your belongings reach your new home safely, regardless of the distance.
  • Office Moving: Shifting an entire office is a complex task that requires meticulous planning and precision. Our office moving services make this a seamless process, with minimal downtime.
  • Piano Moving: Moving a piano requires special handling to prevent damage. Our experienced piano movers have the tools and training to transport your instrument safely.
  • Packing Services: If you’re dreading the task of packing, our packing services can take this off your hands. We use high-quality packing materials and techniques to ensure your items are well-protected.
  • Day Labor: If you need help loading, unloading, or even packing, our day labor services can provide you with the extra hands you need.

Choosing the right service isn’t merely about convenience; it can also significantly impact the overall cost of your move. Remember, the best movers aren’t necessarily the most expensive ones but those who provide you with the best value for your money.

Benefits of Hiring Professional Movers

Hiring professional movers like QShark offers numerous benefits:

  • Expertise: We have the knowledge, skills, and experience to handle any move efficiently.
  • Safety: We use the right equipment and techniques to move your belongings safely, minimizing the risk of injury or damage.
  • Time-saving: With our help, you can save a lot of time that you would otherwise spend on packing, loading, unloading, and unpacking.
  • Insurance: We provide insurance coverage for your belongings during the move, offering you peace of mind.

Whether you’re seeking the top, best, or most affordable movers, your search ends with QShark.

Choosing the Right Service

Deciding on the right moving service depends on various factors:

  1. Distance: A local move requires a different set of services compared to a long-distance move.
  2. Size of Move: The number of items, their size, and their complexity (e.g., piano, antiques, etc.) will determine the type of service you need.
  3. Budget: While everyone wants top-quality services, choosing a service that fits your budget is crucial.
  4. Time: If you’re pressed for time, full-service movers who can handle everything from packing to unpacking might be the best choice.
  5. Special Requirements: Some items may require special handling, affecting your chosen service.

Remember, a successful move is a well-planned one. The first step is understanding your needs and choosing the right service.

In the next section, we will delve into pre-moving tips, helping you plan ahead to ensure your move is as seamless as possible.

Pre-Moving Tips: Planning Ahead

One of the critical steps to a successful move is planning ahead. The following tips will guide you through preparing for your move, and ensure you are ready when our professional movers arrive.

The Benefits of Starting Early

Starting your preparation early is the key to a smooth moving process. Here’s why:

  • It gives you ample time to sort and pack your items.
  • It allows you to address any issues that may arise during the process.
  • It reduces the stress associated with last-minute rushing.
  • It provides you with the opportunity to utilize QShark’s moving services fully.

Creating a Moving Checklist

A moving checklist is essential to keep track of your moving process. It helps ensure you don’t forget any important tasks. Here are some things you might want to include in your checklist:

  • Inventory creation: List all the items you plan to move.
  • Sorting and decluttering: Decide what to keep, donate, sell, or throw away.
  • Packing: Plan when and how you will pack each room.
  • Notifying important parties: Make a list of all the organizations, utilities, and individuals you need to notify about your move.
  • Finalizing your moving services: Confirm your booking with QShark, ensuring all the details of your moving service are correctly recorded.

Deciding on the Ideal Moving Date

Choosing the right moving date is more crucial than you might think. Here are some factors to consider:

  • Availability: Choose a date when you can take time off work to supervise the move.
  • Cost: Some periods (like weekends or end of the month) may be busier for movers, and therefore more expensive.
  • Weather: In some areas, the weather can significantly impact the move. Try to choose a date with typically good weather conditions.

Notifying Important Parties

Inform all relevant parties about your move. This may include:

  • Utility companies: Notify them in advance to disconnect/reconnect your utilities.
  • Postal services: Update your address to forward your mail.
  • Employers and schools need to update their records and make necessary arrangements.
  • Friends and family: Tell them about your move and new address.

With these pre-moving tips, you’re well on your way to being fully prepared for moving day. Next, we will guide you through sorting and decluttering your home before the move.

Sorting and Decluttering

Sorting and decluttering your home before moving is crucial for many reasons – it reduces the amount of stuff you have to pack, lowers moving costs, and helps you start fresh in your new home. Here are some steps to help you effectively declutter:

The Benefits of Decluttering Before Moving

  • Cost-Effective: The less you move, the less you pay. This is especially relevant if you’re looking for cheap movers.
  • Saves Time: Decluttering means you’ll have fewer items to pack and unpack, saving you time on both ends of your move.
  • Fresh Start: Moving to a new place is an opportunity to get rid of unused or unnecessary items and start fresh.

Tips for Sorting Belongings Effectively

  • One Room at a Time: Tackle one room at a time to avoid being overwhelmed.
  • Categorize Your Items: Make four categories – keep, sell, donate, and discard.
  • Be Ruthless: If you haven’t used something in a year and it doesn’t have sentimental value, consider letting it go.

Disposing of Unwanted Items

Once you’ve sorted out the items you don’t want to move, here are a few things you can do with them:

  • Sell: You can sell valuable items online or have a garage sale.
  • Donate: Give usable items to charity or to someone who can use them.
  • Recycle or Discard: Make sure to dispose of items that can’t be sold or donated in an environmentally friendly manner.

A well-sorted and decluttered home will make packing easier and your moving day more straightforward and efficient. This, in turn, will allow your professional movers to complete the job faster. The next section will look into creating a home inventory, an essential step in moving.

professional movers moving furniture

Creating a Home Inventory

A home inventory is a detailed list of everything you own and plans to move. It’s a valuable tool that keeps you organized during your move, assists in unpacking, and is essential to making an insurance claim.

Why a Home Inventory is Important

  • Organization: A home inventory helps you keep track of your items during the chaotic moving process.
  • Insurance Purposes: In case of damage or loss, an inventory provides a record for insurance claims.
  • Unpacking: An inventory can guide the unpacking process, making sure nothing is misplaced or forgotten.

Steps to Creating a Detailed Home Inventory

  1. List Your Items: Go through each room in your house and list every item. Don’t forget spaces like your garage, basement, or attic.
  2. Take Photos or Videos: Visual documentation can help provide proof of the condition and value of your items.
  3. Record Details: For valuable items, write down serial numbers and any identifying features.
  4. Assign Value: Estimate the value of each item. This might be important for insurance purposes and deciding which items to move.
  5. Keep It Safe: Store your inventory in a safe place, such as a cloud storage service. This ensures you don’t lose your record if the physical copy gets misplaced.

Useful Tools for Creating a Home Inventory

Some various apps and tools can make the process of creating a home inventory simpler. They allow you to easily input information, add photos, and even export or print your inventory.

With your sorted, decluttered home and detailed inventory, you’re ready for the next step: packing. The following section will provide comprehensive advice on packing your belongings for the big move.

Packing Your Belongings

Packing your belongings is probably the most time-consuming part of moving. However, it can be a smooth and efficient process with the right planning and materials.

Essential Packing Materials

Before packing, ensure you have all the necessary packing materials. These include:

  • Boxes: Gather various sizes of sturdy moving boxes.
  • Packing Tape: High-quality packing tape ensures your boxes stay securely closed during the move.
  • Bubble Wrap and Packing Paper: These protect your items during transit.
  • Marker Pens: You’ll need these for labeling your boxes.
  • Furniture Covers: These protect furniture from dust and damage.

If packing sounds overwhelming, remember that QShark offers professional packing services to help you with this task.

Packing Tips

Packing your belongings carefully and logically can help ensure they arrive at your new home undamaged. Here are some tips:

  • Start Early: Begin packing as soon as possible. It always takes longer than you think.
  • Pack Room by Room: This helps you stay organized and makes unpacking easier.
  • Label Boxes: Write the room and a brief description of the contents on each box.
  • Pack Smart: Heavier items go at the bottom of the box. Fill gaps with packing paper or bubble wrap.
  • Special Items: Consider using professional packing services for fragile or high-value items.
  • Essential Box: Pack a box with essentials you’ll need immediately at your new home. This might include toiletries, change of clothes, important documents, and snacks.

The process of packing your belongings can be a good time to consider if you’ve decluttered enough. Remember, the fewer items you have to move, the easier the moving process will be.

The next section will discuss the final steps to take before your moving day. This will ensure that when our Orange County Movers or Movers San Diego, or Irvine Movers arrive, everything will be ready to go.

Final Preparations Before Moving Day

The last few days before your move can be stressful, but following these steps will help ensure that you’re prepared for moving day.

Confirm Your Moving Details

Double-check all the details with your moving service. Ensure they have the correct date, time, and address. Confirm any last-minute details, such as parking arrangements for the moving truck.

Prepare Your Appliances

If you’re moving appliances, make sure they’re ready to go:

  • Refrigerator: Defrost and clean it at least 24 hours before moving day.
  • Washing Machine and Dryer: Disconnect, clean, and dry these appliances to prevent mold and mildew.
  • Stove and Oven: Clean them and, if necessary, disconnect them.

Pack Your Personal Items

Pack a bag of personal items that you’ll keep with you during the move. This could include important documents, medications, toiletries, clothes, and anything else you’ll need immediate access to.

Prepare Your Home for the Movers

To make the move easier and more efficient, do the following:

  • Clear a Path: Make sure the movers have clear access in and out of your home.
  • Protect Your Home: Cover floors and corners to prevent damage.
  • Label Rooms: If you’ve labeled your boxes by room, labeling the rooms in your new home can help the movers know where to place boxes.

Saying Goodbye

Before you leave, it’s a good idea to do a final sweep of your home:

  • Check Every Room: Open all cabinets, check all outlets, and look behind doors.
  • Clean: Leave the home clean for the next occupants.
  • Lock Up: Ensure all doors and windows are locked.
  • Utilities: Double-check that all utilities have been shut off or transferred to the new owner.

You’re now ready for the big day! When our professional movers arrive, whether they’re our top-rated Irvine Movers, Movers San Diego, or Orange County Movers, you can rest easy knowing you’re fully prepared. In the final section of this guide, we will cover what to expect on moving day and how to ensure it goes as smoothly as possible.

Moving Truck and movers

Moving Day: What to Expect

Moving day has arrived! It’s the culmination of all your planning and preparation. Here’s what to expect and how to make the day go as smoothly as possible.

Meeting the Movers

When the professional movers from QShark arrive, they’ll do a walk-through of your home to get a sense of the task ahead. This is an excellent opportunity to point out any items that need special handling or are not to be moved.

Loading the Moving Truck

Our experienced movers will begin loading the truck, taking care to protect your items and home from damage. You might be surprised at the speed and efficiency of our professional movers!

Last-minute Packing

If you have any items that you didn’t manage to pack, our packing services can take care of that for you.

The Walk-through

Once the truck is loaded, do a final walk-through of your home to make sure nothing has been forgotten.

Transporting Your Belongings

Our professional movers will then transport your belongings to your new home. Whether you’re moving locally with our local moving services or moving long distance with our long distance movers, you can be sure your items are in good hands.

Unloading at Your New Home

At your new home, our movers will unload your belongings with the same care and efficiency they showed when loading the truck. They’ll place your items in the rooms you specify, making unpacking easier.

Checking Your Inventory

Finally, check your inventory to ensure all items have arrived and are in good condition. If there are any issues, contact QShark as soon as possible.

Moving day can be a whirlwind of activity, but it doesn’t have to be stressful with a team of professional movers on your side. By following this guide, you’ll be prepared and ready to make your move successful. Welcome to your new home!

Remember, whether you need office moving, piano movers, day labor, or just the best movers for your home, QShark Moving Company is here to help. Contact us today for all your moving needs.

blog author

Author: Vlad Kandybovich

Meet Vlad Kandybovich, your friendly moving expert with over 10 years in the game! As the heart and soul behind QShark Moving Company, he has been a part of more than 50,000 moving journeys, helping individuals like you make smooth and stress-free transitions. Vlad is not just about the business; he genuinely cares about making each move a happy memory. So, when you are looking for advice or a tip on your next move, know that Vlads wisdom comes with a big dose of care and friendship. Happy moving!
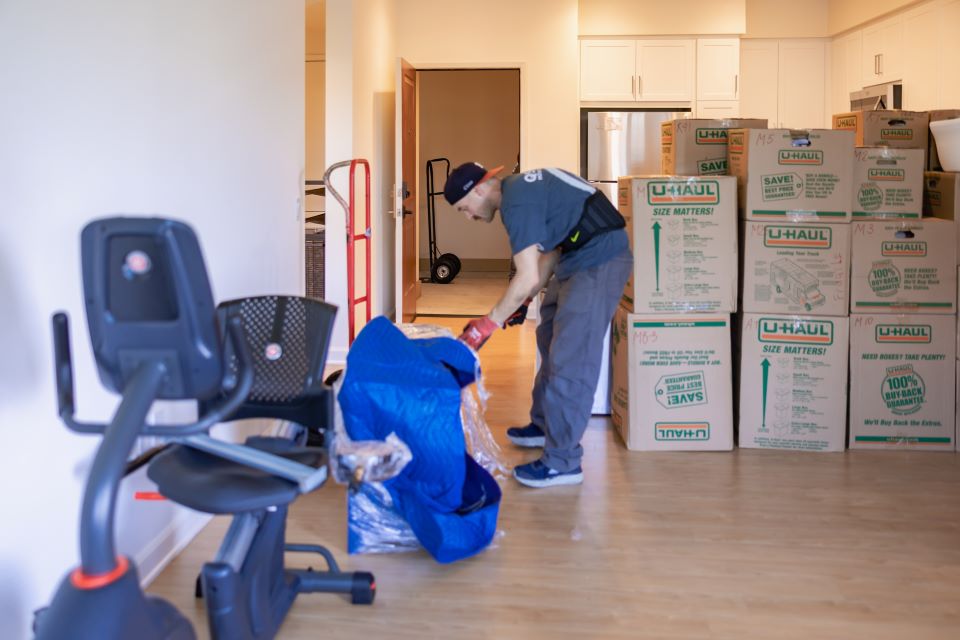
How to pack for movers? answer from professional moving company

How To Pack For Movers?

Welcome to QShark Moving Company’s all-encompassing guide on how to pack for a move! Whether you are making use of our top-tier moving service, considering our professional packing services, or simply seeking some expert guidance, you are in the right place. In this guide, we aim to address every detail related to packing for a move, providing you with the information you need to ensure a smooth transition to your new home. Now we will learn how to pack for movers.

With QShark Moving Company, you have found your best movers in Southern California. Our services range from local moving to long distance moves, and include specialized services like office moving and piano moving. Regardless of the nature of your move, our ultimate goal is to alleviate your stress and make the moving process as seamless as possible.

“At QShark Moving Company, we believe that a successful move begins with careful and strategic packing.”

In this guide, we will walk you through the following:

  • Initial Preparation for Packing
  • Understanding Different Types of Items
  • A Detailed, Step-by-step Packing Guide
  • Effective Labeling and Organization of Boxes
  • Special Considerations for Packing
  • Preparation for Moving Day
  • An Overview of QShark Moving Company’s Packing Services
  • FAQs, Resources, and References

Whether you’re one of our cherished Orange County Movers, or looking for reliable Movers in San Diego or Irvine Movers, this guide aims to be a valuable resource.

Moreover, QShark Moving Company is not just a moving company; we strive to be your trusted partner in the moving process. If you need extra assistance, remember that we also offer day labor to help with packing and other tasks.

Pack your worries away as you embark on your journey with QShark, your professional movers. With our dedicated team, you’ll experience moving at its best, even if you are on a budget and looking for cheap movers. Let’s get started with our comprehensive packing guide!

Initial Preparation for Packing

The key to a successful move is thorough planning and preparation. It’s best to begin your moving process by planning everything in advance. Here are the steps you can take:

1. Creating a Moving Checklist

  • Outline all the tasks that need to be completed prior to your move.
  • Set a timeline for when each task should be finished.
  • Keep the list flexible and open for changes as required.
  • Regularly update your list as tasks are completed.

2. Tools and Materials for Packing

Before you start packing, gather all the necessary packing supplies. Here’s a list of items you might need:

  • Cardboard boxes in various sizes.
  • Heavy-duty boxes for heavier items.
  • Packing tape.
  • Bubble wrap for fragile items.
  • Old newspapers or packing paper.
  • Stretch wrap for furniture.
  • Markers for labeling boxes.
  • Scissors or box cutters.

3. Taking Inventory

Take stock of everything you own. This helps in many ways:

  • Determines the number and size of boxes you’ll need.
  • It helps identify items that need special care or packing techniques.
  • Assists in unpacking and arranging items in your new home.
  • Useful for insurance purposes.

4. Deciding What to Keep, Donate, Sell, or Dispose Of

Moving is an excellent opportunity to declutter. Evaluate every item and decide if it’s worth the space and effort to pack and move. Consider the following for each item:

  • Keep: Things that are of value, often used, or have sentimental value.
  • Donate: Items in good condition that are not often used. Consider giving these to friends, family, or charity.
  • Sell: Items that are valuable but not needed can be sold online or in a yard sale.
  • Dispose of: Items that are neither usable nor sellable.

Remember, the less you have to pack, the easier your move will be. With these initial preparation steps, you are ready to start packing. The following sections will guide you through the process. Let’s get packing with your top movers at QShark Moving Company!

Understanding Different Types of Items

When packing for a move, understanding the different types of items in your household and how they should be packed can help prevent damage and make the unpacking process easier. Let’s categorize the typical household goods and discuss the ideal packing approach for each:

  1. Fragile Items: These include items like glassware, china, decorative pieces, picture frames, and electronics. They require special handling and should be packed with care using sufficient protective materials like bubble wrap, foam peanuts, or packing paper.
  2. Large Furniture: Furniture can be bulky, heavy, and difficult to move. It might be necessary to disassemble some pieces for easier transport. Items such as beds, tables, bookshelves, and couches fall into this category.
  3. Clothing: Clothes are typically easy to pack, but certain items like suits, dresses, or coats might need extra care to prevent wrinkles or damage.
  4. Books and Documents: While these might not be fragile, books can become quite heavy when packed together. They require sturdy boxes and careful handling.
  5. Outdoor and Garage Items: These can include a variety of items like tools, gardening equipment, outdoor furniture, and potentially hazardous materials such as fertilizers or paint.

By recognizing these categories, you can apply the best packing practices for each type, ensuring your belongings safely reach your new home. Continue reading for our detailed, step-by-step packing guide to learn the best ways to pack each type of item with your best movers at QShark Moving Company!

Movers carrying iitems down the stairs

Step-by-step Packing Guide

Now that we’ve classified our items, let’s dive into the step-by-step process of packing them.

Packing Fragile Items

Protecting your delicate items is of utmost importance during a move. Follow these steps to ensure they arrive safely at your destination.

Materials Needed

  • Bubble wrap
  • Packing paper
  • Packing tape
  • Sturdy boxes
  • Marker for labeling

Packing Process

  1. Start by lining your box: Before you put anything in your box, line the bottom with a layer of bubble wrap or crumpled packing paper for added cushioning.
  2. Wrap each item individually: Using bubble wrap or packing paper, wrap each fragile item individually. Secure the wrap with packing tape.
  3. Place items in the box: Start by placing the heaviest items at the bottom of the box. Build layers with lighter items on top.
  4. Fill empty spaces: Fill any gaps in the box with crumpled packing paper or additional bubble wrap to prevent items from shifting during the move.
  5. Close and secure the box: Close it well with packing tape once it is packed. Shake the box gently to ensure nothing moves.
  6. Label the box: Use a marker to label the box with its contents and the room it belongs to. Don’t forget to write “FRAGILE” on all sides.

Packing Large Furniture

Moving large furniture can be a challenge, but with the right approach, you can ensure it’s done smoothly and safely.

Materials Needed

  • Furniture covers or moving blankets
  • Plastic stretch wrap
  • Packing tape
  • Tools for disassembling furniture, if needed

Packing Process

  1. Clean and empty the furniture: Ensure all furniture is clean and free of personal items. Remove cushions, drawers, and shelves if possible.
  2. Disassemble, if possible: If a piece of furniture can be taken apart, do so. This can make it easier to transport and prevent damage. Remember to keep all screws, bolts, and other hardware in a labeled bag.
  3. Wrap the furniture: Use furniture covers or moving blankets to wrap the pieces. Secure with plastic stretch wrap or packing tape.
  4. Secure any moving parts: If a furniture item has any moving parts, make sure they are secured with packing tape.

Remember, if you need help with heavy furniture, our day labor service can provide assistance. Continue reading our step-by-step packing guide to learn how to handle clothing, books, documents, and outdoor items for your move with QShark, your professional movers.

Packing Clothes

Clothing can be packed in several ways depending on the type of garment and your preferences.

Materials Needed

  • Cardboard boxes or suitcases
  • Wardrobe boxes for hanging clothes
  • Vacuum bags for bulky items

Packing Process

  1. Sort and declutter: Separate your clothes into categories (e.g., shirts, pants, undergarments). This is a great opportunity to declutter, donate, or sell items you no longer want or need.
  2. Use wardrobe boxes for hanging clothes: These special boxes allow you to move clothes on hangers directly from your closet to the box, reducing wrinkles and the time spent packing and unpacking.
  3. Roll clothes to save space: Use the rolling method instead of folding for clothes that are not hung up. This technique saves space and can reduce wrinkles.
  4. Use suitcases: Make use of suitcases you already have. They are ideal for packing clothes and are easy to move.
  5. Use vacuum bags for bulky items: Bulky items like coats and sweaters take up a lot of space. Vacuum bags can compress these items, making them easier to pack and transport.

Packing Books and Documents

Books and documents can be heavy and may require special care to prevent damage during the move.

Materials Needed

  • Small, sturdy boxes
  • Packing paper

Packing Process

  1. Sort and declutter: Before packing, go through your collection and decide which books and documents you really need to keep.
  2. Use small boxes: Books are heavy, so use small boxes to make them easier to lift and prevent the box’s bottom from breaking.
  3. Pack books flat or spine down: Pack your books flat or spine down to prevent damage to the spines.
  4. Fill gaps with packing paper: Any extra space in the box should be filled with packing paper to prevent books from moving and getting damaged.

Packing Outdoor and Garage Items

Outdoor and garage items can be tricky to pack due to their size, shape, and potential hazards.

Materials Needed

  • Boxes and packing tape
  • Bubble wrap for delicate items
  • Trash bags for lightweight items

Packing Process

  1. Drain fuel from equipment: If you’re packing machinery like lawnmowers or chainsaws, drain the fuel before you move.
  2. Use original packaging when possible: If you still have the original packaging for tools or other garage items, use it. The original packaging is often the safest way to transport these items.
  3. Secure sharp objects: For tools with sharp edges or points, make sure these are well secured to prevent injuries.
  4. Label hazardous materials: If you’re moving items like paint, fertilizer, or other potentially hazardous materials, make sure they’re clearly labeled.

With all items safely packed, we can organize, label, and prepare for moving day with your top movers at QShark Moving Company!

Effective Labeling and Organization of Boxes

Labeling and organizing your boxes efficiently will make the unpacking process a breeze. Here’s how to do it:

Materials Needed

  • Different colored markers
  • Label stickers or plain paper and tape
  • A notebook or moving inventory sheet

Labeling Process

  1. Label each box: Write a general description of the contents and the room it belongs to on the top and side of each box. Make sure the label is visible even when boxes are stacked.
  2. Use color-coding: Assign each room a different color and use markers of that color for labeling. This system can speed up the unloading process as it is clear where each box should go at a glance.
  3. Number your boxes: Number each box and keep a detailed inventory. This will help you ensure no box gets lost in the move and will also be useful when deciding which box to unpack first.
  4. Indicate handling instructions: Use labels or clear written instructions for boxes containing fragile items, liquids, or heavy items. Indications like ‘Fragile’, ‘This side up’, or ‘Heavy’ can be very helpful.

Organization Process

  1. Keep a detailed inventory: Document the contents of each box in a notebook or on an inventory sheet. This will not only help ensure nothing gets lost, but it can be a lifesaver when you’re unpacking and can’t remember where a particular item is.
  2. Pack rooms separately: If possible, pack and stack boxes by room. This way, when you arrive at your new home, you can easily place the boxes in their respective rooms, making the unpacking process much easier.
  3. Consider essential items: Pack an ‘open first’ box with essential items that you will need immediately upon arrival at your new home, such as toiletries, a change of clothes, snacks, etc.

With your items packed and organized, you’re almost ready for moving day. Just a few more steps and tips to ensure everything goes smoothly with QShark, your best movers!

Preparing for Moving Day

The day before your move, there are a few last-minute preparations to take care of. These steps will ensure moving day goes as smoothly as possible.

Materials Needed

  • Personal items and important documents
  • Contact information for your moving company

Preparation Steps

  1. Confirm arrangements with your moving company: Double-check the time, date, and location with your moving company. Make sure you have the contact information for the moving day representative.
  2. Prepare essential items: Pack a bag of personal items you will need during the move, such as medications, chargers, snacks, and water. Don’t forget important documents, like your ID, moving documents, and lease or home purchase documents.
  3. Do a final walk-through: Check each room one last time to make sure nothing has been left behind. Look in all cupboards, closets, and behind doors.
  4. Clean and secure your home: Clean your house or apartment, take out the trash, and make sure all windows and doors are locked.
movers packing furniture before moving

Moving Day Tips

Moving day can be stressful, but we can help it go smoothly with some additional tips.

  1. Be available to guide the movers: Whether you’ve hired professional movers or are getting help from friends, it’s important to be available to direct them. Clearly communicate where each box should go in your new home.
  2. Protect your home: Cover floors to avoid scratches and dirt, and remove door and window screens if needed to protect them and create more space for moving large items.
  3. Check the inventory list: As the truck is being loaded, check off the boxes and items from your inventory list.
  4. Have payment ready: If you’ve hired movers, make sure you understand the payment terms and have payment ready.
  5. Take care of your movers: Whether they’re friends or professionals, make sure everyone is hydrated and fed. A happy moving crew makes for a smoother move!

And there you have it – your comprehensive, step-by-step guide to packing for a move. Now you’re ready to get moving with QShark Moving Company, your top choice among Orange County movers!

Remember, we’re here to help make your move as easy as possible. Whether you need local moving or long-distance movers, office moving or piano movers, or just some extra help with packing services, QShark Moving Company has you covered. Safe travels!

Conclusion

Congratulations! If you’ve followed this comprehensive guide, you’re now well-prepared for your upcoming move. Packing is an integral part of the moving process, and with careful planning and organization, it can be a smooth, manageable task.

Remember, moving is more than just transporting items from one location to another. It’s about relocating your life, with all its precious memories and cherished possessions. That’s why at QShark Moving Company, we’re committed to providing a moving service that’s not just about physical logistics but also about understanding and respecting the value each item holds for you.

Whether you’re looking for Irvine Movers or Movers in San Diego, remember that our goal is to provide the best moving experience for you.

Best of luck with your move, and remember, QShark is here to make your moving process hassle-free and efficient. Contact us today to learn more about how we can help you embark on this new journey!

blog author

Author: Vlad Kandybovich

Meet Vlad Kandybovich, your friendly moving expert with over 10 years in the game! As the heart and soul behind QShark Moving Company, he has been a part of more than 50,000 moving journeys, helping individuals like you make smooth and stress-free transitions. Vlad is not just about the business; he genuinely cares about making each move a happy memory. So, when you are looking for advice or a tip on your next move, know that Vlads wisdom comes with a big dose of care and friendship. Happy moving!
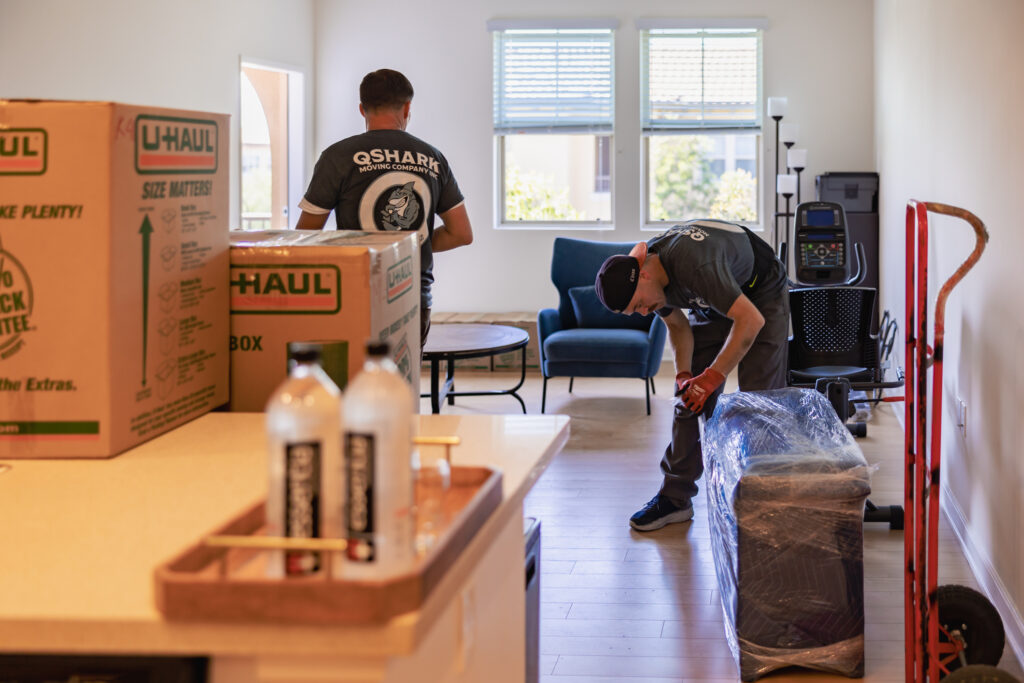
How Long Do Movers Take to Load a Truck?

How Long Do Movers Take to Load a Truck?

One common query we often receive is, “How long do movers take to load a moving truck?” This guide aims to shed light on this question, providing an in-depth look into the factors affecting the loading process and what you can expect when utilizing our services. At QShark Moving Company, we understand that moving can be a stressful time filled with many questions.

As professional movers, we provide a range of services, including:

All these services are designed to ensure a seamless transition from one location to another.

The time it takes to load a truck during a move can vary greatly depending on several factors. From the size of your home to the quantity and type of items you have and even the level of preparation before the move, each aspect plays a crucial role in the overall timeline.

In this guide, we’ll take you through every step of the process. We want to give you a clear understanding of what happens during the loading phase of your move, how long you can expect it to take, and how you can help to make the process smoother and faster.

Stick with us as we explore:

  1. Factors influencing the time to load a truck
  2. The moving process, step by step
  3. Estimated loading times
  4. Tips for speeding up the loading process

“A journey of a thousand miles begins with a single step.” – Lao Tzu

As top movers in the industry, QShark is committed to making your move as efficient and stress-free as possible. Let’s dive into the factors that influence how long it takes to load a moving truck.

Factors Influencing the Time to Load a Truck

When planning a move, it’s essential to understand what can influence the amount of time it takes to load the truck. At QShark, we are best movers who consider all these factors to provide the most accurate estimate and ensure a seamless moving experience. Let’s look at some key factors:

1. Size of the Home or Apartment

The size of your home or apartment is one of the most critical factors in determining how long it will take to load your belongings into the moving truck.

  • Studio or One-Bedroom Apartment: Smaller apartments typically have fewer items and can be loaded more quickly.
  • Two-Bedroom Home or Apartment: These homes often have more furniture and personal items, increasing the time it takes to load the truck.
  • Three-Bedroom Home or Larger: Larger homes usually have more belongings and take the longest to load.

2. Quantity and Types of Items

The quantity and types of items you have can also greatly affect the loading time.

  • Furniture: Larger items such as beds, sofas, and wardrobes require more time and care to load safely.
  • Appliances: Appliances like refrigerators, washers, and dryers are heavy and may need special handling.
  • Personal Items: The number of boxes and personal items also adds to the loading time.

3. Accessibility

How easy it is for movers to access your home can impact how quickly they can load the truck.

  • Stairs: Homes with stairs may take longer to load, especially with heavy or bulky items.
  • Elevator Access: In apartment buildings, waiting for elevators can add to the overall loading time.
  • Distance to the Truck: If the truck can’t be parked close to your home, it can increase the time it takes to carry items to it.

4. Packing

Whether your items are packed and ready to go can greatly influence the time to load.

  • Pre-Packed Items: The movers can start loading the truck immediately if all your items are packed and ready to go.
  • Packing on Moving Day: It can delay the loading process if you’re still packing on a moving day. QShark offers packing services to help ensure a more efficient move.

Understanding these factors can give you a better idea of what to expect on moving day and how to prepare. Next, we’ll walk through the moving process step-by-step to clarify what happens during each phase.

“Preparation is the key to success.” – Alexander Graham Bell

The Moving Process: Step by Step

At QShark Moving Company, we pride ourselves on making the moving process as smooth and efficient as possible. Here’s a step-by-step guide on what to expect during the loading phase of your move.

1. Initial Walk-Through and Inventory

Before the loading begins, our professional movers conduct an initial walk-through of your home. This step allows us to:

  • Understand the layout of your home
  • Identify any items that require special handling
  • Plan the most efficient way to load your items into the truck

The walk-through usually takes 15-30 minutes, depending on the size of your home and the number of items to move.

2. Preparation of Larger Items

Once we’ve completed the walk-through and have a plan, we will start preparing your larger items for loading. This can include:

  • Disassembling furniture: Beds, tables, and other large furniture items may need to be disassembled for easier and safer transport.
  • Wrapping appliances: We wrap appliances in protective materials to prevent damage during the move.
  • Protecting fragile items: Items like artwork, mirrors, and electronics are carefully wrapped and packed to ensure they remain safe throughout the move.

The time taken for this step can vary greatly based on the number and types of items you have. Generally, it can take anywhere from 30 minutes to a few hours.

3. Loading Process

With the preparation complete, we start loading your items into the truck. We do this strategically to maximize space and ensure the safe transport of your belongings.

  • Heavy items and appliances are usually loaded first, and placed toward the back of the truck.
  • Furniture and larger items are loaded next, followed by boxes and smaller items.
  • Fragile items are placed strategically to prevent any damage.

Depending on the factors discussed in the previous section, the loading process can take anywhere from 2 to 6 hours or more.

4. Verification and Final Check

Once everything is loaded, we do a final walk-through of your home to ensure no items are left behind. We also cross-check with the inventory list. This step usually takes about 15-30 minutes.

Moving is more than just loading a truck; it’s a comprehensive process that we at QShark aim to make as smooth and stress-free as possible. Understanding this process and the time involved can help you better plan your move.

“Success usually comes to those who are too busy to be looking for it.” – Henry David Thoreau

Movers San Diego

Estimated Loading Times

At QShark Moving Company, we strive to provide accurate estimates for our moving services. However, each move is unique, so the time it takes to load a truck can vary. Here are some general estimates based on the size of your home:

1. Studio or One-Bedroom Apartment

The average loading time for a studio or one-bedroom apartment can range from 2 to 4 hours. This estimate assumes:

  • A moderate amount of furniture
  • Appliances such as a refrigerator and washer/dryer
  • Approximately 20-30 boxes

2. Two-Bedroom Home or Apartment

A two-bedroom home or apartment may take between 3 to 6 hours to load. This estimate considers:

  • More furniture, including additional beds, dressers, and possibly a dining set
  • Standard appliances, plus potentially more items like a dishwasher or second TV
  • Approximately 30-50 boxes

3. Three-Bedroom Home or Larger

Loading can take 5 to 8 hours or more for homes with three or more bedrooms. This estimate is based on:

  • Multiple pieces of furniture in each room
  • Multiple appliances and potentially specialty items such as a piano
  • 50+ boxes

These estimates are broad averages, and the actual time may vary based on factors like the volume of items, preparation, and accessibility.

“It does not matter how slowly you go as long as you do not stop.” – Confucius

In the next section, we’ll provide some useful tips on how you can speed up the loading process, helping make your move with QShark even more efficient.

Tips for Speeding Up the Loading Process

An efficient move is a successful move. At QShark Moving Company, we are not just professional movers; we’re partners in your move. To help make your move as efficient as possible, here are some tips:

1. Importance of Organization

The organization is key to a smooth moving process. Here’s how you can stay organized:

  • Categorize your items: Keep similar items together. For example, pack kitchen items in one box and bedroom items in another.
  • Label your boxes: Clearly labeling each box with its contents and the room it belongs to can save a lot of time during loading and unloading.

2. Pre-Move Preparation

The more you prepare before moving day, the faster the loading process can be. Consider:

  • Packing in advance: Aim to have all your items packed by moving day. This way, the movers can start loading right away.
  • Disassembling furniture: If possible, disassemble large furniture items in advance. This can save a lot of time on a moving day.

3. Clear Pathways

Ensuring clear pathways can make it easier and faster for movers to carry your items to the truck.

  • Remove obstacles: Make sure hallways and entrances are clear of any obstacles.
  • Arrange for parking: Arrange for the moving truck to park as close to your home.

Following these tips can help make the moving process faster and more efficient. Remember, at QShark, we are top movers committed to providing you with the best moving experience possible.

“Efficiency is doing things right; effectiveness is doing the right things.” – Peter Drucker

Next, we’ll talk about how QShark Moving Company’s commitment to efficiency sets us apart from other movers.

Why Choose QShark as Your Moving Partner

At QShark Moving Company, we stand out from the crowd thanks to our commitment to efficiency, professionalism, and customer satisfaction. We ensure every move is handled with the utmost care and precision. Here’s why we are the best movers for your needs:

1. Wide Range of Services

We offer a comprehensive range of moving services, from local moving to long distance moving, and office moving to piano moving. We also offer packing services and day labor. No matter your moving needs, QShark has you covered.

2. Professional and Experienced Team

Our team of professional movers has handled your move efficiently and safely. We take great pride in our work and are committed to providing our clients the highest level of service.

  • Extensive training: Our movers undergo rigorous training to ensure they are knowledgeable in the latest moving techniques and safety procedures.
  • Friendly and attentive: Our team is always friendly, responsive, and attentive to your needs, ensuring a positive moving experience.

3. Customized Moving Plans

We understand that every move is unique. At QShark, we create customized moving plans tailored to your needs, ensuring a seamless and stress-free move.

  • Personalized approach: We take the time to understand your individual requirements and develop a plan that works best for you.
  • Flexible scheduling: We work around your schedule to ensure your move takes place at the most convenient time.

4. High-Quality Equipment and Materials

We use only the highest-quality equipment and materials to ensure your belongings’ safe and efficient transport.

  • Well-maintained trucks: Our moving trucks are regularly serviced and maintained to provide a reliable and efficient moving experience.
  • Protective materials: We use top-quality packing materials, including padded blankets and shrink wrap, to protect your items during the move.

5. Commitment to Customer Satisfaction

At QShark, your satisfaction is our priority. We go above and beyond to ensure your move is smooth and stress-free.

  • Transparent pricing: We provide upfront, transparent pricing with no hidden fees or surprises.
  • Prompt communication: Our team is always available to answer your questions and address any concerns you may have.

Choosing QShark Moving Company as your moving partner means you can rest assured knowing your move is in the hands of experienced, dedicated professionals. Let us help you make your next move a success!

“The secret of success is to do the common things uncommonly well.” – John D. Rockefeller

Moving Company near you, professional movers

Conclusion

Understanding how long it takes to load a moving truck can greatly assist in planning and preparing for your move. Several factors, including the size of your home, the number of items you have, accessibility, and how well-packed your belongings are, all play a part in determining the duration of the loading process.

At QShark Moving Company, we offer a comprehensive range of moving services tailored to your needs. Our team of professional movers is committed to delivering exceptional service, making your move as seamless and efficient as possible.

Remember, the key to a successful move is preparation and organization. Following our tips and understanding the moving process can help ensure a smoother, stress-free moving day. With QShark as your moving partner, you can have peace of mind knowing that your move is in the hands of experienced, dedicated professionals.

“The best way to predict the future is to create it.” – Peter Drucker

If you have any more questions about your upcoming move or want to learn more about our services, don’t hesitate to contact us. We’re here to help!

References

In writing this guide, we drew on our extensive experience in the moving industry. For further reading, you may want to check out the following resources:

Happy moving from the QShark team!

“Success is not the key to happiness. Happiness is the key to success. If you love what you are doing, you will be successful.” – Albert Schweitzer

Frequently Asked Questions (FAQs)

To wrap up this comprehensive guide, let’s address some common questions that clients often have about the moving process:

1. Can I help the movers to speed up the process?

While your intention to help is appreciated for safety and efficiency, we recommend allowing our professional movers to handle the heavy lifting. However, there are things you can do to expedite the process:

  • Pack your items in advance
  • Label your boxes clearly
  • Clear pathways for easy access

2. What if I need to move last minute?

At QShark Moving Company, we understand that sometimes, you may need to move unexpectedly. We offer flexible scheduling and will do our best to accommodate your last-minute moving needs.

3. Are there any items that movers will not move?

There are certain items that movers generally will not move due to safety or legal reasons. These include hazardous materials, perishable food, plants, pets, and personal items like keys, wallets, or personal documents. If you’re unsure about a specific item, it’s always best to ask.

4. Do you offer packing services?

Yes, we do! We offer packing services to make your move even more hassle-free. Our team is trained in the best packing practices to ensure your items are safe and secure.

5. Do you handle specialty items like pianos?

Absolutely. We are experienced piano movers and can safely move your piano or other large, delicate items.

If you have any other questions, feel free to contact us. We’re here to make your move as smooth and stress-free as possible!

“Success is not in what you have, but who you are.” – Bo Bennett

That concludes our comprehensive guide on the moving process. Thank you for choosing QShark Moving Company as your moving partner! We look forward to making your next move a success.

blog author

Author: Vlad Kandybovich

Meet Vlad Kandybovich, your friendly moving expert with over 10 years in the game! As the heart and soul behind QShark Moving Company, he has been a part of more than 50,000 moving journeys, helping individuals like you make smooth and stress-free transitions. Vlad is not just about the business; he genuinely cares about making each move a happy memory. So, when you are looking for advice or a tip on your next move, know that Vlads wisdom comes with a big dose of care and friendship. Happy moving!
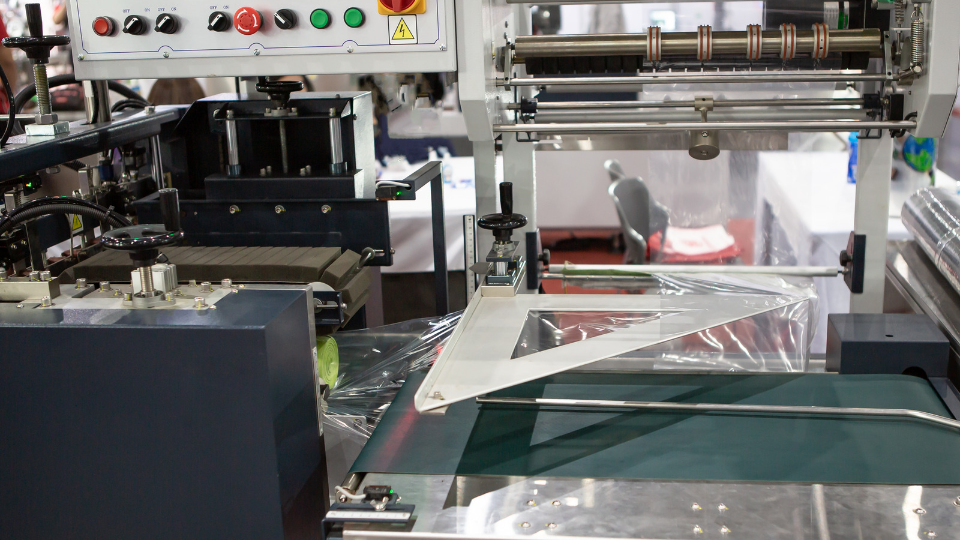
How Far in Advance to Hire Movers?

How Far in Advance to Hire Movers?

One of the most important questions when planning a move is “How far in advance should I hire movers?” This decision can significantly impact the smoothness and efficiency of your relocation process. This comprehensive guide aims to answer this crucial question and provide insights into various facets of moving. From identifying your unique moving needs and calculating your timeline to exploring different moving services and understanding what they include, we will guide you through every step. Additionally, we’ll touch on critical aspects like estimating costs, researching movers, reading reviews, and finalizing a comprehensive contract. Let’s embark on this journey to ensure your moving process is seamless and stress-free.

Identifying Your Moving Needs

Before you begin your moving journey, it’s crucial to identify your specific moving needs. Are you making a short, local move or a more complex, long-distance one? Do you have specialty items like a piano that require Piano movers? Understanding your unique requirements will help you make an informed decision when hiring professional movers.

Consider:

  • The distance of the move
  • The size and quantity of items to be moved
  • Any specialty items or delicate belongings
  • Your budget constraints
  • Your preferred moving timeline

By identifying these aspects, you can better understand the type of moving service you need.

Calculating the Timeline for Moving

Next, it’s time to calculate your moving timeline. Planning is the key to a successful move, and understanding your timeline will help you secure the best movers for your situation.

Typically, hiring movers at least two months in advance for long-distance moves and at least one month in advance for local moves is recommended. However, booking even earlier during peak moving seasons like summer is advisable.

Remember:

  • Provide ample time to compare multiple moving companies and services.
  • Ensure your chosen moving date is available.
  • Allow time for unexpected changes or delays.

Exploring Different Moving Services

Not all moving services are created equal. From local moving to office moving and long-distance movers, there’s a service to suit every moving need. Explore these services and understand the specifics of each to ensure you’re getting the best fit for your requirements.

Key services include:

  • Local moving: Ideal for short-distance moves within the same city or region.
  • Office moving: Specialized in relocating businesses and office equipment safely and efficiently.
  • Long-distance moving: Perfect for moves across the state or country, providing extra care for the long haul.

Understanding What is Included in Moving Services

When hiring a moving service, it’s important to understand what’s included. Some companies offer comprehensive services, including packing, loading, unloading, and unpacking at your new location. Others may provide a more basic service, leaving some tasks to you.

Typically, a moving service will include:

  • Loading and unloading of your belongings
  • Transporting your items to your new location
  • Basic liability coverage for your items during transport

Additional services, like packing services, or day labor may come at an extra cost, so it’s essential to clarify these details upfront.

Estimating the Cost of Hiring Movers

Determining the cost of hiring top movers is a critical step in your moving journey. Several factors influence this cost, including the distance of the move, the size and weight of your belongings, the services you choose, and even the time of year.

To get an estimate:

  • Request quotes from multiple moving companies.
  • Discuss your specific moving needs and any additional services you require.
  • Clarify any potential extra costs, such as for heavy items or difficult access.

Remember, the cheapest quote isn’t always the best. Quality, reliability, and professionalism are also important considerations.

Should you hire movers?

Researching Local and Long-Distance Movers

With so many moving companies available, it’s crucial to research to find the right one for your needs. Look for professional movers who have experience in the type of move you’re planning, whether it’s local or long-distance.

Research should include:

  • Checking company credentials and licensing.
  • Comparing services and prices.
  • Reading reviews and testimonials from past customers.

Sorting Through Reviews and Ratings

Reviews and ratings are invaluable resources when choosing a moving company. They provide insight into the experiences of past customers, allowing you to gauge the quality of service, professionalism, and value for money. Look for consistent positive feedback across multiple reviews to ensure a reliable picture.

Consider:

  • Overall satisfaction ratings.
  • Comments on punctuality, care of belongings, and professionalism.
  • Any recurring complaints or issues.

Scheduling a Consultation with Movers

Once you’ve narrowed down your options, it’s time to schedule a consultation with your preferred movers. This is an opportunity to ask specific questions, clarify your requirements, and better understand the company’s professionalism and customer service.

During the consultation:

  • Discuss your moving needs in detail.
  • Ask about the moving process and what to expect on a moving day.
  • Discuss any special requirements or concerns you may have.

Clarifying Your Requirements with Movers

After scheduling a consultation, communicate your specific moving needs to your chosen moving service. This includes details about your current and future location, the number and types of items to be moved, and any special instructions or requirements.

Ensure to:

  • Provide accurate information to prevent any misunderstandings or issues on moving day.
  • Discuss any potential challenges, such as narrow staircases, lack of elevators, or parking restrictions.
  • Clarify the dates and times for pickup and delivery.

Drafting a Comprehensive Contract

Before the move, you should have a comprehensive contract with your chosen movers. This contract should outline all the services to be provided, the total cost, and any additional terms or conditions.

A comprehensive contract should include:

  • A detailed list of all services to be provided.
  • The total cost, including any deposit required.
  • The pickup and delivery dates and times.
  • Any insurance or liability coverage included.

Always read the contract carefully before signing to ensure it accurately reflects your agreement with the movers.

Preparing Your Home for Move-In Day

A successful move requires adequate preparation. As move-in day approaches, ensure your home is ready for the movers. This could include disassembling furniture, packing your belongings, and ensuring clear access for the moving team.

Pre-move preparations may include:

  • Sorting and packing your belongings.
  • Labeling boxes clearly with their contents and the room they belong to in the new home.
  • Creating a clear path for movers to move items out of your home easily.

Utilize packing services if you require assistance with this part of the process.

Selecting the Most Appropriate Payment Option

Understanding your payment options is crucial when hiring movers. Most professional movers offer various payment methods, including cash, credit card, or electronic transfer. Some may require a deposit to secure your booking.

Consider:

  • The payment methods are available.
  • The timing of payments (deposit, balance due).
  • Any cancellation or refund policies.

Ensure you’re comfortable with the payment terms before proceeding with the moving contract.

Moving Truck, loading storage

Managing Communication During the Move

Effective communication is key to a smooth moving process. Ensure you have a point of contact with your moving service who can answer questions, resolve issues, and keep you updated throughout the move.

Effective communication includes:

  • Confirming details before moving day.
  • Checking in regularly on a moving day.
  • Addressing any issues or concerns promptly.

Properly Insuring Your Belongings During Transportation

Insurance is an essential consideration when moving. While professional movers take great care of your belongings, accidents can happen. Ensure your belongings are adequately insured during transport to protect against potential loss or damage.

Key points to consider:

  • The moving company provides basic liability coverage.
  • The option for additional coverage.
  • Personal homeowner’s or renter’s insurance may cover your move.

Assessing the Quality of Service After Move-Out

Once the move is complete, take time to assess the quality of service provided by your movers. Were they punctual, professional, and careful with your belongings? Were there any issues or areas for improvement?

Consider:

  • The condition of your belongings upon delivery.
  • The professionalism and efficiency of the moving team.
  • Your overall satisfaction with the moving process.

Why It Matters: “How Far in Advance Should I Hire Movers?”

You might still be pondering, “How far in advance should I hire movers?” The answer to this question plays a significant role in determining the success of your move. Hiring professional movers well in advance ensures you secure a slot with your preferred moving service during your desired moving window. This is particularly crucial during peak moving seasons when availability can become scarce.

The Role of Planning: “How Far in Advance Should I Hire Movers?”

“How far in advance should I hire movers?” – this is a question where planning makes all the difference. If you’re planning a local move, hiring movers about one month in advance is generally recommended. However, if you’re looking at a long-distance move, you should consider hiring long-distance movers two months or more in advance. Remember, the earlier you start, the more choices you’ll have in terms of availability and services.

Factors Influencing the Timeline: “How Far in Advance Should I Hire Movers?”

When asking, “How far in advance should I hire movers?” it’s important to consider the specific factors influencing your move. For instance, if you’re planning an office move that typically involves more equipment and coordination, or if you require specialty services like piano movers, you might need to book your movers even further in advance to ensure they can accommodate your specific needs.

Flexibility and Convenience: “How Far in Advance Should I Hire Movers?”

Finally, “How far in advance should I hire movers?” also impacts your level of flexibility and convenience. Hiring top movers well in advance allows you to have greater control over your moving dates and times, and gives you ample time to prepare. It also offers the convenience of being able to coordinate other related tasks, such as arranging packing services, without feeling rushed or stressed.

Conclusion

Moving can be a complex and stressful process, but with the right planning and the help of top movers, it can be made significantly easier. By considering the factors outlined in this guide and investing time in research and preparation, you can ensure a smooth and successful move.

Remember, the key is to start early, understand your needs, and choose a reputable, professional moving service that can cater to those needs effectively. With Qshark Moving Company, you’re one step closer to a hassle-free moving experience.

blog author

Author: Vlad Kandybovich

Meet Vlad Kandybovich, your friendly moving expert with over 10 years in the game! As the heart and soul behind QShark Moving Company, he has been a part of more than 50,000 moving journeys, helping individuals like you make smooth and stress-free transitions. Vlad is not just about the business; he genuinely cares about making each move a happy memory. So, when you are looking for advice or a tip on your next move, know that Vlads wisdom comes with a big dose of care and friendship. Happy moving!
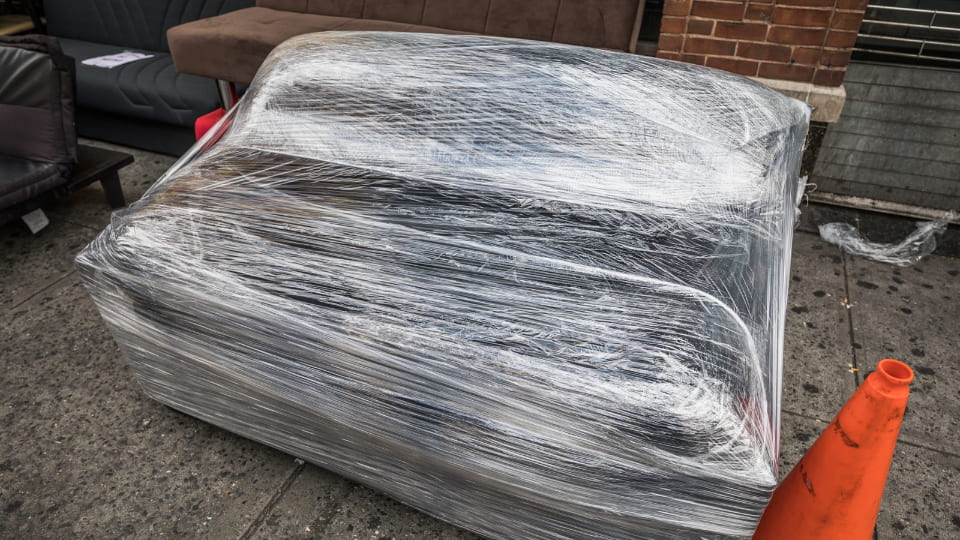
How Long Does It Take Movers to Load a Truck?

how long it takes to load a truck

If you’re planning a move, one question that’s likely to pop up is, “How long does it take professional movers to load a truck?” The answer to this question isn’t straightforward, as the loading time depends on numerous factors like the number of items, their size and weight, and the preparation is done before the movers arrive.

At QShark Moving Company, we understand how crucial it is for our customers to plan their moves effectively. That’s why we’re committed to providing you with all the information you need to anticipate the duration of the moving process.

This guide aims to explain the various aspects that affect the loading time when using a moving service. Whether you’re looking into local moving, office moving, or long distance moving, we’ve got you covered.

As top movers in the industry, we have vast experience handling different items, including pianos and antiques. Our piano movers are trained to handle your precious instrument with the utmost care and precision.

We also offer packing services and day labor to ensure your move is as stress-free as possible. Our best movers can help you with packing, loading, transportation, unloading, and unpacking, making us a one-stop shop for all your moving needs.

So, without further ado, let’s dive into how long it takes movers to load a truck and what you can do to ensure a smooth and efficient moving process with QShark, your reliable moving company.

Understanding the Moving Process

Before we delve into the specifics of loading a moving truck, it’s important to understand the entire moving process, which is typically divided into five main stages:

  1. Packing: This involves sorting, wrapping, and boxing up your belongings. With our packing services, we can take this time-consuming task off your hands. We provide quality packing materials and employ careful packing techniques to protect your items during the move.
  2. Loading: This is the phase we’ll be focusing on in this guide. Here, items are carefully carried out of your home and strategically placed in the moving truck.
  3. Transportation: Your belongings are driven to the new location. The length of this phase depends on the distance between your old and new homes.
  4. Unloading: Once at your new home, items are taken out of the truck and moved into the house.
  5. Unpacking: The final step involves unboxing your items and setting them up in your new space.

All these stages are integral to a successful move. At QShark Moving Company, we excel at every stage, making us the best movers for your relocation needs.

Factors That Affect Loading Time

Different moves have different complexities. Several factors can influence how long it takes to load a moving truck. Here are the primary ones:

  • Number of Items: The more items you have, the longer it will take to load them onto the truck.
  • Size and Weight of Items: Large and heavy items like furniture or a piano take longer to move and load. Our specialized piano movers are well-equipped to handle such delicate tasks efficiently.
  • Special Items: Some items, like antiques, artworks, or delicate electronics, need extra care and take additional time to load safely.
  • Preparation and Packing Efficiency: Properly packed and labeled boxes speed up the loading process. A well-organized move is a faster move.
  • Accessibility of your Home: If your home is difficult to access (e.g., you live on a high floor with no elevator), carrying items to the truck may take longer.
  • Number of Movers: The more hands on deck, the quicker the loading process. We adjust the number of movers based on the size and complexity of your move.

In the next section, we will provide some estimations of the loading time based on different house sizes. Stay tuned!
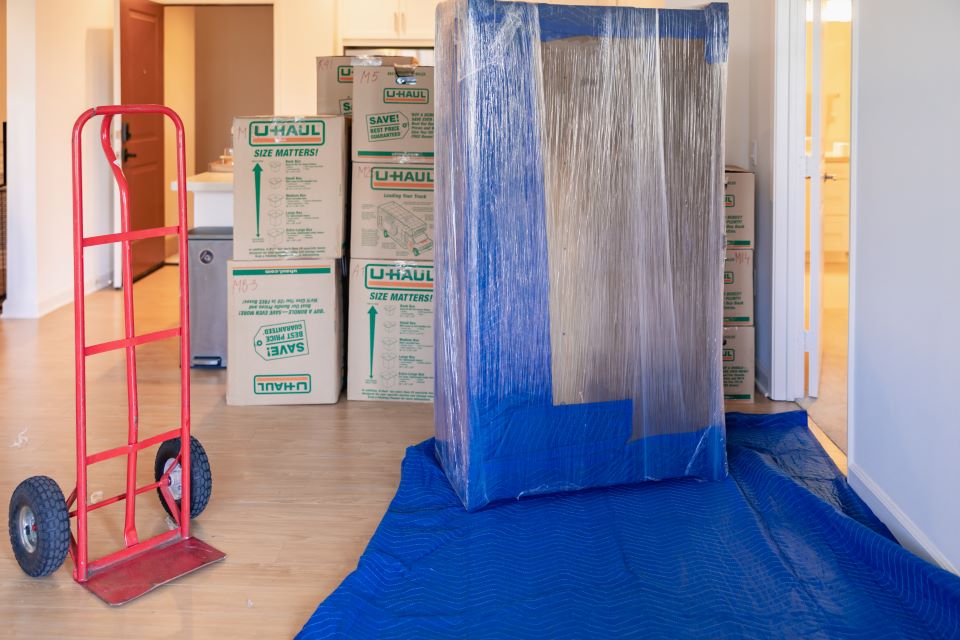
load time for movers

Estimating the Loading Time

While the exact loading time can vary, here are some rough estimates for different sizes of homes when working with our professional movers:

  • Studio or One-Bedroom Apartment: Loading should take approximately 2-3 hours for a well-organized and prepped move.
  • Two-Bedroom Home: Loading from a two-bedroom home can typically be accomplished in 3-5 hours.
  • Three-Bedroom Home: Loading can take 4-6 hours for larger homes with three bedrooms.
  • Four-Bedroom Home or Larger: In this case, loading could take 6-8 hours or more.

Keep in mind that these times are estimates, and actual times may vary based on the unique circumstances of each move.

Detailed Breakdown of the Loading Process

To give you a better understanding of what happens during the loading phase, here’s a detailed breakdown:

  1. Arrival and Initial Assessment: Our top movers will arrive at your home, greet you, and do a walkthrough to understand the scope of the job.
  2. Strategy Planning for Loading: We’ll devise a loading strategy, determining the order in which items should be moved to maximize space and protect your belongings.
  3. Wrapping and Protecting Furniture: Furniture and other large items will be wrapped in protective padding to prevent damage during the move.
  4. Carrying Items to the Truck: Our team will start carrying boxes and furniture to the truck, placing them according to the pre-determined strategy.
  5. Organizing and Securing Items within the Truck: We carefully organize the truck to ensure everything fits and is secure for transport. This includes the use of straps and ropes to prevent items from shifting during the journey.
  6. Final Check before Departure: We do a final sweep of your home to ensure nothing has been left behind before we depart.

Remember, these steps are handled by our best movers to ensure your move is as stress-free as possible. With our expertise, you can focus on starting your new chapter while we handle the logistics of your move.

In the next section, we’ll share how QShark Moving Company optimizes the loading time, ensuring you get the best value for your time and money.

How QShark Moving Company Optimizes Loading Time

At QShark Moving Company, we go above and beyond to provide a swift and efficient moving experience. Here’s how we optimize the loading process:

  • Trained Professionals: Our professional movers are highly trained and have extensive experience in the field. They know how to handle all types of items, from bulky furniture to delicate antiques.
  • Advanced Equipment and Tools: We use a range of advanced equipment, including dollies, straps, and moving blankets, to speed up the loading process while ensuring the safety of your belongings.
  • Tailored Approach: Every move is unique. We develop a customized moving plan for each client, which helps us to work efficiently and effectively.
  • Efficient Loading Strategies: We use proven strategies to load the truck efficiently. This involves loading heavier items first, then filling in spaces with smaller boxes and items.
  • Special Care for Delicate and Valuable Items: Items that require extra care, like pianos or antiques, are handled by our specialized piano movers and office movers. They are skilled in packing, handling, and loading such items to ensure their safety.
how to load a truck?

How Customers Can Help Speed Up the Loading Process

While our top movers do the heavy lifting, there are a few things you can do to help speed up the loading process:

  • Pre-Move Preparation: Declutter your home before the move. The fewer items to move, the faster the loading process. Also, consider packing non-essential items yourself.
  • Accessibility: Ensure there’s a clear path from your home to the moving truck. This includes reserving a parking spot for the truck and clearing any obstacles in the way.
  • Availability: Being available on moving day to answer questions and provide directions can save a lot of time.

By playing an active role in the moving process, you can help us provide you with the best moving service possible. Remember, our goal is to ensure your move is smooth, efficient, and stress-free.

Next, we’ll discuss the importance of proper loading and why choosing a reliable moving company like QShark is critical. Stay tuned!

Importance of Proper Loading

Proper loading is crucial in the moving process for several reasons:

  • Ensuring Safety during Transport: Correctly loaded items are less likely to shift during transportation, reducing the risk of damage.
  • Preventing Damage to Items: Properly loaded and secured items are less prone to scratches, dents, or other damage.
  • Maximizing Space within the Truck: Efficient loading means more items can fit into the truck, possibly reducing the number of trips needed.

At QShark Moving Company, our professional movers are trained in loading. They know how to strategically place items in the truck to maximize space and ensure safety.

QShark’s Commitment to Efficient and Safe Moving

As a leading moving company, QShark is committed to providing efficient, safe, and stress-free moving services. We pride ourselves on our team of best movers who bring expertise and professionalism to every job.

Here are a few testimonials from our satisfied customers:

“The QShark team was fantastic! They packed and loaded our four-bedroom home in record time. Everything arrived at our new house in perfect condition. I couldn’t recommend them more!” – Jane D.

“I was worried about moving my piano, but QShark’s piano movers handled it with such care. They really are the best!” – Mark S.

Our customer satisfaction is our top priority. Trust QShark to deliver an exceptional moving experience, whether you’re moving locally or long-distance.

In conclusion, we’ll recap the key points of this guide and provide the next steps to book your move with QShark. Let’s wrap things up!

Conclusion

Loading a moving truck is a critical step in the relocation process. While the exact time it takes depends on various factors, such as the number of items, their size and weight, and the preparation done beforehand, our professional movers at QShark Moving Company are dedicated to ensuring a swift and efficient process.

We have provided you with an in-depth guide on how long it takes movers to load a truck, as well as a detailed breakdown of the loading process and tips on how to speed up the process. Our top movers are skilled in handling different types of moves, from local moving and office moving to long-distance moves. With QShark, you can rest assured that your move will be handled with the utmost care and professionalism.

To get started with QShark for your upcoming move, visit our website and request a free quote. Our team will happily discuss your moving needs and help you plan the perfect move.

Thank you for choosing QShark Moving Company – your reliable partner- for a smooth, stress-free moving experience!

Get Your Free Moving Estimate:
Receive your cost estimation within just 10 minutes